以前の記事ではServer Coreの環境をAzure VM上に作成して、Visual Studio 2017で作成したASP.NET MVCアプリを配布および動作させる方法について紹介しました。
Azure VMはIaaSなので運用環境の条件にあわせて細かいカスタマイズが可能なのがメリットですが、やはりSaaSであるAzure App Service(Web Apps)の方がインフラストラクチャをほぼ意識せず運用できるので何かと楽ではあります。
ということで、今回はWeb Appsの一つであるWeb App for Containersで「Server Core + ASP.NET MVCアプリ」の環境を動作させる方法について紹介します。
- Docker Desktop for Windowsの準備
- ASP.NET MVCアプリケーションを作成
- コンテナイメージを作成する
- Azure Container Registryにコンテナイメージを配布
- Web App for Containersを作成
- まとめ
- 最後に
Web App for Containersとは?
Web Appsには現時点で3種類のサービスがあります。
- Web App on Windows
- Web App on Linux
- Web App for Containers
1.はグレープシティ製品をお使いの方にはお馴染みの環境ですね。2.と3.はどちらもコンテナ技術を利用した環境ですが2.はLinux固定です。今回使用する3.はASP.NETアプリケーションを運用する際にWindows Serverコンテナを利用する場合や、.NETやNode.jsなど使用する言語のバージョンをカスタマイズしたい場合に適しています。
なお、利用できるアプリケーションの種類は以下となります。
- Web App on Windows → ASP.NET、ASP.NET Core
- Web App on Linux → ASP.NET Core
- Web App for Containers → ASP.NET、ASP.NET Core
注意点としては、3.でASP.NETを使う場合にはServer Coreベースのコンテナイメージが必要です。ASP.NET Coreを使う場合にはLinuxかNano Serverベースのコンテナイメージが必要になります。また、現時点ではWeb App for ContainersでのWindows ServerコンテナはGAされておらずパブリックプレビューとなっています。
では使ってみましょう!
Docker Desktop for Windowsの準備
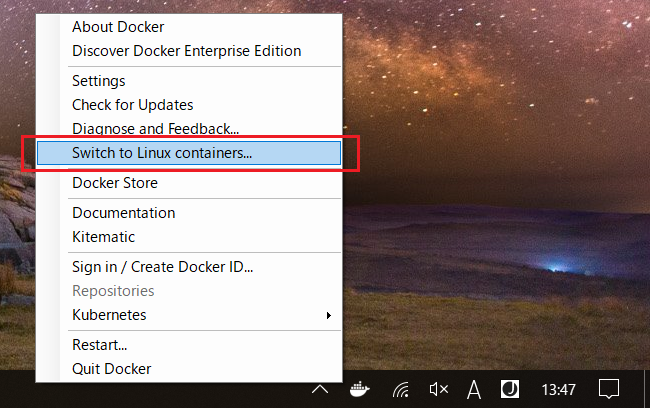
まずDocker Desktop for Windowsをインストールして起動しておきます。
起動後にWindows Serverコンテナを使用する状態にしておいてください。
ASP.NET MVCアプリケーションを作成
※ 過去記事などでアプリケーションを作ったことがある場合は、ここを飛ばして「コンテナイメージを作成する」に進んでください
次にデプロイするアプリケーションを作成していきます。以下を参考にFlexGridでデータを表示するASP.NET MVCアプリを作成します。
まず、ModelsフォルダにSaleクラスを追加します。
Sale.cs
public class Sale
{
public int ID { get; set; }
public DateTime 開始日 { get; set; }
public DateTime 終了日 { get; set; }
public string 国名 { get; set; }
public string 製品名 { get; set; }
public string 色 { get; set; }
public double 金額 { get; set; }
public double 金額2 { get; set; }
public double 割引 { get; set; }
public bool アクティブ { get; set; }
public MonthData[] 傾向 { get; set; }
public int ランク { get; set; }
/// <summary>
/// データを取得
/// </summary>
/// <param name="total"></param>
/// <returns></returns>
public static IEnumerable<Sale> GetData(int total)
{
var countries = new[] { "米国", "イギリス", "カナダ", "日本", "中国",
"フランス", "ドイツ", "イタリア", "韓国", "オーストラリア" };
var products = new[] { "Widget", "Gadget", "Doohickey" };
var colors = new[] { "黒色", "白色", "赤色", "緑色", "青い色" };
var rand = new Random(0);
var dt = DateTime.Now;
var list = Enumerable.Range(0, total).Select(i =>
{
var country = countries[rand.Next(0, countries.Length - 1)];
var product = products[rand.Next(0, products.Length - 1)];
var color = colors[rand.Next(0, colors.Length - 1)];
var date = new DateTime(dt.Year, i % 12 + 1, 25, i % 24, i % 60, i % 60);
return new Sale
{
ID = i + 1,
開始日 = date,
終了日 = date,
国名 = country,
製品名 = product,
色 = color,
金額 = rand.NextDouble() * 10000 - 5000,
金額2 = rand.NextDouble() * 10000 - 5000,
割引 = rand.NextDouble() / 4,
アクティブ = (i % 4 == 0),
傾向 = Enumerable.Range(0, 12).Select(x =>
new MonthData
{
Month = x + 1,
Data = rand.Next(0, 100)
}).ToArray(),
ランク = rand.Next(1, 6)
};
});
return list;
}
internal static dynamic GetCountries()
{
throw new NotImplementedException();
}
internal static dynamic GetProducts()
{
throw new NotImplementedException();
}
}
public class MonthData
{
public int Month { get; set; }
public double Data { get; set; }
}
次にControllersフォルダにFlexGridControllerコントローラーを追加します。
FlexGridController.cs
using System.Web.Mvc;
using C1MvcWebApplication1.Models;
public class FlexGridController : Controller
{
// GET: FlexGrid
public ActionResult Index()
{
return View(Sale.GetData(15));
}
}
最後にViewsフォルダにIndex.cshtmlビューを追加します。
Index.cshtml
@using C1.Web.Mvc;
@using C1MvcWebApplication1.Models;
@using C1.Web.Mvc.Serializition;
@using C1.Web.Mvc.Grid;
@using C1.Web.Mvc.Fluent;
@using C1.Web.Mvc.CollectionView;
@model IEnumerable<Sale>
@(Html.C1().FlexGrid<Sale>()
.AutoGenerateColumns(false)
.Height(450)
.Width(700)
.AllowAddNew(true)
.SelectionMode(C1.Web.Mvc.Grid.SelectionMode.Cell)
.CssClass("grid")
.Bind(Model)
// FlexGridに列データを連結します
.Columns(bl =>
{
bl.Add(cb => cb.Binding("ID"));
bl.Add(cb => cb.Binding("開始日").Format("yyyy年/MM月/dd日"));
bl.Add(cb => cb.Binding("製品名"));
bl.Add(cb => cb.Binding("金額").Format("c"));
bl.Add(cb => cb.Binding("割引").Format("p0"));
bl.Add(cb => cb.Binding("アクティブ"));
})
)
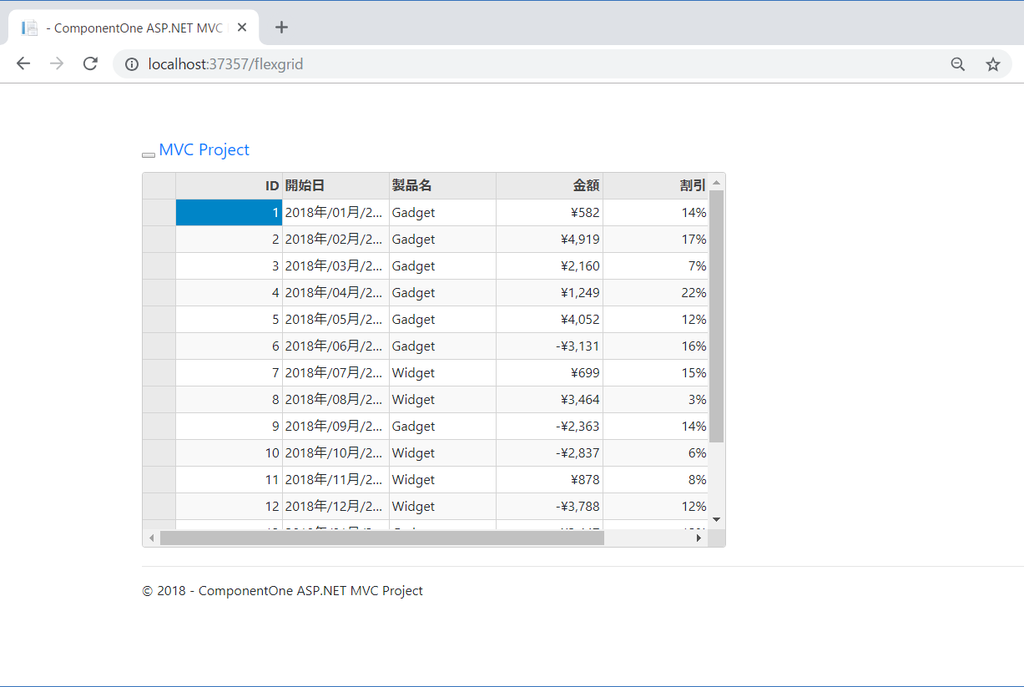
ローカルでデバッグ実行してみます。FlexGridでデータを表示出来ていればOKです。
コンテナイメージを作成する
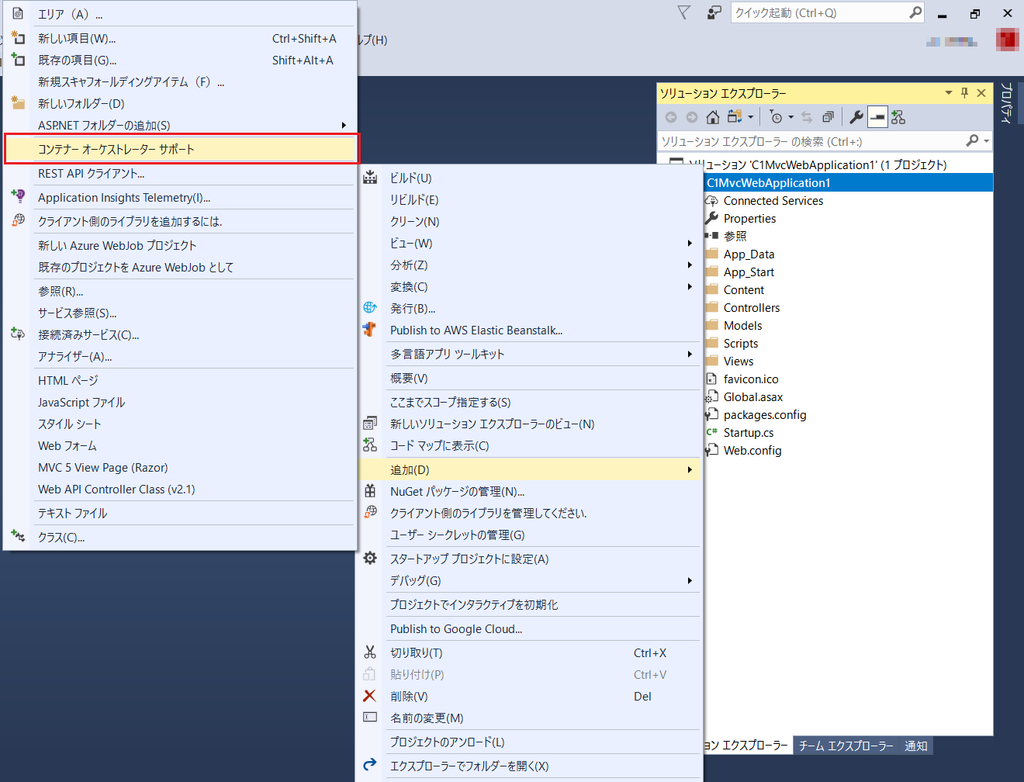
Visual Studioのソリューションエクスプローラーでプロジェクトを右クリックして[追加]ー[コンテナー オーケストレーラー サポート]をクリックします。
[Docker Compose]を選択して[OK]をクリックします。

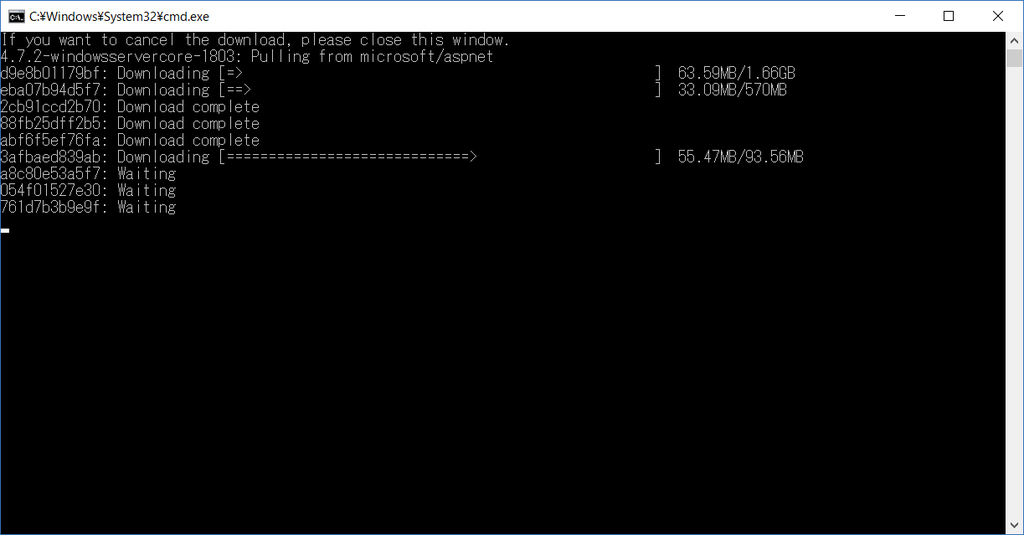
コマンドプロンプトが起動してDocker Hubmicrosoft/aspnetから基本イメージ4.7.2-windowsservercore-1803のコピーが始まりますが、このイメージは現時点ではサポートされていません。
Azure App Service で Windows コンテナーのサポートのパブリック プレビューを開始 – Cloud and Server Product Japan Blog
コピーをキャンセルするためにコマンドプロンプトを閉じます。
プロジェクトのDockerfileをクリックして利用する基本イメージを4.7.2-windowsservercore-ltsc2016に変更します。

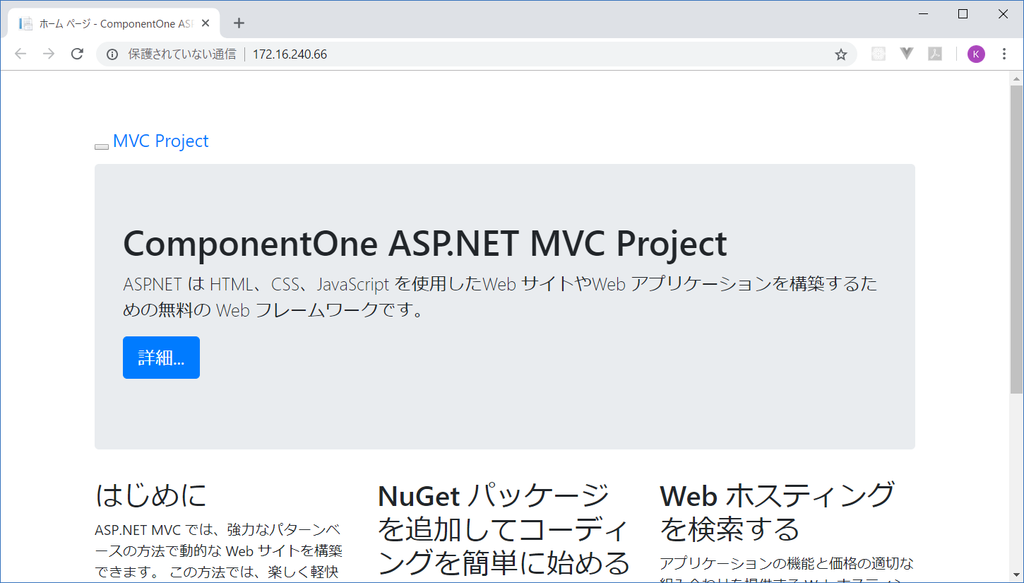
この状態でDockerを使ってデバッグ実行してみます。以下のようにブラウザでアプリが起動しているコンテナのIPアドレスを参照していればOKです。
なお、Visual StudioでのDockerの利用方法については以下にも記載されていますので参考にしてください。
Azure Container Registryにコンテナイメージを配布
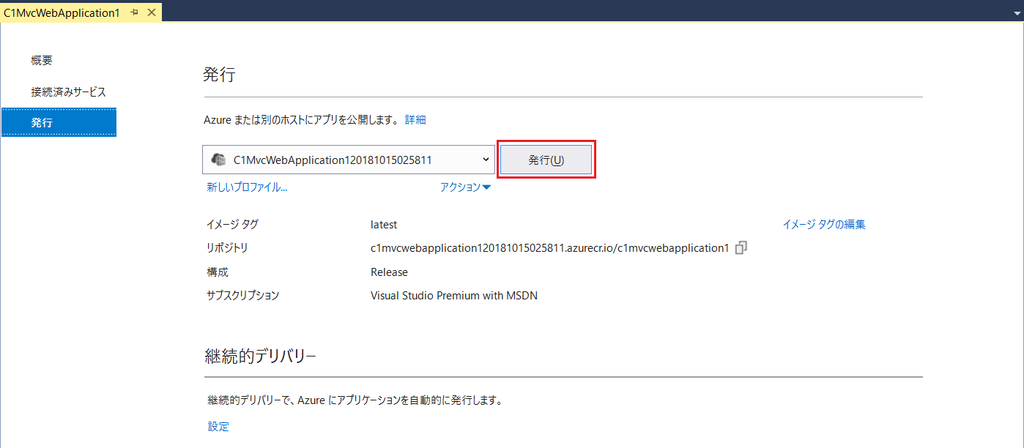
作成したアプリケーションのコンテナイメージをAzure Container Registryに配布します。
Visual Studioのソリューションエクスプローラーでプロジェクトを右クリックして[発行]をクリックします。
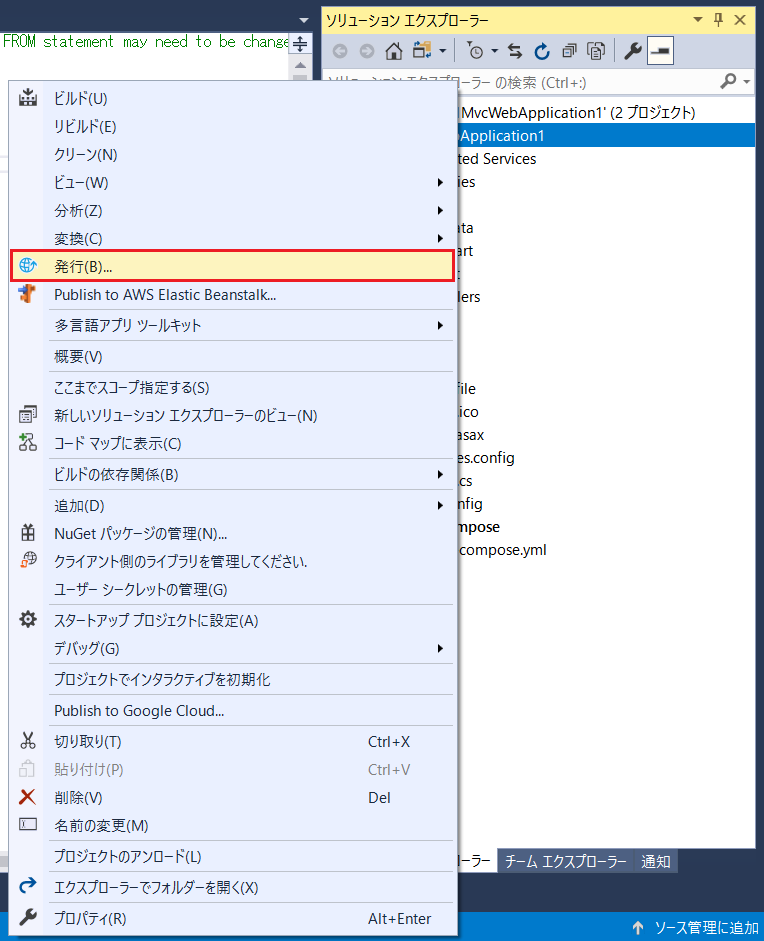
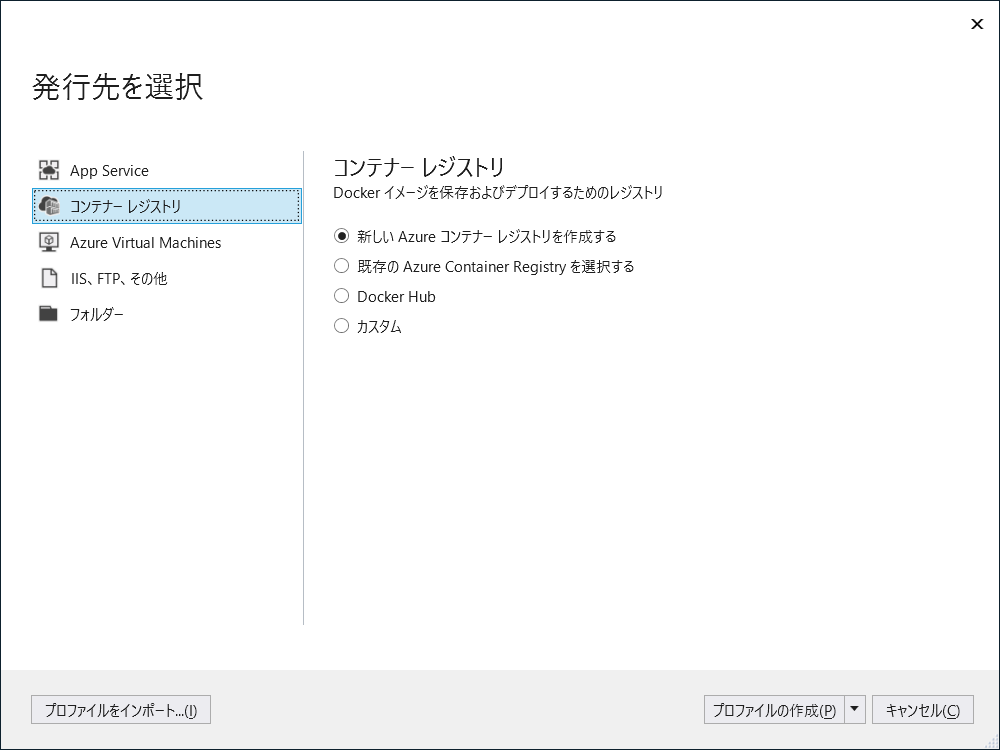
発行先は[コンテナー レジストリ]を選択し[プロファイルの作成]をクリックします。
必要項目を入力して[作成]をクリックします。
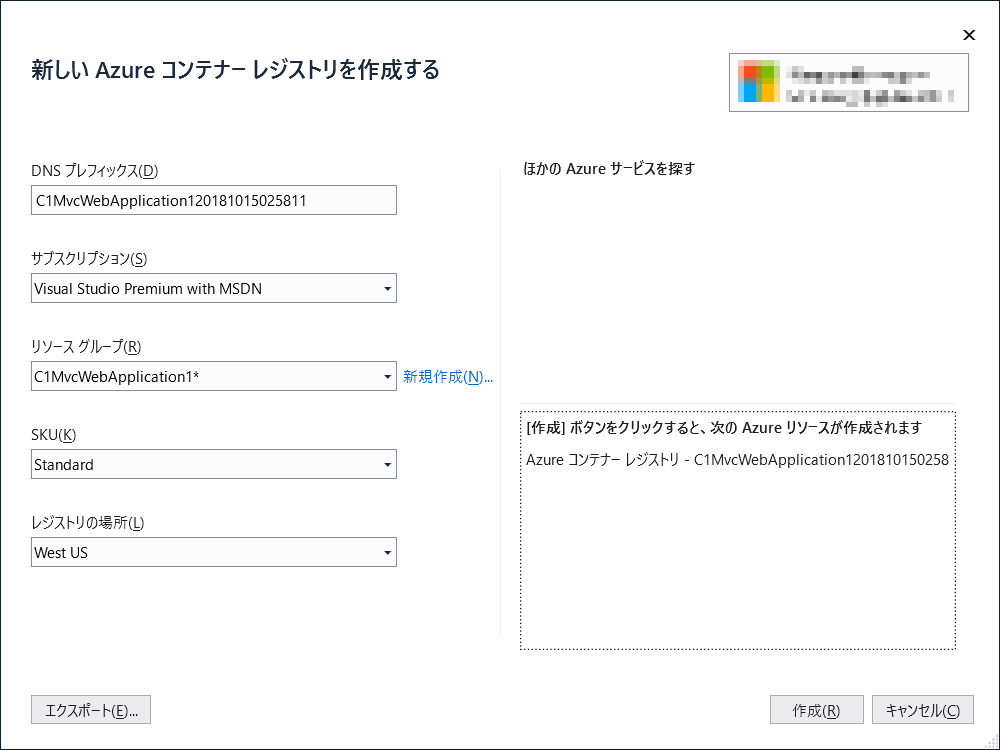
[発行]をクリックして作成したコンテナー レジストリに発行します。
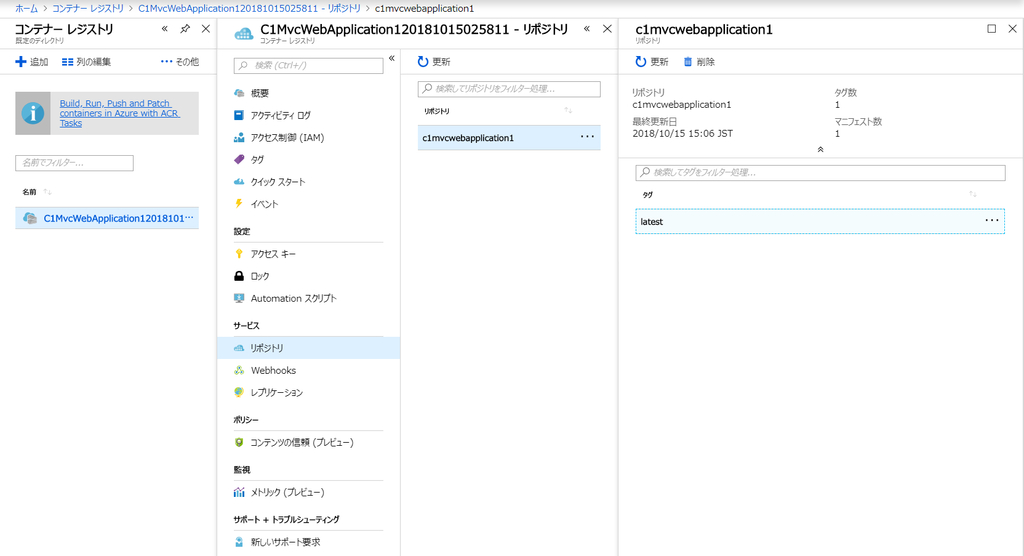
完了後にAzureポータルで確認してみます。Azure Container Registryで確認できればOKです。
Web App for Containersを作成
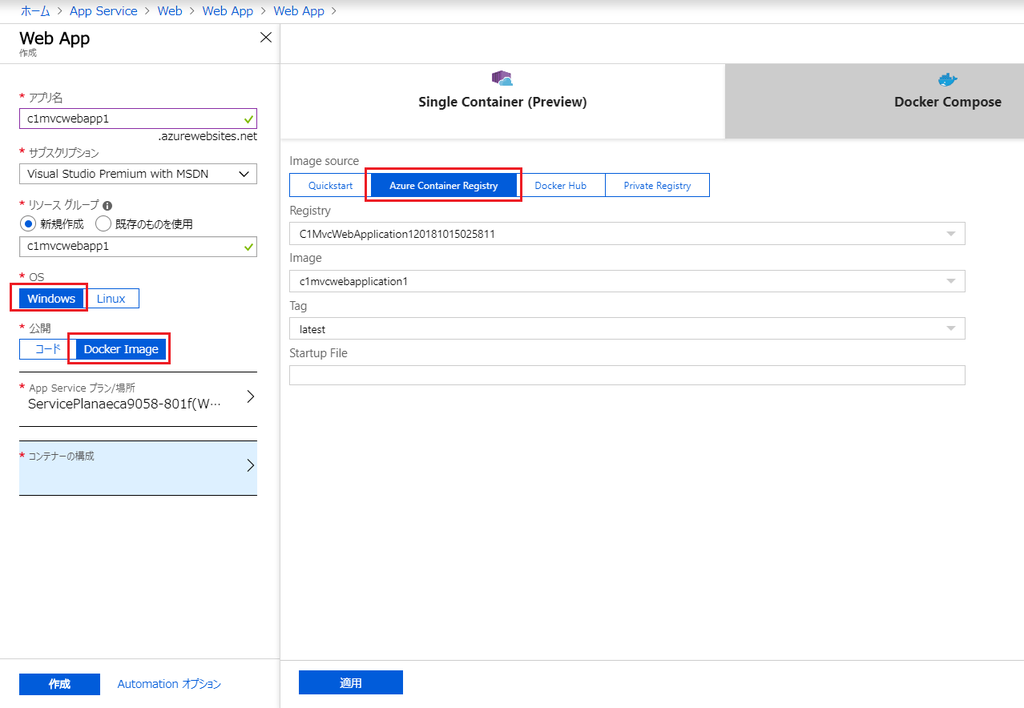
Azureポータルで新規にWeb Appsを作成し、以下のようにAzure Container Registryに発行したコンテナイメージを使用してWeb App for Containersを作成します。
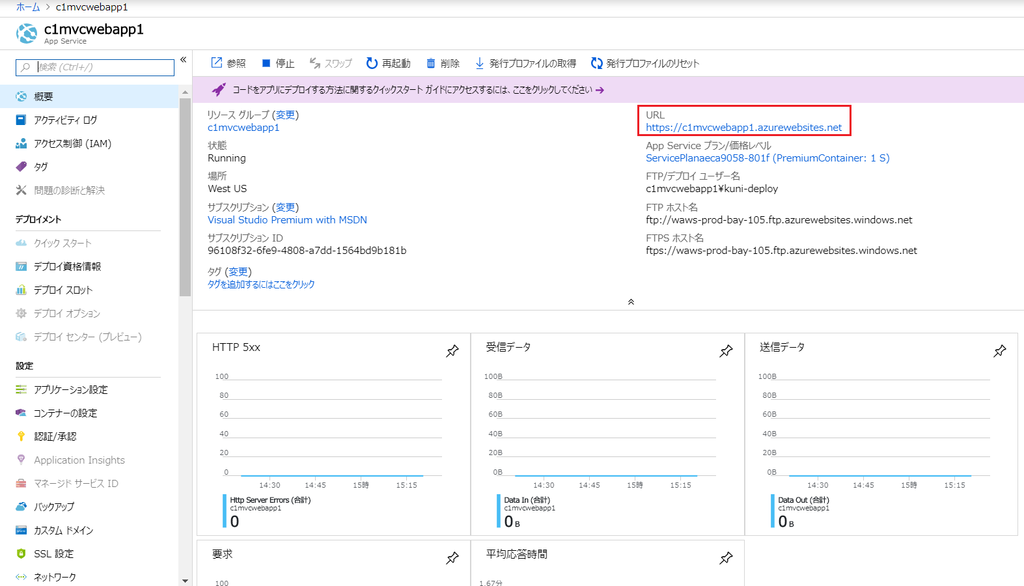
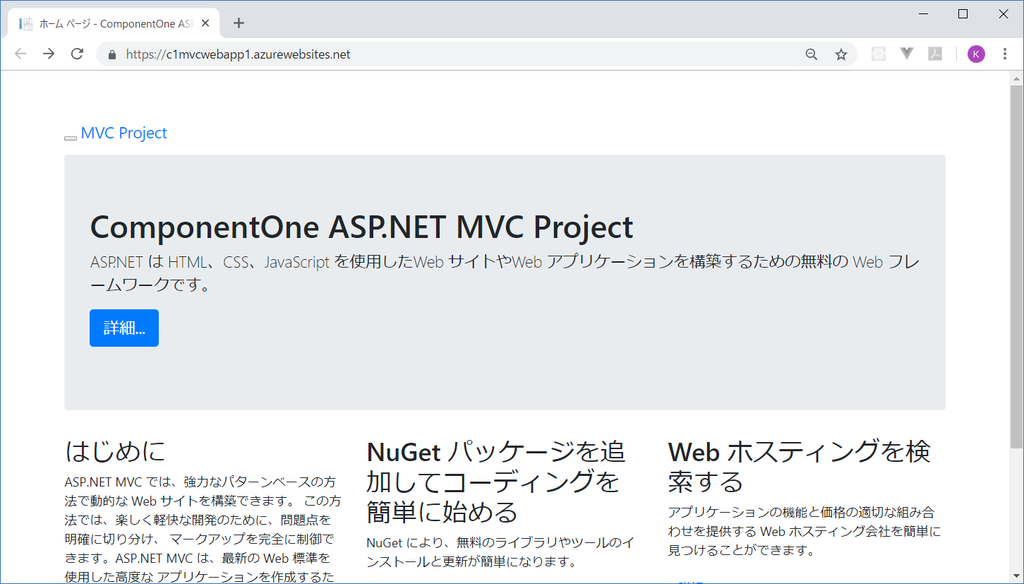
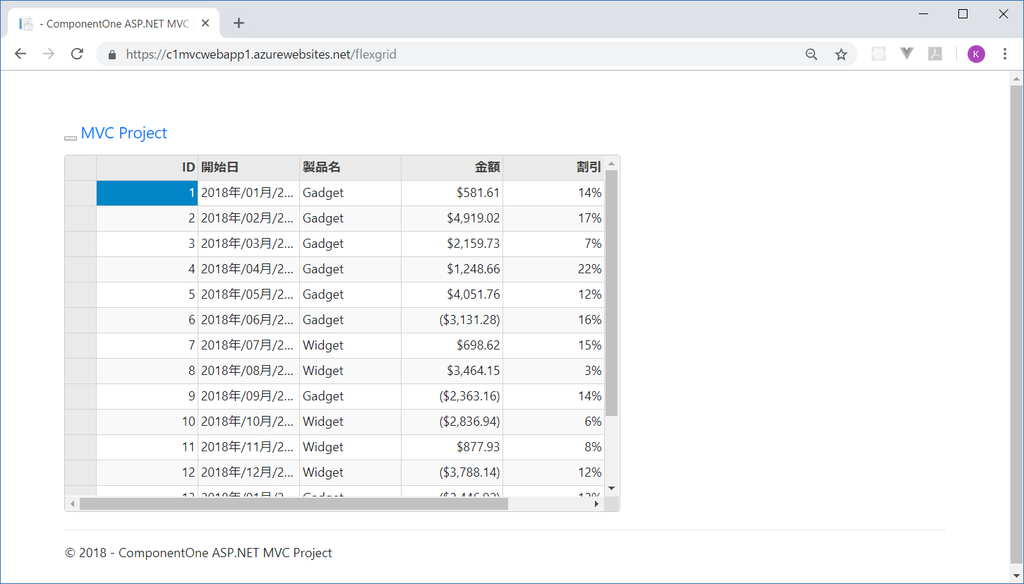
デプロイが完了したらアプリケーションのURLを参照してみます。
以下のようにアプリケーションが起動していれば完了です!
まとめ
Web App for ContainersへのASP.NET MVCアプリケーションのデプロイもVisual StudioとAzure Container Registryを利用すると比較的シンプルに実施できることがお分かりいただけたかと思います。 Web App for ContainersではWindows Serverコンテナのサポートはまだパブリックプレビューではありますが、今後に期待したいサービスですね。
最後に
グレープシティ製品が対応している運用環境はこちらにまとめてありますのでご覧ください。
