「複数項目の選択って何?」とピンとこない方もいるかと思いますが、百聞は一見に如かず、ということで以下をご覧ください。
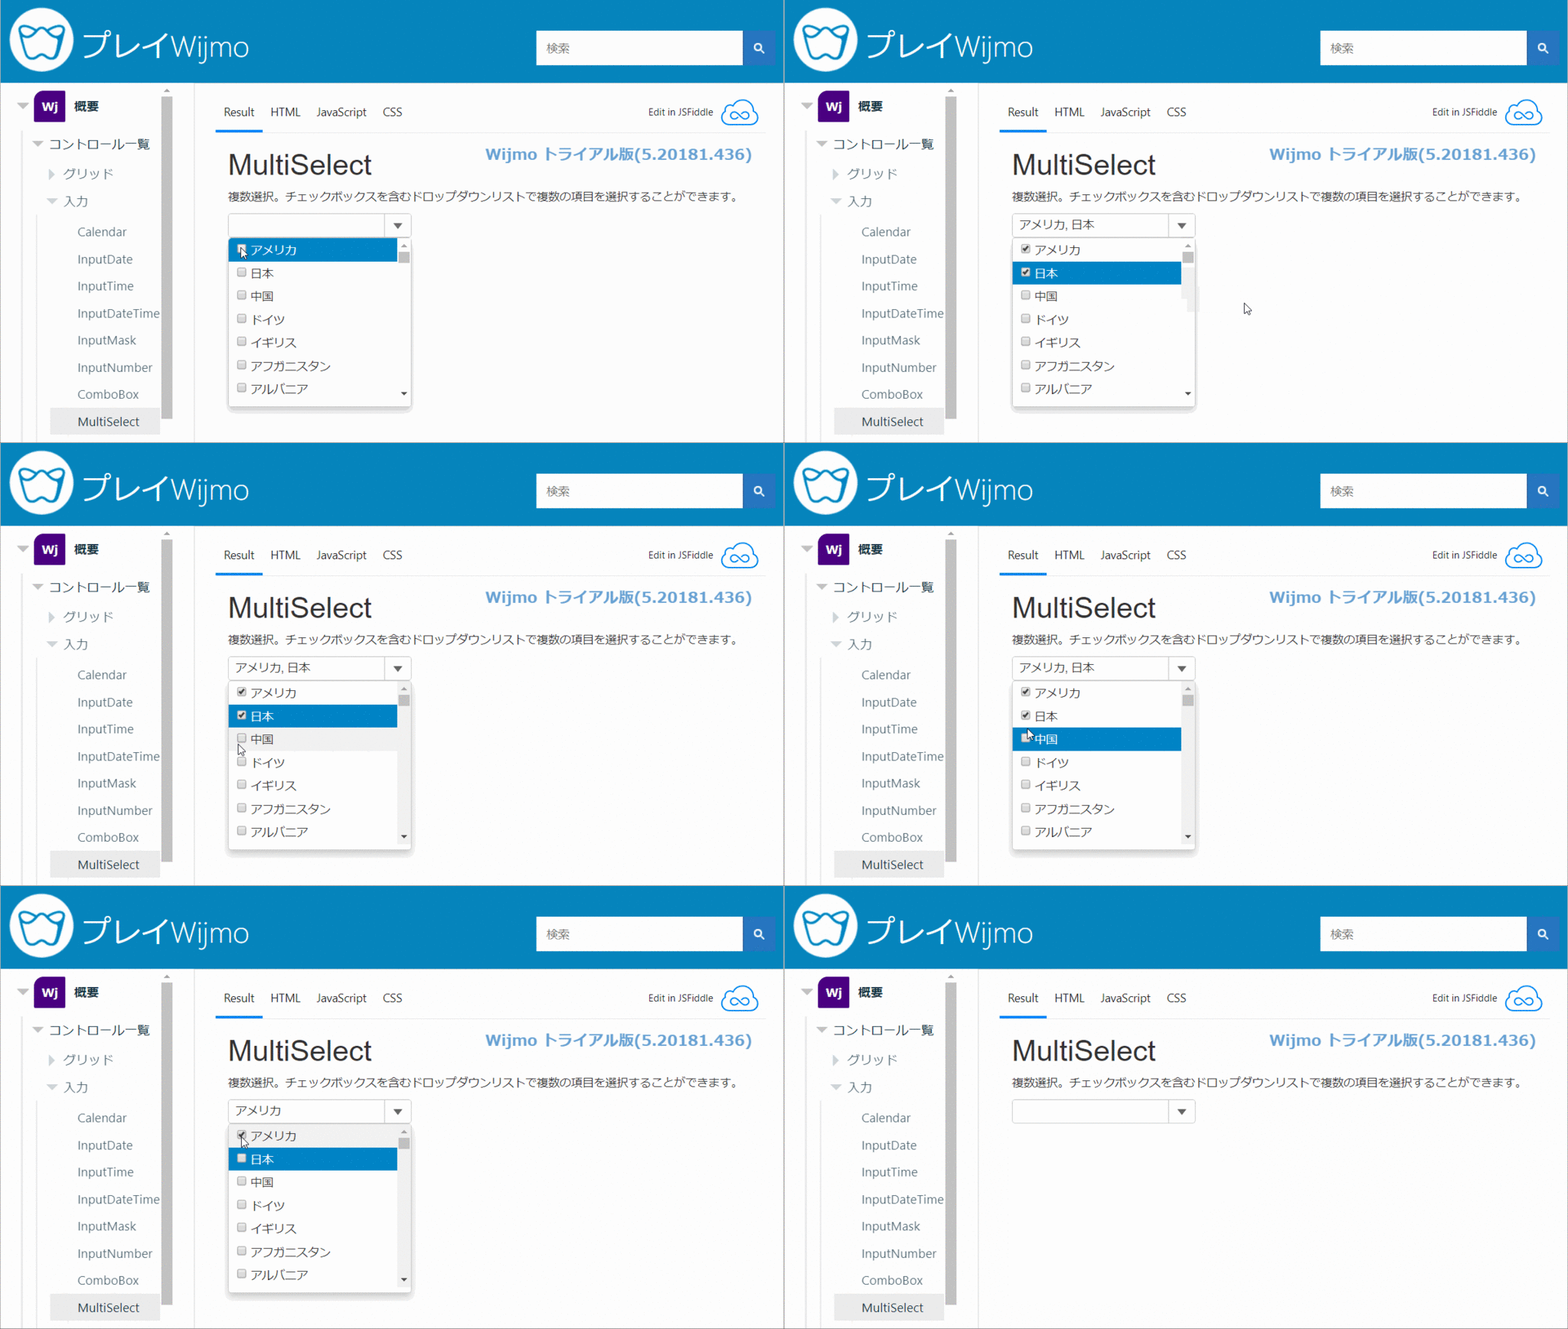
Webサイトでよく見かける入力方法ですね。この複数項目の選択、MultiSelect(マルチセレクト)コントロールがComponentOne Studio 2018J v1で追加されました。
Windows Forms、WPF、UWPで利用いただけます。
今回はこのリストに表示させるアイテムのデータソースとしてAzure SQL Databaseを使用してみます。
Azure SQL DatabaseといえばAzure SQL Database Managed Instanceが現時点でPublic Previewとして提供されています。今後GAされればオンプレミスにあるSQL ServerをAzure SQL Databaseへ移行する場合にベストなサービスになりそう、ということで要注目ですね。
SQL Database Managed Instance が始まります – Microsoft Japan Data Platform Tech Sales Team Blog
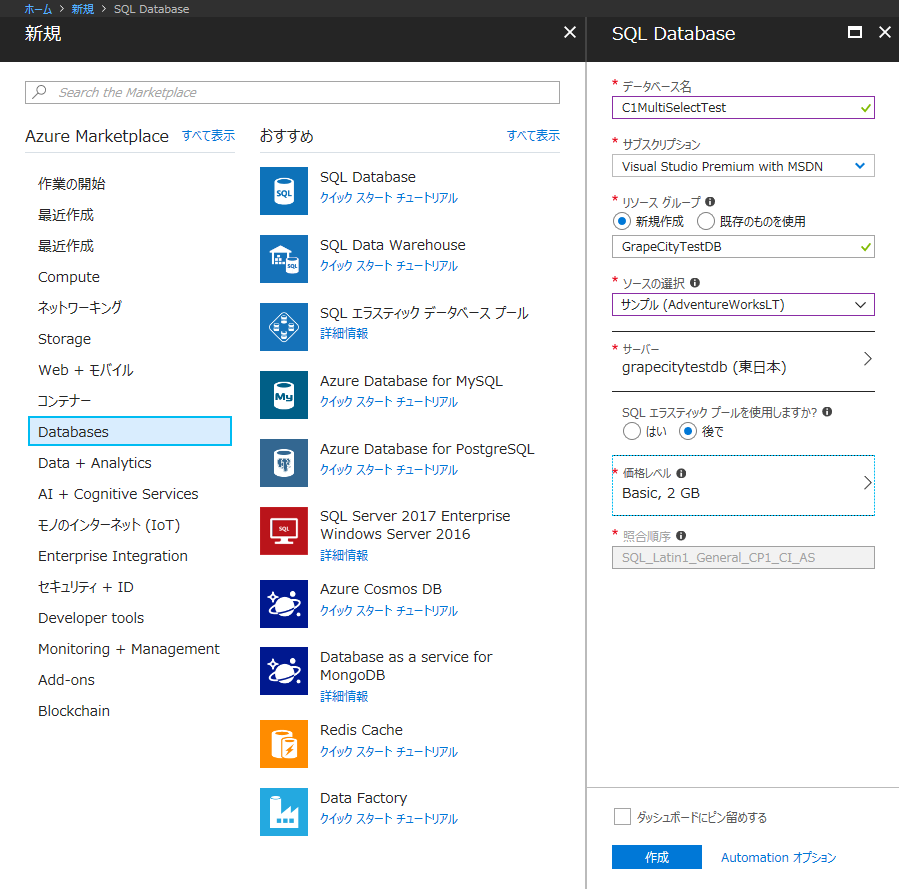
まずはじめにAzureポータルで以下の手順を参考にAzure SQL Databaseでデータソースとなるデータベースを作成します。
Azure Portal: SQL データベースの作成 | Microsoft Docs
今回は公式のサンプルソースとして用意されているAdventureWorksLTを使用します。
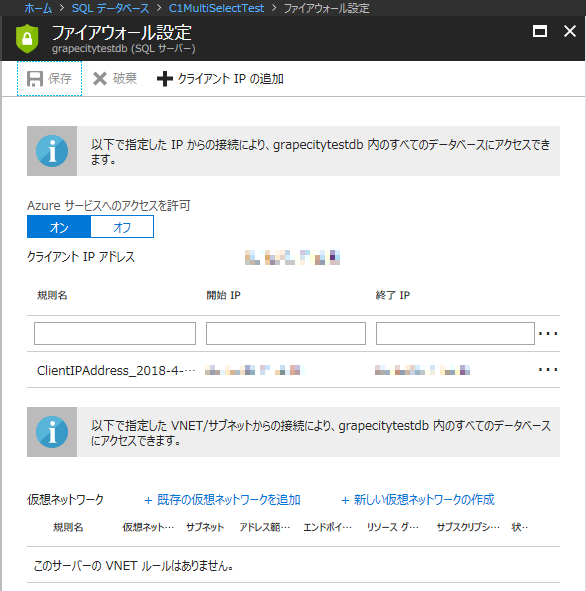
データベースを作成した後には、以下の手順を参考にファイアウォールの設定をします。
Azure SQL データベースのセキュリティ保護 | Microsoft Docs
ここではローカルのIPアドレスを設定しておきます。この設定をしないとローカルからアクセス出来ないので必ず設定してください。
データベースへの接続確認やデータを参照する方法としてSQL Server Management Studio (SSMS)、Visual StudioのSQL Server オブジェクトエクスプローラーを利用している方が多いかと思いますが、今回はSQL Operations Studioを使ってみます。
以下の手順を参考にデータベースに接続します。
クイック スタート: SQL Operations Studio (プレビュー) を使用して Azure SQL Database に接続して照会する | Microsoft Docs
このツールはWindowsだけでなく、macOSやLinuxでも利用できるクロスプラットフォームなツールです。個人的には他のツールより比較的動作が重くない印象でお気に入りです。
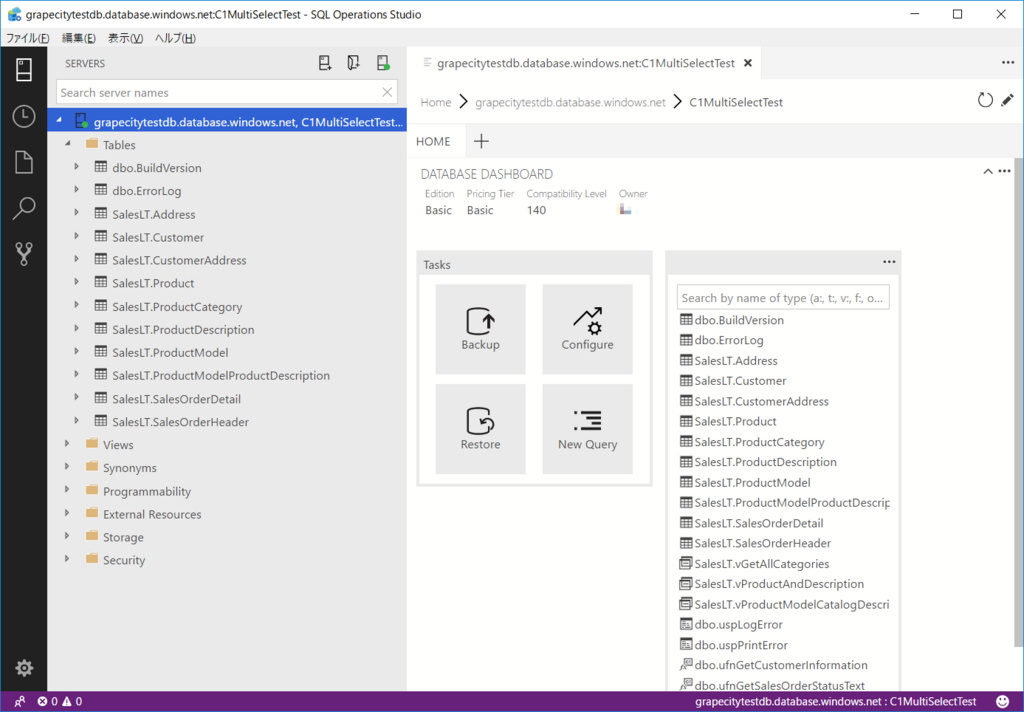
ローカルからの接続確認が終了したら準備は完了です。次はMultiSelectを使用したアプリケーションを作成します。今回はWindows Forms、WPF、UWPのプロジェクトとAzure SQL Databaseに接続する部分のコードを共有プロジェクトとして1つのソリューションで管理するように作成します。
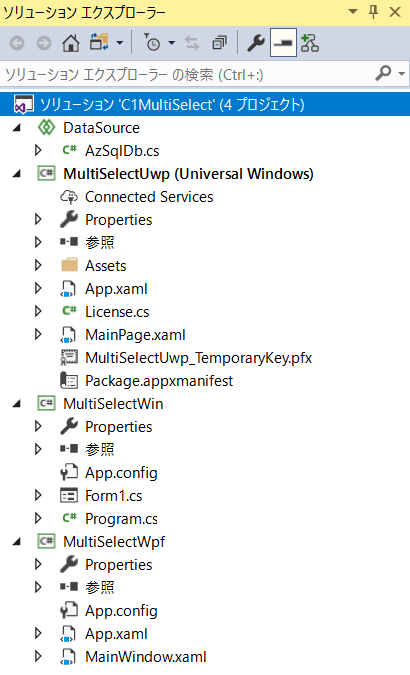
共有プロジェクトのAzSqlDbクラスではAzure SQL Databaseへの接続を設定します。
データソースとしてAdventureWorksLTにあるSalesLT.CustomerからSELECT TOPを利用して先頭から50件の項目をクエリしてCustomerオブジェクトに格納し、MultiSelectで利用します。
AzSqlDb.cs(共有プロジェクト)
class AzSqlDb
{
public ObservableCollection<Customer> Connect()
{
ObservableCollection<Customer> customers = new ObservableCollection<Customer>();
try
{
SqlConnectionStringBuilder builder = new SqlConnectionStringBuilder();
builder.DataSource = "grapecitytestdb.database.windows.net";
builder.UserID = "your_username";
builder.Password = "your_password";
builder.InitialCatalog = "C1MultiSelectTest";
using (SqlConnection connection = new SqlConnection(builder.ConnectionString))
{
connection.Open();
StringBuilder sb = new StringBuilder();
sb.Append("SELECT TOP 50 " +
"cs.FirstName as FirstName, " +
"cs.LastName as LastName, " +
"cs.EmailAddress as EmailAddress " +
"FROM[SalesLT].[Customer] cs ");
String sql = sb.ToString();
using (SqlCommand command = new SqlCommand(sql, connection))
{
using (SqlDataReader reader = command.ExecuteReader())
{
while (reader.Read())
{
customers.Add(new Customer(
reader.GetString(0),
reader.GetString(1),
reader.GetString(2),
reader.GetString(0) + " " +
reader.GetString(1) + " " +
"<" + reader.GetString(2) + ">"));
}
}
}
}
}
catch (SqlException e)
{
Debug.WriteLine(e.ToString());
}
return customers;
}
}
public class Customer
{
string firstname;
string lastname;
string emailaddress;
string displaytext;
public Customer(string _firstname, string _lastname, string _emailaddress, string _displaytext)
{
this.firstname = _firstname;
this.lastname = _lastname;
this.emailaddress = _emailaddress;
this.displaytext = _displaytext;
}
public string FirstName
{
get
{
return firstname;
}
}
public string LastName
{
get
{
return lastname;
}
}
public string EmailAddress
{
get
{
return emailaddress;
}
}
public string DisplayText
{
get
{
return displaytext;
}
}
}
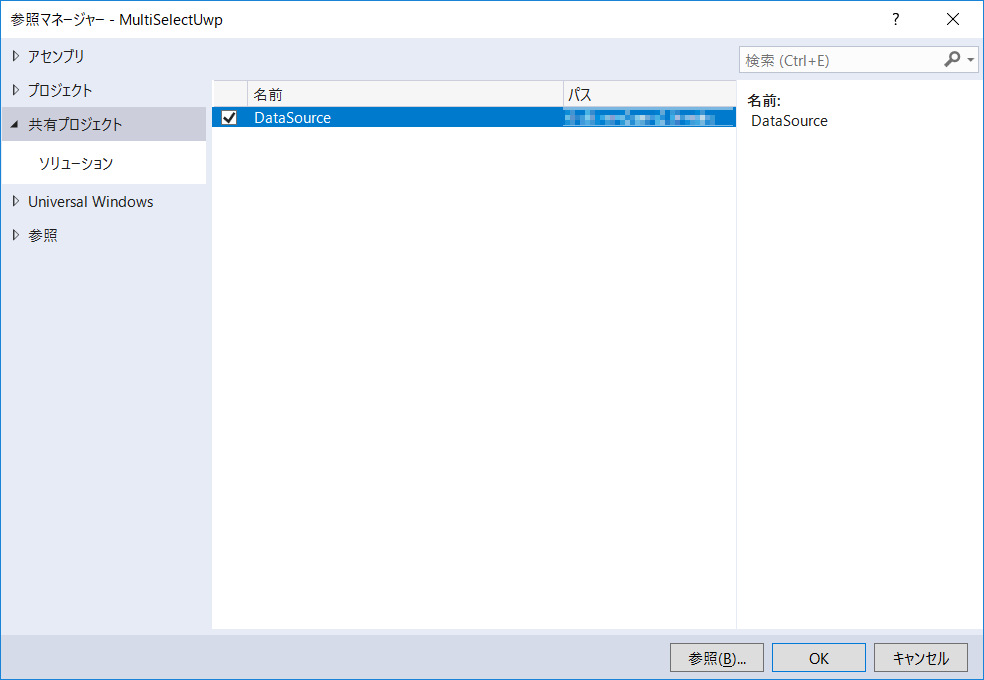
共有プロジェクトを利用できるようにWindows Forms、WPF、UWPの各プロジェクトから参照に追加しておきます。
各プラットフォームのプロジェクトでMultiSelectのデータソースとしてDataSource.AzSqlDb.Connectの戻り値を設定します。
| プラットフォーム | データソースを設定するプロパティ |
|---|---|
| Windows Forms | BindingInfo.DataSource |
| WPF | ItemsSource |
| UWP | ItemsSource |
また、MultiSelectのリストに表示する項目としてCustomerのDisplayTextを設定します。
| プラットフォーム | 表示項目を設定するプロパティ |
|---|---|
| Windows Forms | BindingInfo.DisplayMemberPath |
| WPF | DisplayMemberPath |
| UWP | DisplayMemberPath |
Form1.cs(Windows Forms)
private void Form1_Load(object sender, EventArgs e)
{
var azSqlDb = new DataSource.AzSqlDb();
azSqlDb.Connect();
mselect.BindingInfo.DataSource = azSqlDb.Connect();
mselect.BindingInfo.DisplayMemberPath = "DisplayText";
mselect.ShowSelectAll = true;
mselect.SelectAllCaption = "全て選択";
mselect.UnselectAllCaption = "全て解除";
mselect.HeaderFormat = "{count} アイテム選択されています";
}
MainWindow.xaml.cs(WPF)
public MainWindow()
{
InitializeComponent();
var azSqlDb = new DataSource.AzSqlDb();
azSqlDb.Connect();
mselect.ItemsSource = azSqlDb.Connect();
mselect.DisplayMemberPath = "DisplayText";
mselect.ShowSelectAll = true;
mselect.SelectAllCaption = "全て選択";
mselect.UnSelectAllCaption = "全て解除";
mselect.HeaderFormat = "{count} アイテム選択されています";
}
MainPage.xaml.cs(UWP)
public MainPage()
{
this.InitializeComponent();
var azSqlDb = new DataSource.AzSqlDb();
azSqlDb.Connect();
mselect.ItemsSource = azSqlDb.Connect();
mselect.DisplayMemberPath = "DisplayText";
mselect.ShowSelectAll = true;
mselect.SelectAllCaption = "全て選択";
mselect.UnSelectAllCaption = "全て解除";
mselect.HeaderFormat = "{count} アイテム選択されています";
}
各プラットフォームのプロジェクトを実行して確認してみます。
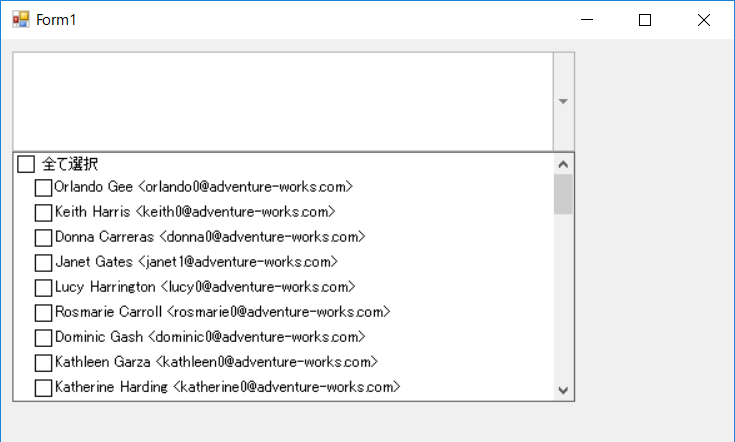
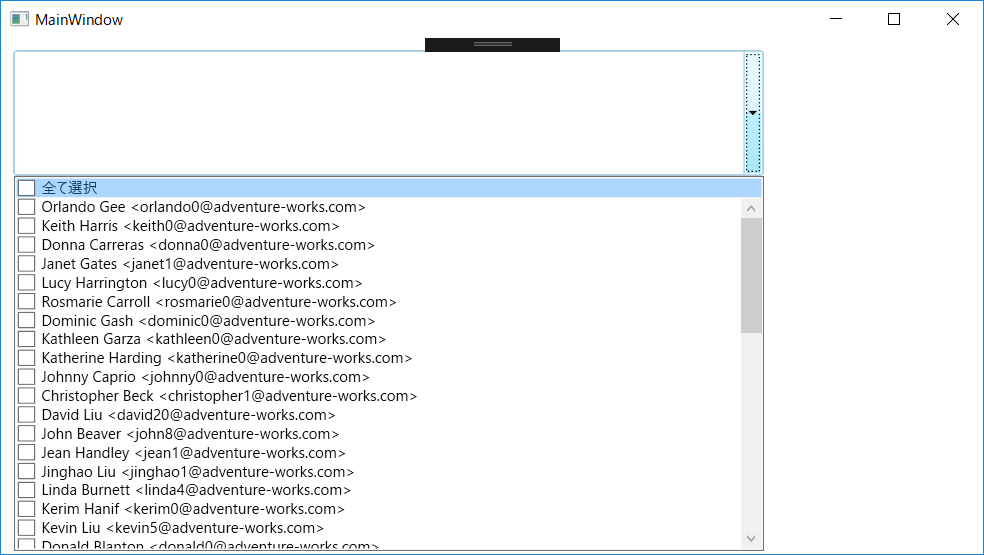
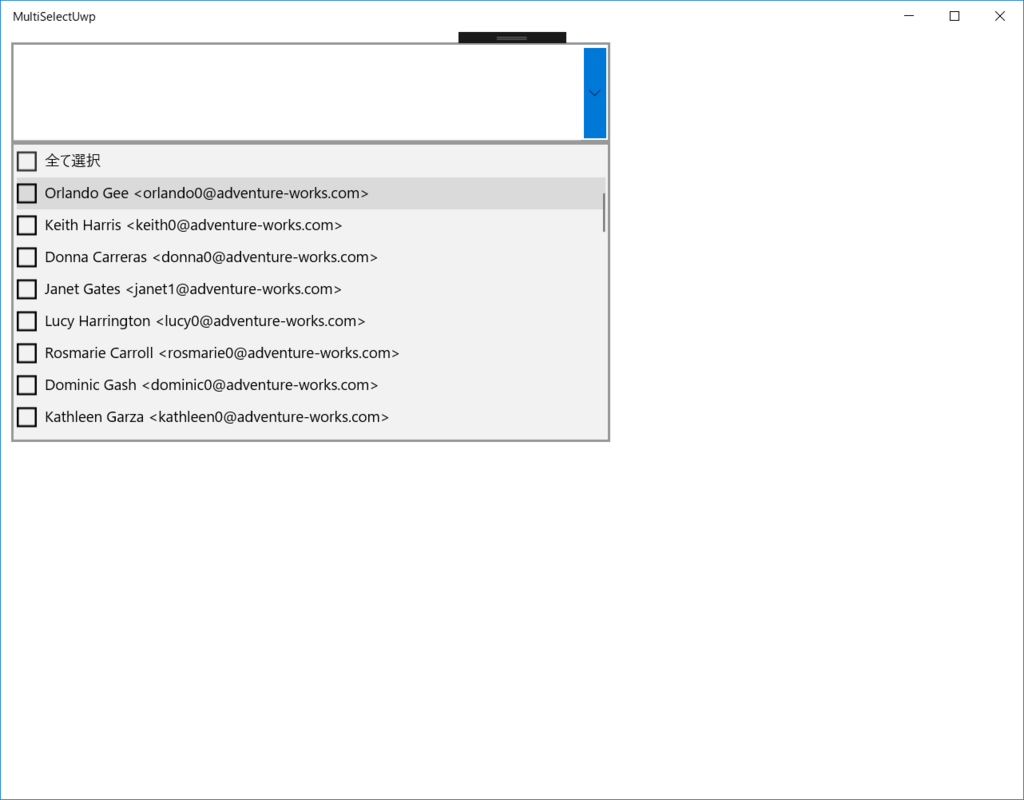
問題なく設定できているようです!
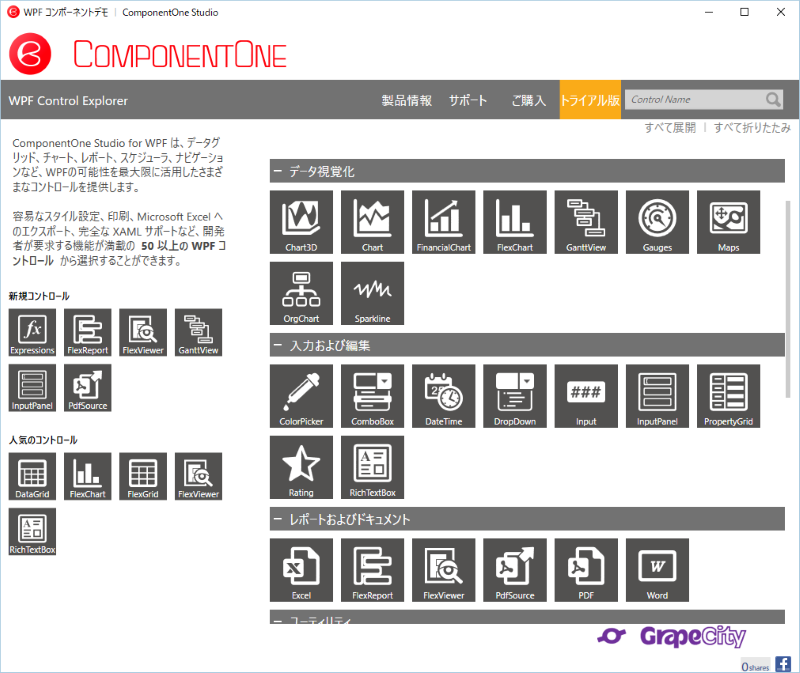
今回紹介したMultiSelectコントロールの他にもComponentOne Studioに含まれるコントールの機能を確認できるデモを用意していますので是非お試しください。
Windows Forms | WPF | UWP
