はじめに
今回はComponentOne 2018J v2で追加されたDashboardLayoutとTabPanelをASP.NET Core MVCのRazorページで実装してみます。
まずは簡単にDashboardLayoutとTabPanelの紹介をしたいと思います。
DashboardLayoutコントロール
このコントロールではWebアプリではおなじみともいえるダッシュボードを実装できます。DashboardLayoutコントロールでは、1つの場所にグリッド、グラフ、レポートなど複数のコンテンツをまとめて表示することが可能です。
TabPanelコントロール
こちらはWebアプリに限らずデスクトップアプリでもよく見られる実装ですね。タブによって表示するコンテンツを切り替えることが可能です。
では、この2つのコントロールにグリッド(FlexGrid)、棒グラフ(FlexChart)、円グラフ(FlexPie)の3つのコントロールを追加してデータを表示するアプリケーションを作成してみます。
ASP.NET Core MVCアプリの作成
ComponentOne テンプレートを使用してASP.NET Core MVCアプリケーションを作成します。
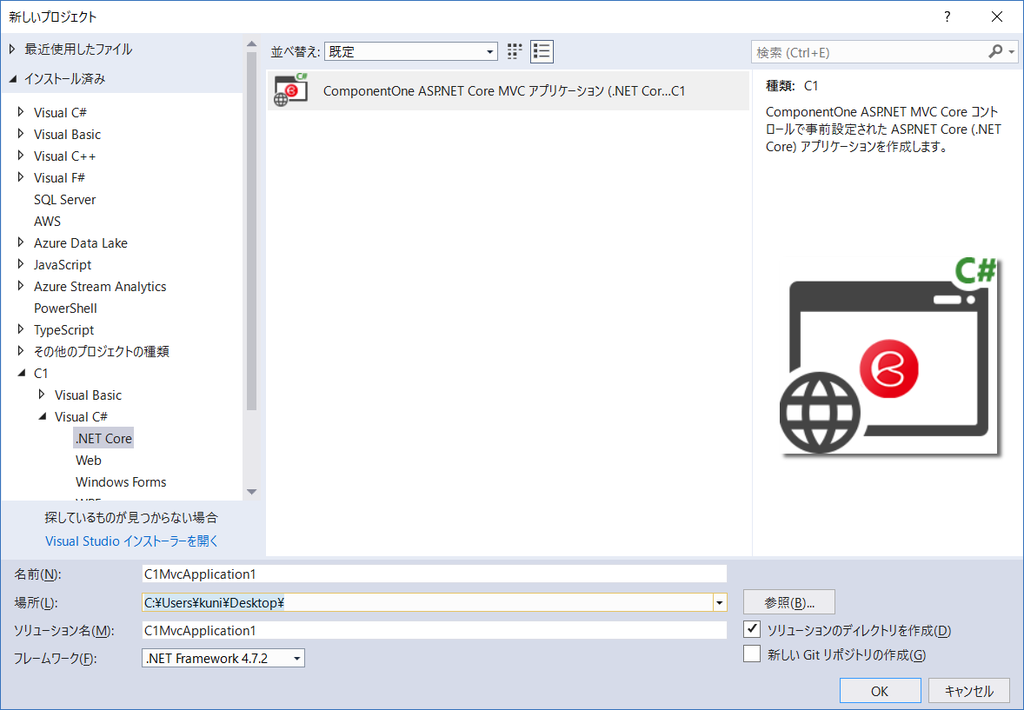
Visual Studioで[ファイル]→[新規作成]→[プロジェクト]を選択します。さらにインストール済みテンプレートから、[C1]→[Visual C#]→[.NET Core]→[ComponentOne ASP.NET Core MVC アプリケーション (.NET Core)
(C#)]を選択します。
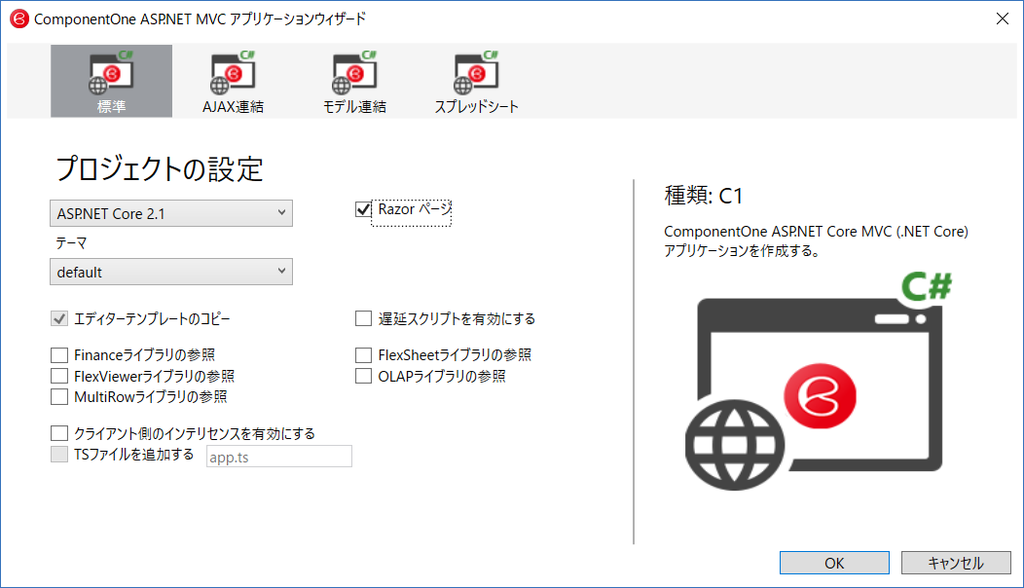
続いて[Razor ページ]を選択します。
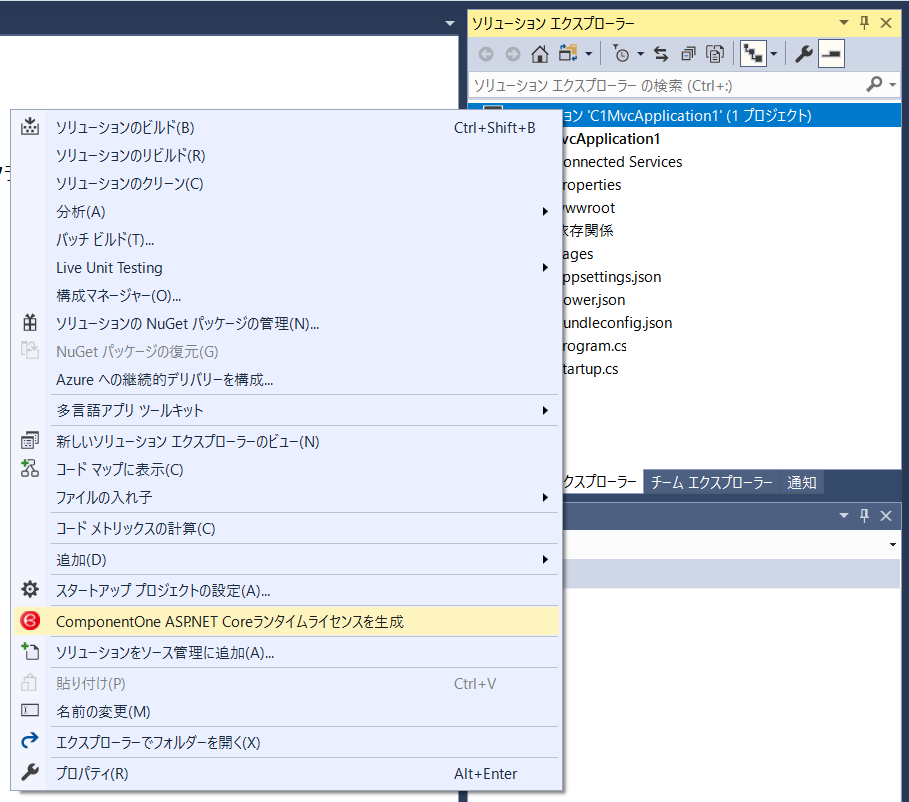
次にライセンスキーを設定します。[ツール]メニューまたはソリューションエクスプローラーでソリューションを右クリックして表示されるコンテキストメニューから、[C1 ASP.NET Coreランタイムライセンスを生成]をクリックします。
表示するデータの準備
Modelsフォルダを作成し、ProductDashboardDataクラスを作成します。
public class ProductDashboardData
{
public static IEnumerable<ProductData> GetProductData()
{
var rand = new Random(0);
var productID = new[] { "GC001", "GC002", "GC003", "GC004", "GC005" };
var products = new[] { "ActiveReports", "SPREAD", "ComponetOne", "Wijmo", "SpreadJS" };
var categories = new[] { ".NET", ".NET", ".NET", "JavaScript", "JavaScript" };
var description = new[] { "使いやすいデザイナ、縦書きなどの日本仕様対応、PDFやExcelへの出力など、日本の帳票開発に必要なすべての機能を搭載したコンポーネントです。",
"グリッドとスプレッドシートの特長を兼ね備えた表計算データグリッドです。ExcelライクなUIを持つアプリケーションを短期間で開発できます。",
"Windowsフォーム、ASP.NET MVC/Web Forms、WPF、UWP、Xamarinのアプリケーションを開発できるコンポーネントを数多く収録したセットです。",
"軽量/高速、タッチファーストで保守性の高いコントロールにより業務アプリケーション開発をサポートする新世代のJavaScriptコントロールです。",
"Excel風グリッドから自在レイアウトまで、Webアプリのデータ表示に特化したSpread.SheetsとSpread.Viewsの2つのコントロールを搭載する高機能JavaScriptライブラリです。"};
var list = products.Select((p, i) =>
{
int stockunits = rand.Next(1, 6);
int orderunits = rand.Next(1, 9);
int sales = rand.Next(1, 6);
return new ProductData { ProductID = productID[i],
ProductName = p,
Category = categories[i],
UnitsInStock = stockunits,
UnitsOnOrder = orderunits,
Sales = sales,
Descriptison = description[i] };
});
return list;
}
}
public class ProductData
{
public string ProductID { get; set; }
public string ProductName { get; set; }
public string Category { get; set; }
public int UnitsInStock { get; set; }
public int UnitsOnOrder { get; set; }
public int Sales { get; set; }
public string Descriptison { get; set; }
}
Razor ページの追加
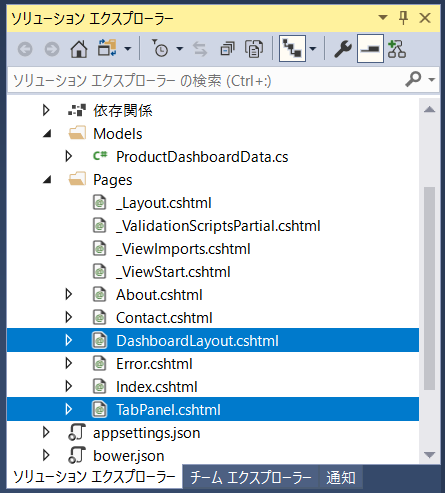
Pagesフォルダを右クリックしてRazorページDashboardLayoutとTabPanelを追加します。
DashboardLayoutコントロールの追加
DashboardLayout.cshtmlに以下のコードを追加します。
<c1-dashboard-layout id="SampleDashboard" allow-drag="true" allow-hide="true" allow-maximize="true" allow-resize="true" allow-show-all="true">
<c1-flow-layout direction="LeftToRight">
<c1-flow-tile header-text="Category Sales" width="500" height="450">
<c1-flex-pie binding-name="ProductName" binding="Sales">
<c1-items-source source-collection="@Model.data"></c1-items-source>
</c1-flex-pie>
</c1-flow-tile>
<c1-flow-tile header-text="Products Stock" width="500" height="450">
<c1-flex-chart binding-x="ProductName" legend-position="Top" chart-type="Column">
<c1-items-source source-collection="@Model.data"></c1-items-source>
<c1-flex-chart-series name="Stock Units" binding="UnitsInStock"></c1-flex-chart-series>
<c1-flex-chart-series name="Order Units" binding="UnitsOnOrder"></c1-flex-chart-series>
</c1-flex-chart>
</c1-flow-tile>
<c1-flow-tile header-text="Product Details" width="1000" height="250">
<c1-flex-grid auto-generate-columns="false">
<c1-flex-grid-column binding="ProductID" width="150"></c1-flex-grid-column>
<c1-flex-grid-column binding="ProductName" width="150"></c1-flex-grid-column>
<c1-flex-grid-column binding="Category" width="150"></c1-flex-grid-column>
<c1-flex-grid-column binding="Descriptison" width="*"></c1-flex-grid-column>
<c1-items-source source-collection="@Model.data"></c1-items-source>
</c1-flex-grid>
</c1-flow-tile>
</c1-flow-layout>
</c1-dashboard-layout>
TabPanelコントロールの追加
TabPanel.cshtmlに以下のコードを追加します。
<c1-tab-panel id="tabPanel">
<div>
<a>Category Sales</a>
<div>
<c1-flex-pie binding-name="ProductName" binding="Sales">
<c1-items-source source-collection="@Model.data"></c1-items-source>
</c1-flex-pie>
</div>
</div>
<div>
<a>Products Stock</a>
<div>
<c1-flex-chart binding-x="ProductName" legend-position="Top" chart-type="Column">
<c1-items-source source-collection="@Model.data"></c1-items-source>
<c1-flex-chart-series name="Stock Units" binding="UnitsInStock"></c1-flex-chart-series>
<c1-flex-chart-series name="Order Units" binding="UnitsOnOrder"></c1-flex-chart-series>
</c1-flex-chart>
</div>
</div>
<div>
<a>Product Details</a>
<div>
<c1-flex-grid auto-generate-columns="false">
<c1-flex-grid-column binding="ProductID" width="150"></c1-flex-grid-column>
<c1-flex-grid-column binding="ProductName" width="150"></c1-flex-grid-column>
<c1-flex-grid-column binding="Category" width="150"></c1-flex-grid-column>
<c1-flex-grid-column binding="Descriptison" width="*"></c1-flex-grid-column>
<c1-items-source source-collection="@Model.data"></c1-items-source>
</c1-flex-grid>
</div>
</div>
</c1-tab-panel>
それぞれのページのPageModelクラスで各コントロールのデータソースに設定するデータを取得しておきます。
using C1CoreMvcDashBoardAndTab.Models;
public class DashboardLayoutModel : PageModel
{
public IEnumerable<ProductData> data;
public void OnGet()
{
data = ProductDashboardData.GetProductData();
}
}
using C1CoreMvcDashBoardAndTab.Models;
public class TabPanelModel : PageModel
{
public IEnumerable<ProductData> data;
public void OnGet()
{
data = ProductDashboardData.GetProductData();
}
}
確認してみる
Visual Studioからデバッグ実行してブラウザで動作を確認してみます。URLに/dashboardlayout、/tabpanelを追加してそれぞれのページを表示してみましょう。
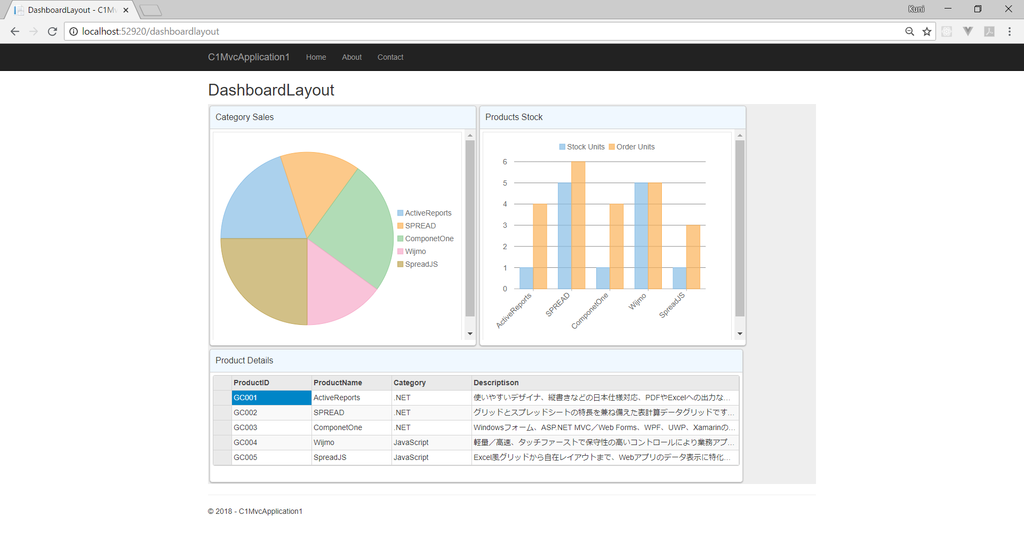
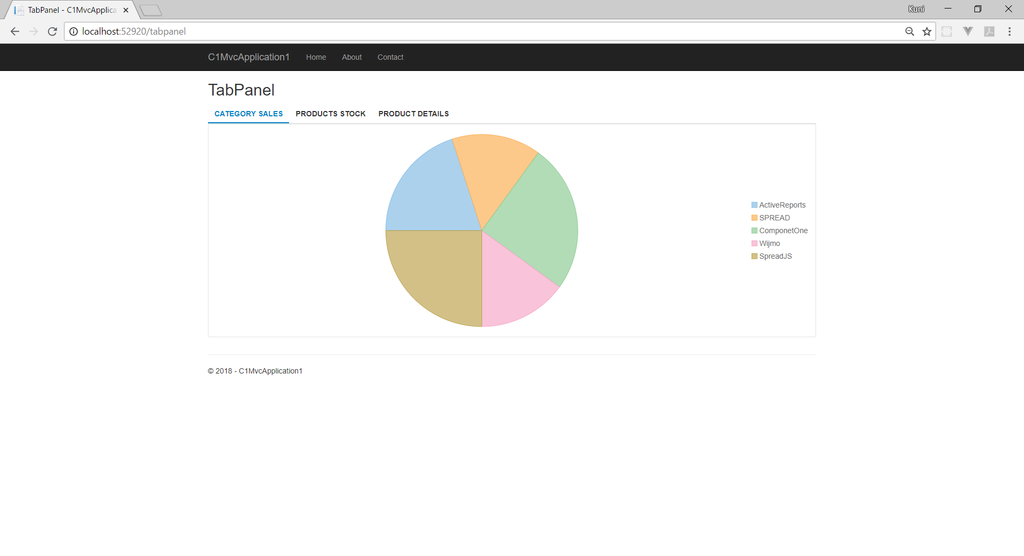
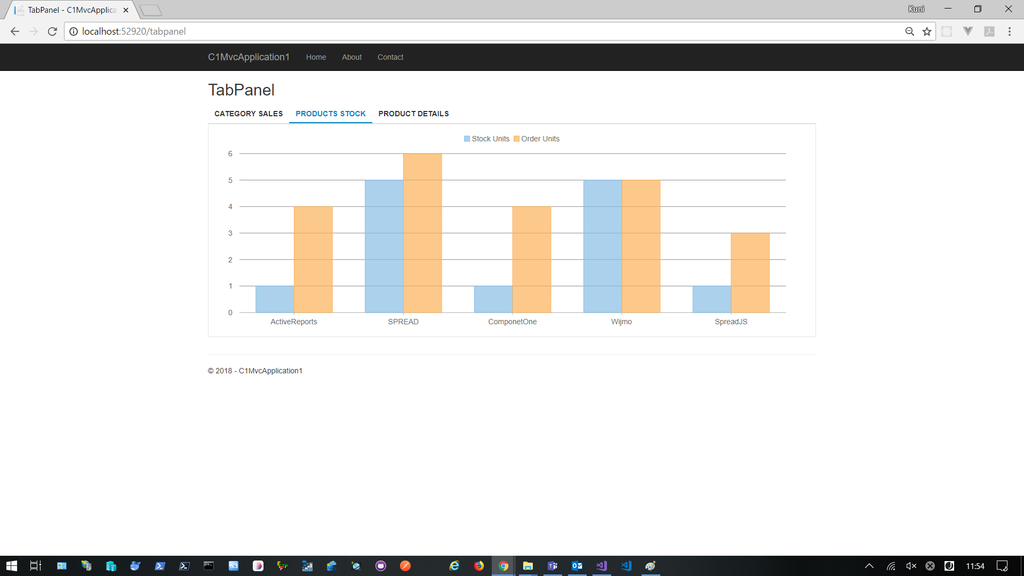
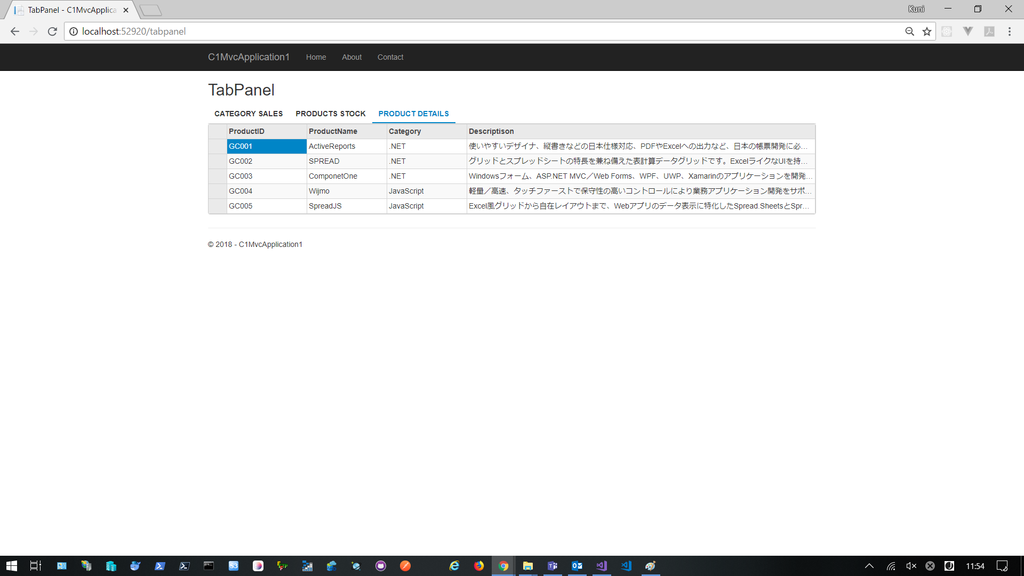
グリッド(FlexGrid)、棒グラフ(FlexChart)、円グラフ(FlexPie)の各コントロールにデータが表示されていれば成功です!
デモはこちら
今回紹介したDashboardLayoutとTabPanel以外のコントロールも動作を確認できるデモを用意しています。是非ご確認ください!
