今回はXamarin.Forms 3.0で追加されたVisual State ManagerをComponentOne for Xamarinでも使ってみたいと思います。
Visual State Managerとは?
Visual State Manager (VSM) は、Xamarin.Forms 3.0 の新機能です。 VSM は、コードからユーザーインターフェースに視覚的変更を加える構造化された方法を提供します。 ほとんどの場合、アプリケーションのユーザーインターフェイスは XAML で定義され、この XAML には Visual State Manager がユーザーインターフェイスの表示に影響を与える方法を記述するマークアップが含まれています。
Xamarin.Forms Visual State Manager – Xamarin | Microsoft Docs
WPFやUWPでアプリケーション開発を行っていた方々にはお馴染みの機能かもしれません。
Entry コントロールで試してみる
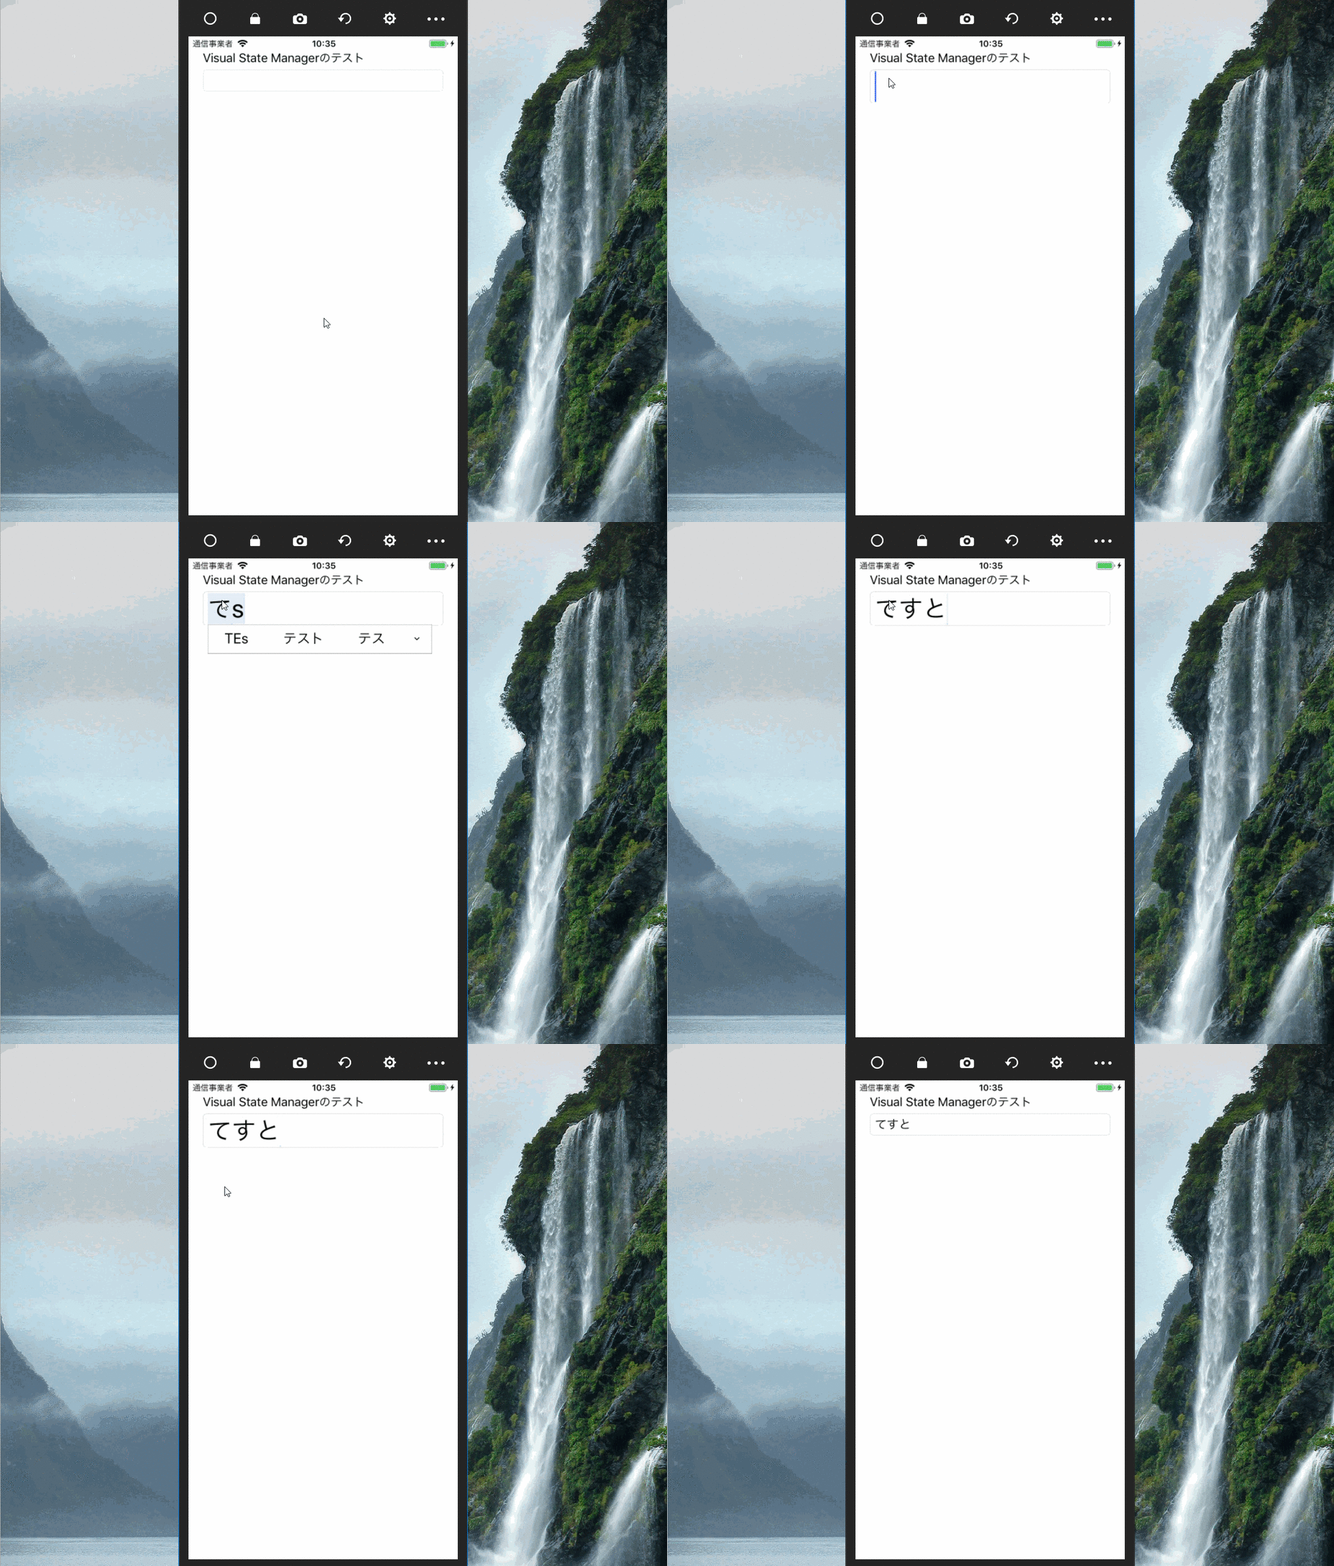
まずはXamarin.FormsのEntryコントロールで試してみましょう。Visual State Managerを使って入力時にだけフォントサイズを2倍にしてテキストを表示するように設定してみます。
<Entry>タグ内に<VisualStateManager.VisualStateGroups>タグを追加します。
<Entry HorizontalOptions="FillAndExpand" >
<VisualStateManager.VisualStateGroups>
</VisualStateManager.VisualStateGroups>
</Entry>
VisualStateManager.VisualStateGroupsタグ内にVisualStateGroupタグを挿入します。
<Entry HorizontalOptions="FillAndExpand" >
<VisualStateManager.VisualStateGroups>
<VisualStateGroup x:Name="CommonStates">
</VisualStateGroup>
</VisualStateManager.VisualStateGroups>
</Entry>
VisualStateGroupタグ内にVisualStateタグを追加します。
<Entry HorizontalOptions="FillAndExpand" >
<VisualStateManager.VisualStateGroups>
<VisualStateGroup x:Name="CommonStates">
<VisualState x:Name="Normal">
</VisualState>
<VisualState x:Name="Focused">
</VisualState>
</VisualStateGroup>
</VisualStateManager.VisualStateGroups>
</Entry>
VisualStateタグ内にVisualState.Settersタグを追加します。
<Entry HorizontalOptions="FillAndExpand" >
<VisualStateManager.VisualStateGroups>
<VisualStateGroup x:Name="CommonStates">
<VisualState x:Name="Normal">
<VisualState.Setters>
</VisualState.Setters>
</VisualState>
<VisualState x:Name="Focused">
<VisualState.Setters>
</VisualState.Setters>
</VisualState>
</VisualStateGroup>
</VisualStateManager.VisualStateGroups>
</Entry>
最後にSetterタグで変更するEntryコントロールのプロパティを設定します。入力時にフォントサイズを2倍(18 ⇒ 36)に変更するようにFontSizeを設定します。
<Entry HorizontalOptions="FillAndExpand" >
<VisualStateManager.VisualStateGroups>
<VisualStateGroup x:Name="CommonStates">
<VisualState x:Name="Normal">
<VisualState.Setters>
<Setter Property="FontSize" Value="18" />
</VisualState.Setters>
</VisualState>
<VisualState x:Name="Focused">
<VisualState.Setters>
<Setter Property="FontSize" Value="36" />
</VisualState.Setters>
</VisualState>
</VisualStateGroup>
</VisualStateManager.VisualStateGroups>
</Entry>
実行してみます。意図したように、入力時にはフォントサイズが通常時とは変更されて表示されていますね!

MaskedEntry コントロールで使ってみる
次にComponentOne for XamarinのMaskedEntryコントロールでVisual State Managerを使ってみます。MaskedEntryコントロールは、ユーザーに書式が設定されたデータ入力を促すように設計された入力コントロールです。今回は「数字12桁のマイナンバー」と「数字8桁の生年月日」を入力する書式を、Maskプロパティでそれぞれ設定します。
<Label Text="マイナンバー(個人)"
       HorizontalOptions="StartAndExpand"/>
<c1:C1MaskedEntry x:Name="C1MaskedEntry1" Mask="0000-0000-0000"
                  Keyboard="Numeric" HorizontalOptions="FillAndExpand">
</c1:C1MaskedEntry>
<Label Text="生年月日"
      HorizontalOptions="StartAndExpand"/>
<c1:C1MaskedEntry x:Name="C1MaskedEntry2" Mask="0000/00/00"
                  Keyboard="Numeric" HorizontalOptions="FillAndExpand">
</c1:C1MaskedEntry>
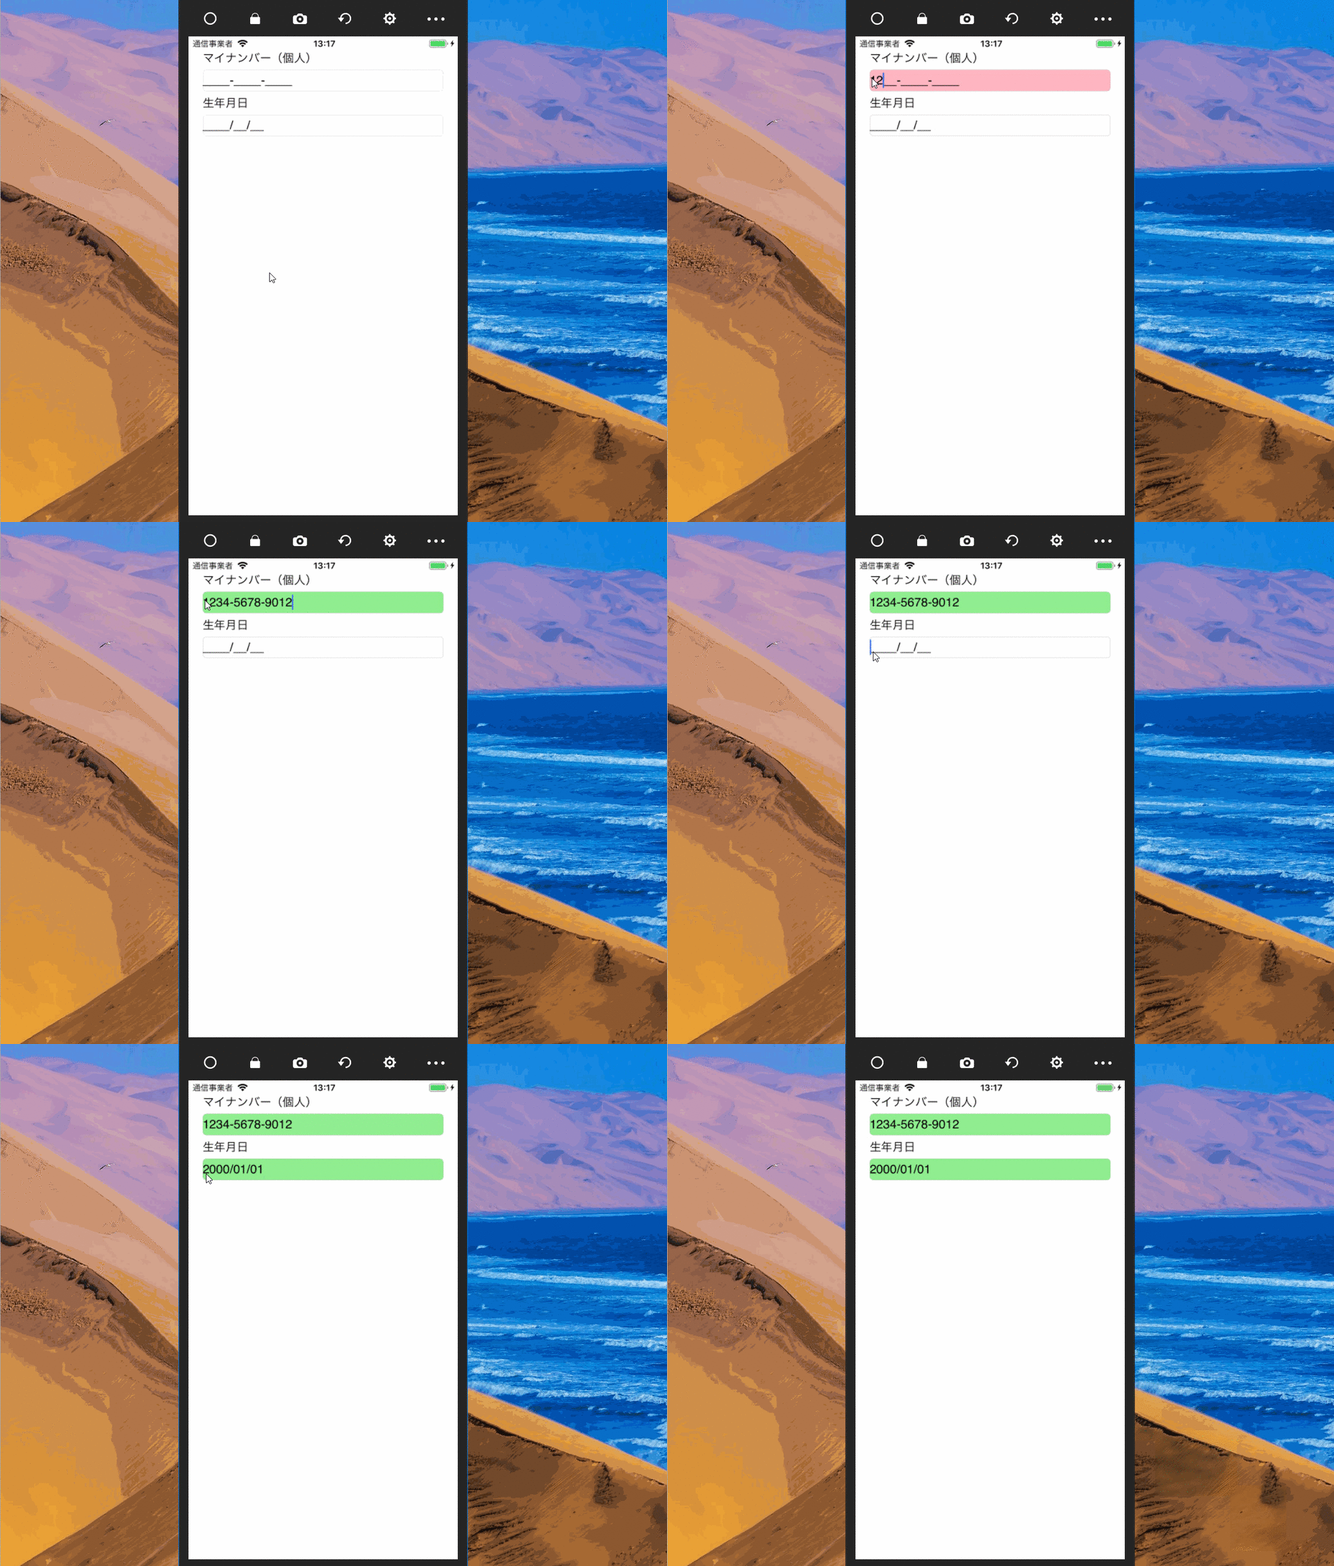
肝心のVisual State Managerの使いどころですが、TextChangedイベントで入力された文字数をチェックして入力中と入力完了時でコントロールの背景色BackgroundColorを変更するようにしてみます。
ビュー
<Label Text="マイナンバー(個人)"
       HorizontalOptions="StartAndExpand"/>
<c1:C1MaskedEntry x:Name="C1MaskedEntry1" Mask="0000-0000-0000"
                  Keyboard="Numeric" TextChanged="C1MaskedEntry1_TextChanged"
                  HorizontalOptions="FillAndExpand">
<VisualStateManager.VisualStateGroups>
<VisualStateGroup Name="ValidationStates">
<VisualState Name="Finished">
<VisualState.Setters>
<Setter Property="BackgroundColor" Value="LightGreen"/>
</VisualState.Setters>
</VisualState>
<VisualState Name="InProgress">
<VisualState.Setters>
<Setter Property="BackgroundColor" Value="LightPink"/>
</VisualState.Setters>
</VisualState>
</VisualStateGroup>
</VisualStateManager.VisualStateGroups>
</c1:C1MaskedEntry>
<Label Text="生年月日"
       HorizontalOptions="StartAndExpand"/>
<c1:C1MaskedEntry x:Name="C1MaskedEntry2" Mask="0000/00/00"
                  Keyboard="Numeric" TextChanged="C1MaskedEntry2_TextChanged"
                  HorizontalOptions="FillAndExpand">
<VisualStateManager.VisualStateGroups>
<VisualStateGroup Name="ValidationStates">
<VisualState Name="Finished">
<VisualState.Setters>
<Setter Property="BackgroundColor" Value="LightGreen"/>
</VisualState.Setters>
</VisualState>
<VisualState Name="InProgress">
<VisualState.Setters>
<Setter Property="BackgroundColor" Value="LightPink"/>
</VisualState.Setters>
</VisualState>
</VisualStateGroup>
</VisualStateManager.VisualStateGroups>
</c1:C1MaskedEntry>
コードビハインド
private void C1MaskedEntry1_TextChanged(object sender, C1.Xamarin.Forms.Input.TextChangedEventArgs e)
{
bool isFinished = C1MaskedEntry1.Value.Length == 12 ? true : false;
GoToState1(isFinished);
}
void GoToState1(bool isFinished)
{
string visualState = isFinished ? "Finished" : "InProgress";
VisualStateManager.GoToState(C1MaskedEntry1, visualState);
}
private void C1MaskedEntry2_TextChanged(object sender, C1.Xamarin.Forms.Input.TextChangedEventArgs e)
{
bool isFinished = C1MaskedEntry2.Value.Length == 8 ? true : false;
GoToState2(isFinished);
}
void GoToState2(bool isFinished)
{
string visualState = isFinished ? "Finished" : "InProgress";
VisualStateManager.GoToState(C1MaskedEntry2, visualState);
}
これで実装は完了です。さっそく実行してみましょう。

入力中と完了時で背景色が変更されていることが確認できましたね!
まとめ
MaskedEntryコントロールとVisual State Managerを組み合わせて使用することで、ユーザーにとってより使いやすい入力フォームをXamarin.Formsで実現できます。今回のサンプルはこちらです。
ComponentOne for Xamarinでは今回紹介したMaskedEntryコントロールの他にもXamarin.Formsで使えるコントロールを揃えています。動作を確認できるサンプルはこちらです。是非お試しください!
