サーバーサイド環境に依存しない帳票開発JavaScriptライブラリ「ActiveReportsJS(アクティブレポートJS)」では、「Webデザイナコンポーネント」の機能を使用して、エンドユーザーがブラウザ上で帳票レイアウトの新規作成や変更を行える環境を構築することができます。
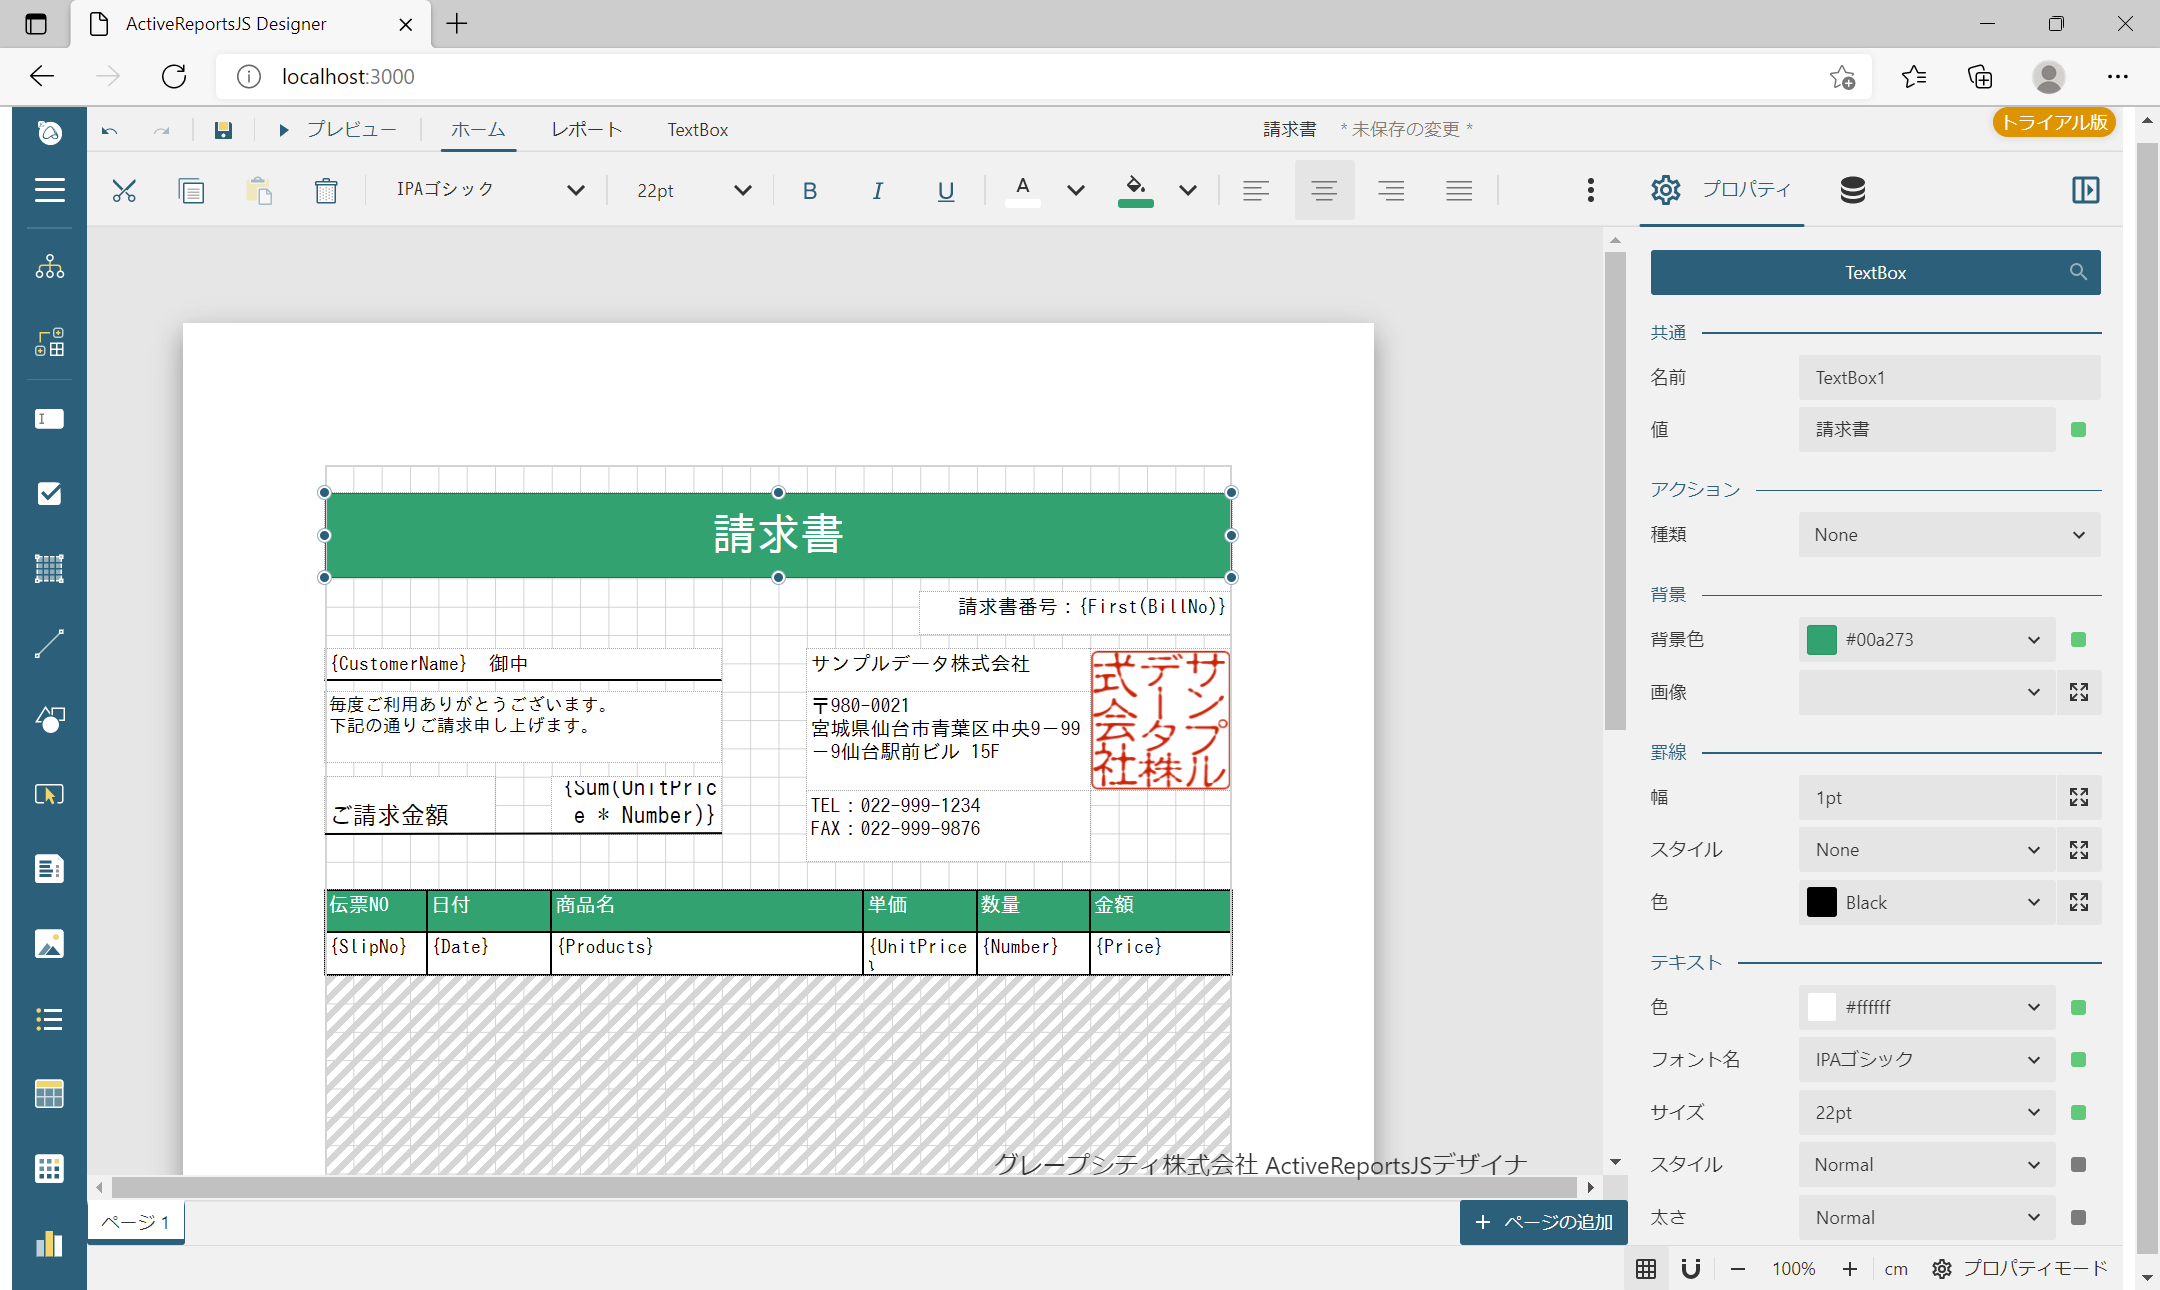
今回の記事ではWebデザイナコンポーネントの導入方法、及びレポートのプレビュー機能や保存機能の実装方法を解説いたします。
目次
※ 以下、Node.jsが環境にインストールされていることが前提となります。インストールしていない場合は、あらかじめこちらより推奨版をインストールしてください。また、エディタとしてVisual Studio Codeを使用します。
Webデザイナの表示
はじめにプロジェクトを作成します。今回は「designer-app」という名前のプロジェクト用のフォルダを用意し、その中でアプリケーション構築を行なっていきます。
プロジェクトフォルダの作成
ターミナルやコマンドプロンプトを開き、任意のディレクトリ上で以下のコマンドを実行して「designer-app」フォルダの作成と同フォルダへの移動を行います。
mkdir designer-app
cd designer-app
プロジェクトの初期化
次にプロジェクトの初期化を行います。「npm init」コマンドを実行して、「package.json」フイル(npmパッケージの定義ファイル)を作成します。途中、プロジェクト名やバージョンなどの設定についていくつか質問されますが、以下のように「-y」オプションを指定することによって、それらの設定を一括で「既定」に設定することが可能です。
npm init -yExpressのインストール
今回はNode.jsで使えるWebアプリケーションフレームワーク「Express」を使用してアプリケーションをホストします。
以下のコマンドを実行してExpressをインストールします。
npm install expressプロジェクト直下に「server.js」を作成し、以下の内容を記述します。
const express = require('express')
const app = express()
const path = require('path');

// 静的ファイルのルーティング
app.use(express.static(path.join(__dirname, 'public')));
app.use('/css', express.static(__dirname + '/node_modules/@grapecity/activereports/styles/'));
app.use('/scripts', express.static(__dirname + '/node_modules/@grapecity/activereports/dist/'));
app.use('/resources', express.static(__dirname + '/node_modules/@grapecity/activereports-localization/dist/designer/'));

app.listen(3000, () => console.log('Listeninig on port 3000...'))
ActiveReportsJSのインストール
次にActiveReportsJSのパッケージをインストールします。
npm install @grapecity/activereports @grapecity/activereports-localizationWebデザイナの初期化
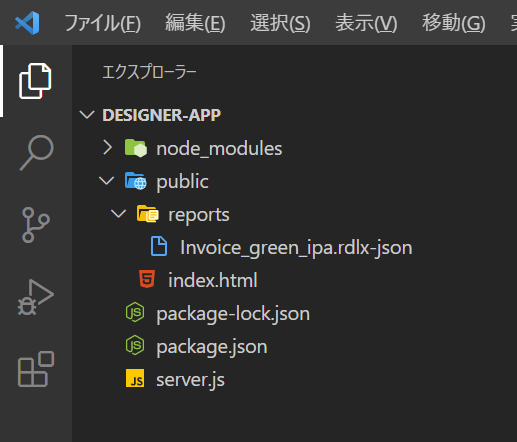
プロジェクト配下に「public」フォルダを新しく作成し、さらにその配下に「index.html」を作成し、以下のようにWebデザイナの初期化処理を記載します。
<html>
<head>
    <meta charset="utf-8" />
    <title>ActiveReportsJS Designer</title>
    <meta name="viewport" content="width=device-width, initial-scale=1">

    <link rel="stylesheet" href="/css/ar-js-ui.css" />
    <link rel="stylesheet" href="/css//ar-js-designer.css" />
    <script type="text/javascript" src="scripts/ar-js-core.js"></script>
    <script type="text/javascript" src="scripts/ar-js-designer.js"></script>
    <script type="text/javascript" src="resources/ja-locale.js"></script>

</head>
<body onload="load()">
    <div id="designer" style="height: 100vh;"></div>
    <script>
        function load() {
            const designer = new GC.ActiveReports.ReportDesigner.Designer("#designer", {language:'ja'});
            designer.setReport({
                id:'./reports/Invoice_green_ipa.rdlx-json' // Webデザイナに読込むレポートを設定
                ,displayName:'請求書' // Webデザイナに表示するレポート名を設定
            });
        }
    </script>
</body>
</html>
レポートファイルの配置
「public」フォルダ配下に「reports」フォルダを作成し、以下のGitHubで公開しているサンプルレポートファイル「Invoice_green_ipa.rdlx-json」をコピーします。
Webデザイナの起動
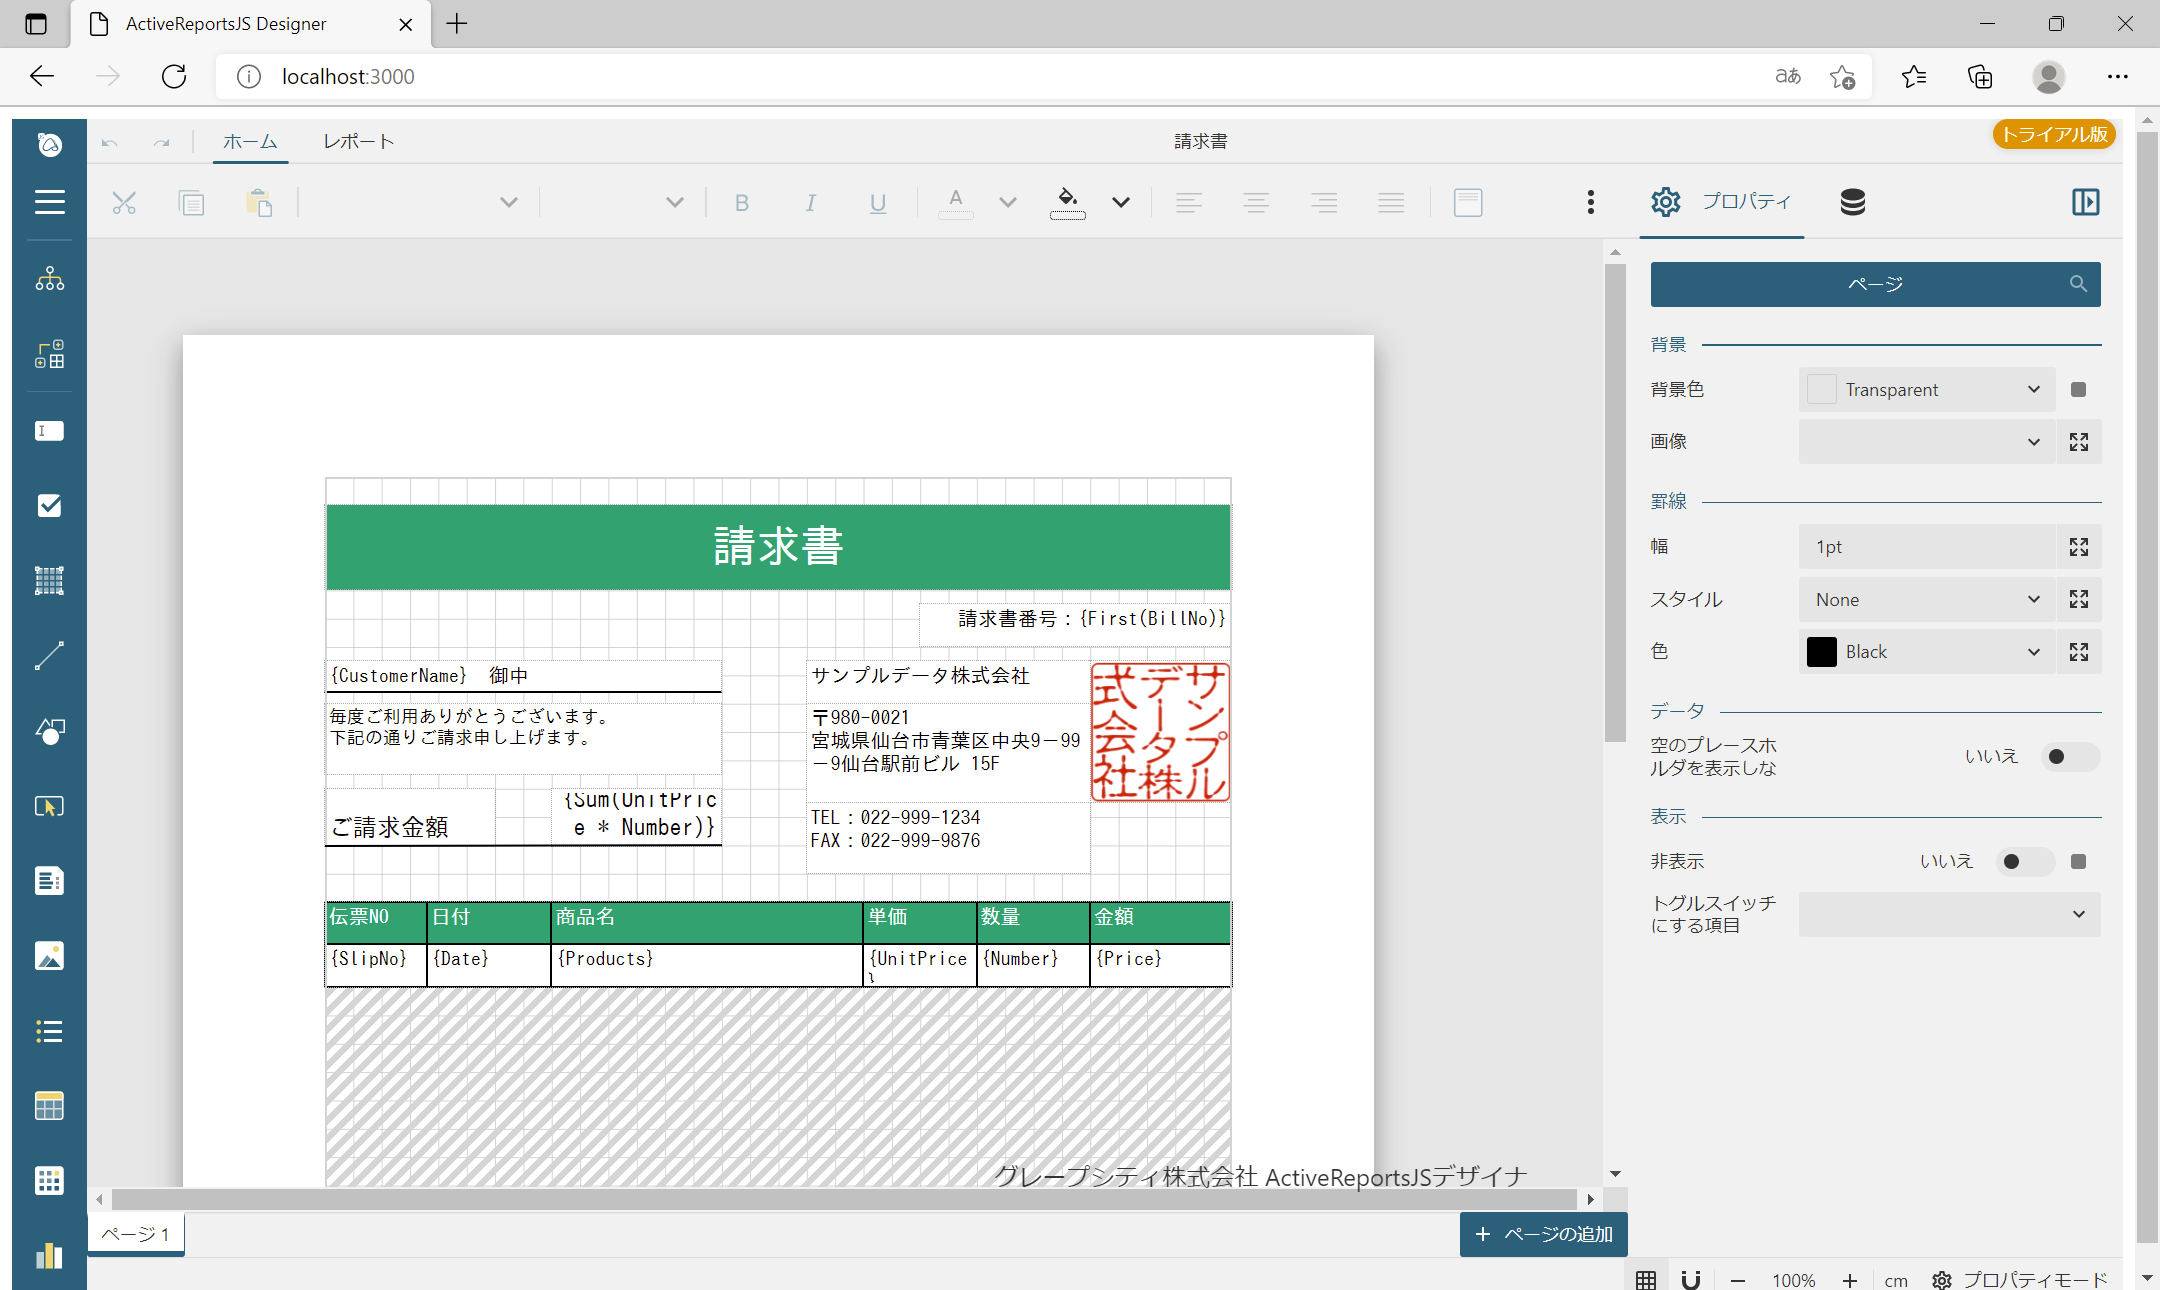
以下のコマンドを実行し、ExpressでWebサーバーを起動します。
node server.js「http://localhost:3000/」にアクセスすると、ブラウザ上にデザイナアプリケーションが表示されます。
レポートのプレビュー機能の実装
Webデザイナコンポーネントは、デフォルトの状態だとプレビューや保存などほとんどの機能が有効化されていないため、必要な機能をそれぞれ実装していく必要があります。
まずは編集したレポートをプレビューする機能を実装してみます。Webデザイナコンポーネント自体にプレビューの機能はないため、帳票ビューワのコンポーネントと組み合わせて使用します。
「server.js」を以下のように修正し、ルーティングを追加します。
const express = require('express')
const app = express()
const path = require('path');

// 静的ファイルのルーティング
app.use(express.static(path.join(__dirname, 'public')));
app.use('/css', express.static(__dirname + '/node_modules/@grapecity/activereports/styles/'));
app.use('/scripts', express.static(__dirname + '/node_modules/@grapecity/activereports/dist/'));
app.use('/resources', express.static(__dirname + '/node_modules/@grapecity/activereports-localization/dist/designer/'));
app.use('/resources', express.static(__dirname + '/node_modules/@grapecity/activereports-localization/dist/'));

app.listen(3000, () => console.log('Listeninig on port 3000...'))
「index.html」を以下のように編集し、画面にビューワを組み込んでプレビュー機能を実装します。また、プレビューからデザイナの編集画面に戻る処理を実装したボタンも追加しています。
<html>
<head>
    <meta charset="utf-8" />
    <title>ActiveReportsJS Designer</title>
    <meta name="viewport" content="width=device-width, initial-scale=1">

    <link rel="stylesheet" href="/css/ar-js-ui.css" />
    <link rel="stylesheet" href="/css//ar-js-viewer.css" />
    <link rel="stylesheet" href="/css//ar-js-designer.css" />
    <script type="text/javascript" src="scripts/ar-js-core.js"></script>
    <script type="text/javascript" src="scripts/ar-js-viewer.js"></script>
    <script type="text/javascript" src="scripts/ar-js-designer.js"></script>
    <script type="text/javascript" src="resources/ja-locale.js"></script>
    <script type="text/javascript" src="resources/ar-js-locales.js"></script>
</head>

<body onload="load()">
    <div>
        <button id="btnDesignerOpen" type="button" style="margin: 1em 0;" onclick="onOpenDesigner()">
            編集に戻る
        </button>
    </div>
    <div id="designer" style="height: 100vh;"></div>
    <div id="viewer" style="height: 100vh;"></div>
    <script>
        const d = document.getElementById("designer");
        const v = document.getElementById("viewer");
        const btn = document.getElementById("btnDesignerOpen");

        function load() {
            const designer = new GC.ActiveReports.ReportDesigner.Designer("#designer", { language: 'ja' });
            designer.setReport({
                id: './reports/Invoice_green_ipa.rdlx-json' // Webデザイナに読込むレポートを設定
                , displayName: '請求書' // Webデザイナに表示するレポート名を設定
            });
            var viewer = new ActiveReports.Viewer('#viewer', { language: "ja" });
            onOpenDesigner();
            designer.setActionHandlers({
                // プレビュー
                onRender: (report) => {
                    onOpenViewer();
                    viewer.open(report.definition);
                    return Promise.resolve();
                },
            });
        }

        function onOpenDesigner() {
            v.style.display = "none";
            btn.style.display = "none";
            d.style.display = "block";
        }

        function onOpenViewer() {
            v.style.display = "block";
            btn.style.display = "block";
            d.style.display = "none";
        }
    </script>
</body>

</html>
以下のコマンドを実行して再度アプリケーションを実行します。
node server.js実行すると、デザイナの上部に[プレビュー]ボタンが追加されます。
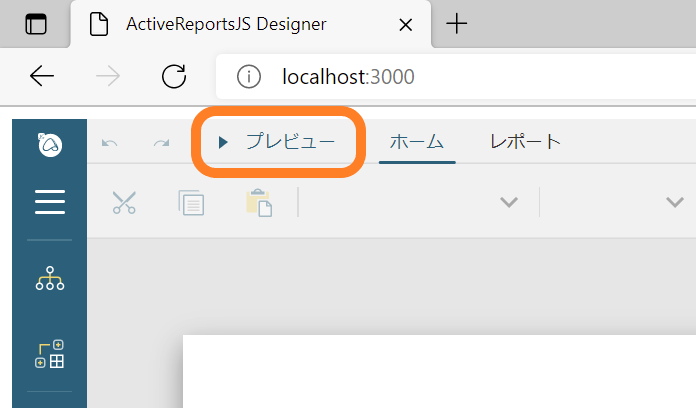
プレビューを実行すると、画面がビューワに切り替わり、レポートをプレビュー表示することができます。また、[編集に戻る]ボタンを押下してデザイナでの編集に戻ります。
レポートファイルの保存機能の実装
次に編集したレポートファイルを保存する処理を実装します。レポートファイルはサーバーに保存する必要があるので、Node.jsで使えるミドルウェアの「Multer」を使用して簡単なAPIを作成します。
以下のコマンドを実行してMulterをインストールします。
npm install multerインストールが完了したら「server.js」にPOSTリクエストでファイルアップロードができるよう、処理を追加します。
const express = require('express')
const app = express()
const path = require('path');

var multer = require('multer');
var storage = multer.diskStorage({
  // 保存先のフォルダを設定
  destination: function (req, file, cb) {
    cb(null, 'public/reports/')
  },
  // 保存ファイル名の設定
  filename: function (req, file, cb) {
    cb(null, file.originalname)
  }
})
var upload = multer({ storage: storage })

app.post('/upload', upload.any(), function(req, res) {
    res.json({ 'result': 'uploaded!' });
})

// 静的ファイルのルーティング
app.use(express.static(path.join(__dirname, 'public')));
app.use('/css', express.static(__dirname + '/node_modules/@grapecity/activereports/styles/'));
app.use('/scripts', express.static(__dirname + '/node_modules/@grapecity/activereports/dist/'));
app.use('/resources', express.static(__dirname + '/node_modules/@grapecity/activereports-localization/dist/designer/'));
app.use('/resources', express.static(__dirname + '/node_modules/@grapecity/activereports-localization/dist/'));

app.listen(3000, () => console.log('Listeninig on port 3000...'))
次に「public/index.html」を以下のように追記し、Webデザイナコンポーネントでレポートの保存を有効化し、さらに先ほど作成したAPIにPOSTリクエストを送信する処理を記載します。
<html>

<head>
    <meta charset="utf-8" />
    <title>ActiveReportsJS Designer</title>
    <meta name="viewport" content="width=device-width, initial-scale=1">

    <link rel="stylesheet" href="/css/ar-js-ui.css" />
    <link rel="stylesheet" href="/css/ar-js-viewer.css" />
    <link rel="stylesheet" href="/css/ar-js-designer.css" />
    <script type="text/javascript" src="scripts/ar-js-core.js"></script>
    <script type="text/javascript" src="scripts/ar-js-viewer.js"></script>
    <script type="text/javascript" src="scripts/ar-js-designer.js"></script>
    <script type="text/javascript" src="resources/ja-locale.js"></script>
    <script type="text/javascript" src="resources/ar-js-locales.js"></script>
</head>

<body onload="load()">
    <div>
        <button id="btnDesignerOpen" type="button" style="margin: 1em 0;" onclick="onOpenDesigner()">
            編集に戻る
        </button>
    </div>
    <div id="designer" style="height: 100vh;"></div>
    <div id="viewer" style="height: 100vh;"></div>
    <script>
        const d = document.getElementById("designer");
        const v = document.getElementById("viewer");
        const btn = document.getElementById("btnDesignerOpen");

        reportStorage = new Map();

        function load() {
            const designer = new GC.ActiveReports.ReportDesigner.Designer("#designer", { language: 'ja' });
            designer.setReport({
                id: './reports/Invoice_green_ipa.rdlx-json' // Webデザイナに読込むレポートを設定
                , displayName: '請求書' // Webデザイナに表示するレポート名を設定
            });
            var viewer = new ActiveReports.Viewer('#viewer', { language: "ja" });
            onOpenDesigner();
            designer.setActionHandlers({
                // プレビュー
                onRender: (report) => {
                    onOpenViewer();
                    viewer.open(report.definition);
                    return Promise.resolve();
                },
                // 上書き保存
                onSave: function (info) {
                    const reportId = info.id;
                    reportStorage.set(reportId, info.definition);

                    const blob = new Blob([JSON.stringify(reportStorage.get(reportId))], { type: 'application/json' });
                    const formData = new FormData();
                    formData.append('report-data', blob, 'Invoice_green_ipa.rdlx-json');
                    const param = {
                        method: "POST",
                        body: formData
                    }
                    // レポートファイルのアップロード
                    fetch("http://localhost:3000/upload", param)
                        .then(res => res.json())
                        .then(data => console.log(data))
                        .catch((error) => console.log(error));
                    return Promise.resolve({ displayName: info.displayName });
                }
            });
        }

        function onOpenDesigner() {
            v.style.display = "none";
            btn.style.display = "none";
            d.style.display = "block";
        }

        function onOpenViewer() {
            v.style.display = "block";
            btn.style.display = "block";
            d.style.display = "none";
        }
    </script>
</body>

</html>
以下のコマンドを実行して再度アプリケーションを実行します。
node server.js実行すると、デザイナの上部に[上書き保存]ボタンが追加されます。
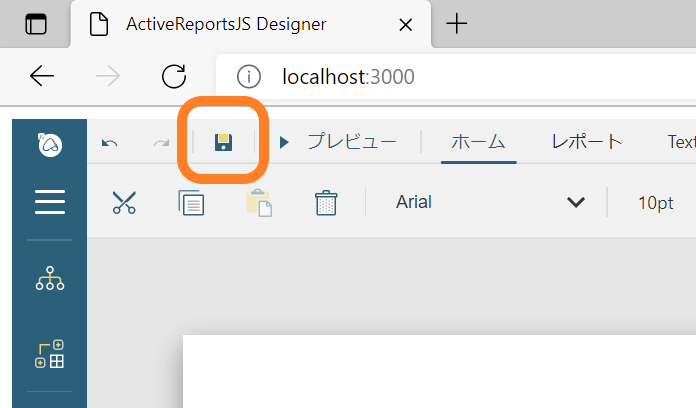
ブラウザ上でレイアウトを編集し[上書き保存]ボタンを押下するとレポートファイルが保存できます。保存後に画面をリロードすると、きちんと更新後のレポートファイルが表示されていることがわかります。
さいごに
以上がActiveReportsJSのWebデザイナコンポーネントの基本的な使い方でした。このほかWebデザイナコンポーネントでは、レポートを新規作成したり、サーバー上のレポートファイルを開いたりする機能を実装することもできるので、気になった方は手軽に動作を試せるオンラインデモや、無料のトライアル版をお試しください。
また、ご導入前の製品に関するご相談、ご導入後の各種サービスに関するご質問など、お気軽にお問合せください。
ActiveReportsJSの詳細情報は製品サイトをご覧ください。
