今回はJavaScriptライブラリ「KaTeX(カテフ)」と「Power Apps Component Framework(略称PCF)」を利用して、Power Apps上で複雑な数式表示ができるカスタムコンポーネントの作成方法について解説していきます。
前回の記事は、「Power Apps」アプリへ高度なUI機能を追加することができる、「コードコンポーネント」の作成方法についてご紹介しました。今回は、前回作成した「コードコンポーネント」を実際にPower Apps環境上で利用する方法や、OSSライブラリを利用し「コードコンポーネント」に、次のような数式表示が行える機能の追加方法について解説していきます。
目次
事前準備
今回は前回使用した開発環境に加え、新たに次の環境を用意します。
- Build Tools for Visual Studio 2022(パッケージ化する為のビルドツール)
- Power Apps 開発者向けプラン(Power Apps環境)
前回までに使用した環境は以下の通りです。
- Visual Studio Code
- Npm or Node.JS ※ LTS (長期サポート) バージョンのご利用をお勧め
- Power Platform CLI(Power Apps Component Frameworkを利用する為のツール)
Power Apps上でコードコンポーネント利用する方法
コンポーネントのパッケージ化
それでは、前回までに作成した「コードコンポーネント」をPower Apps環境へアップする為にソリューションファイルを作成しコンポーネントをパッケージ化していきます。
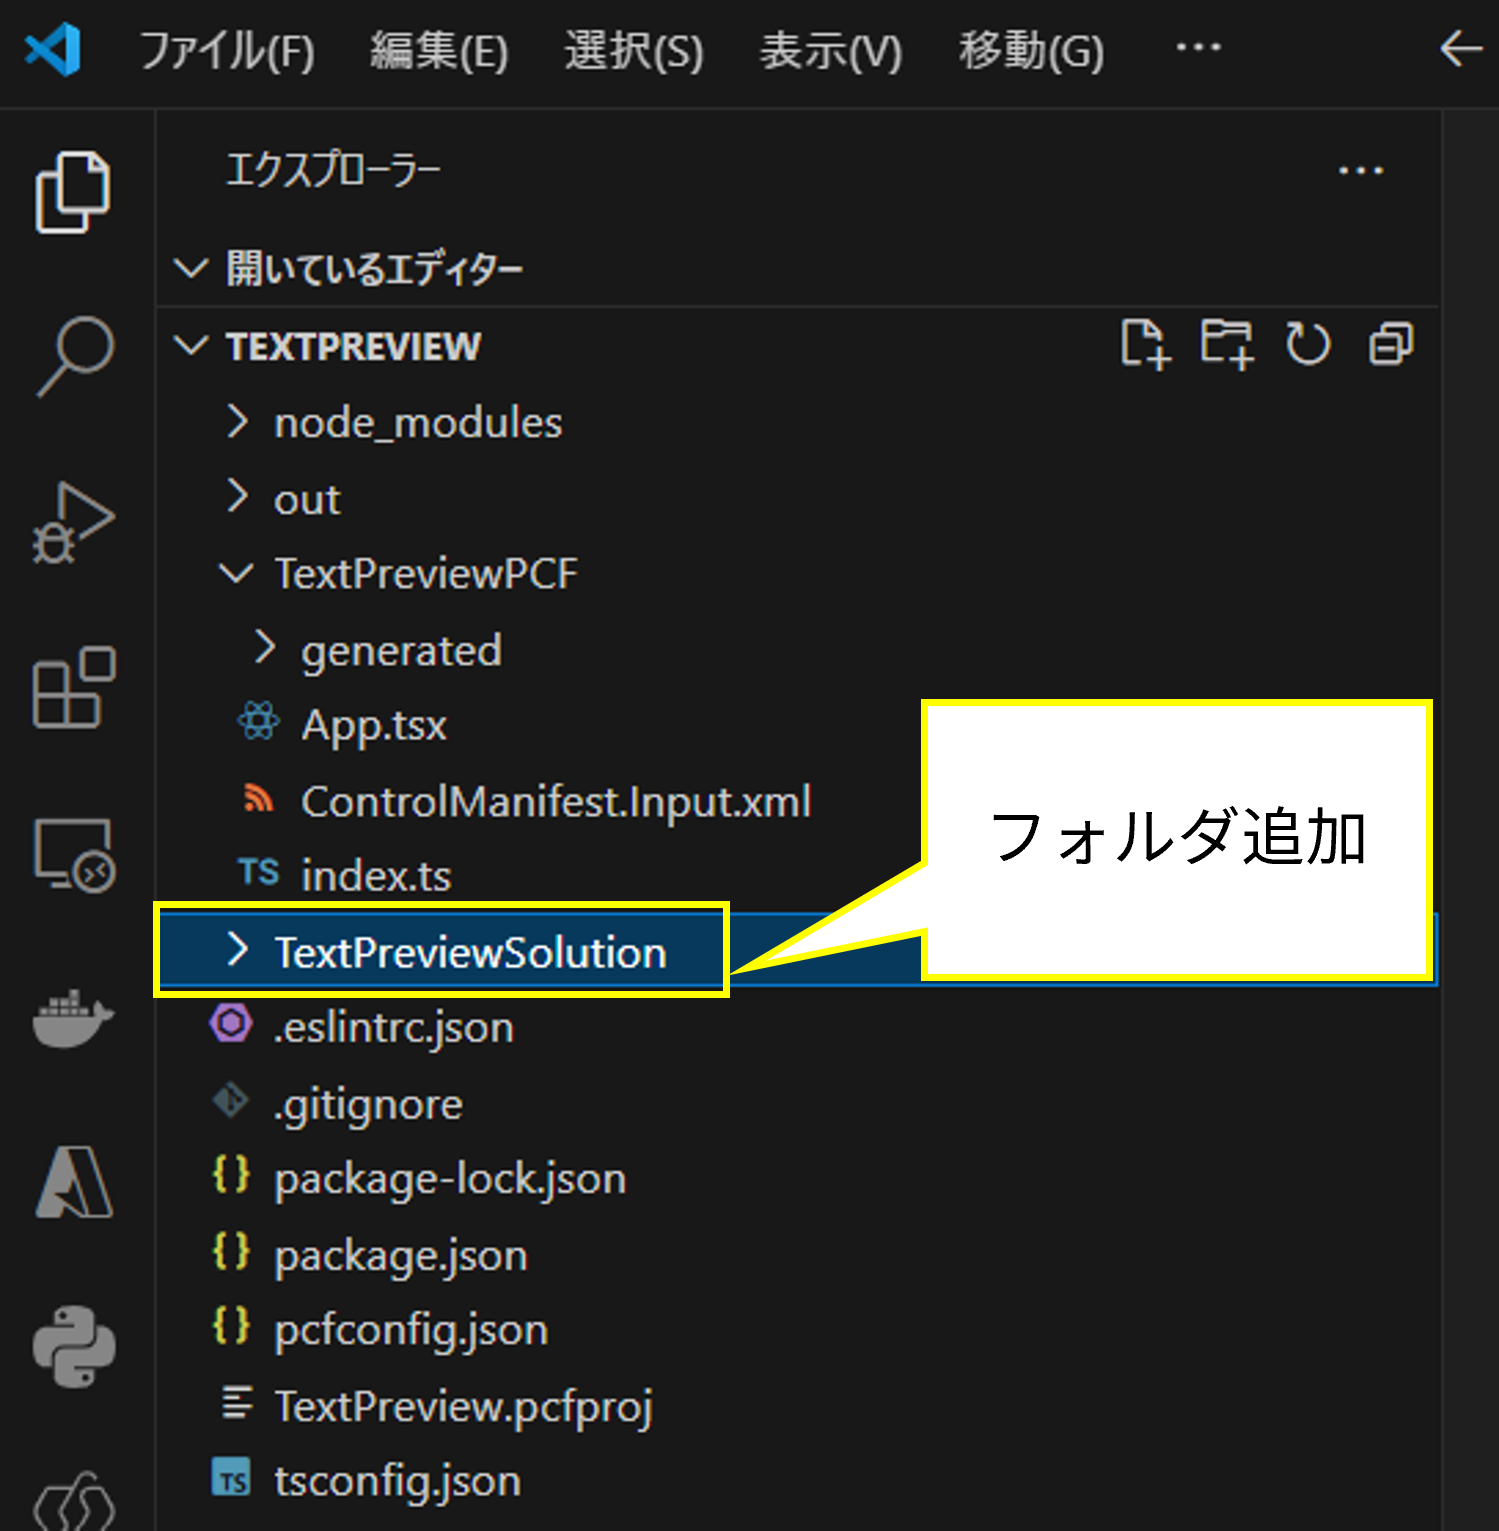
まず、前回作成した「TextPreview」フォルダの配下に、新しくソリューションフォルダを作成します。今回は「TextPreviewSolution」フォルダとして作成しました。
その後、ターミナル上でcdコマンドを実行し作成したフォルダへ移動します。
cd TextPreviewSolution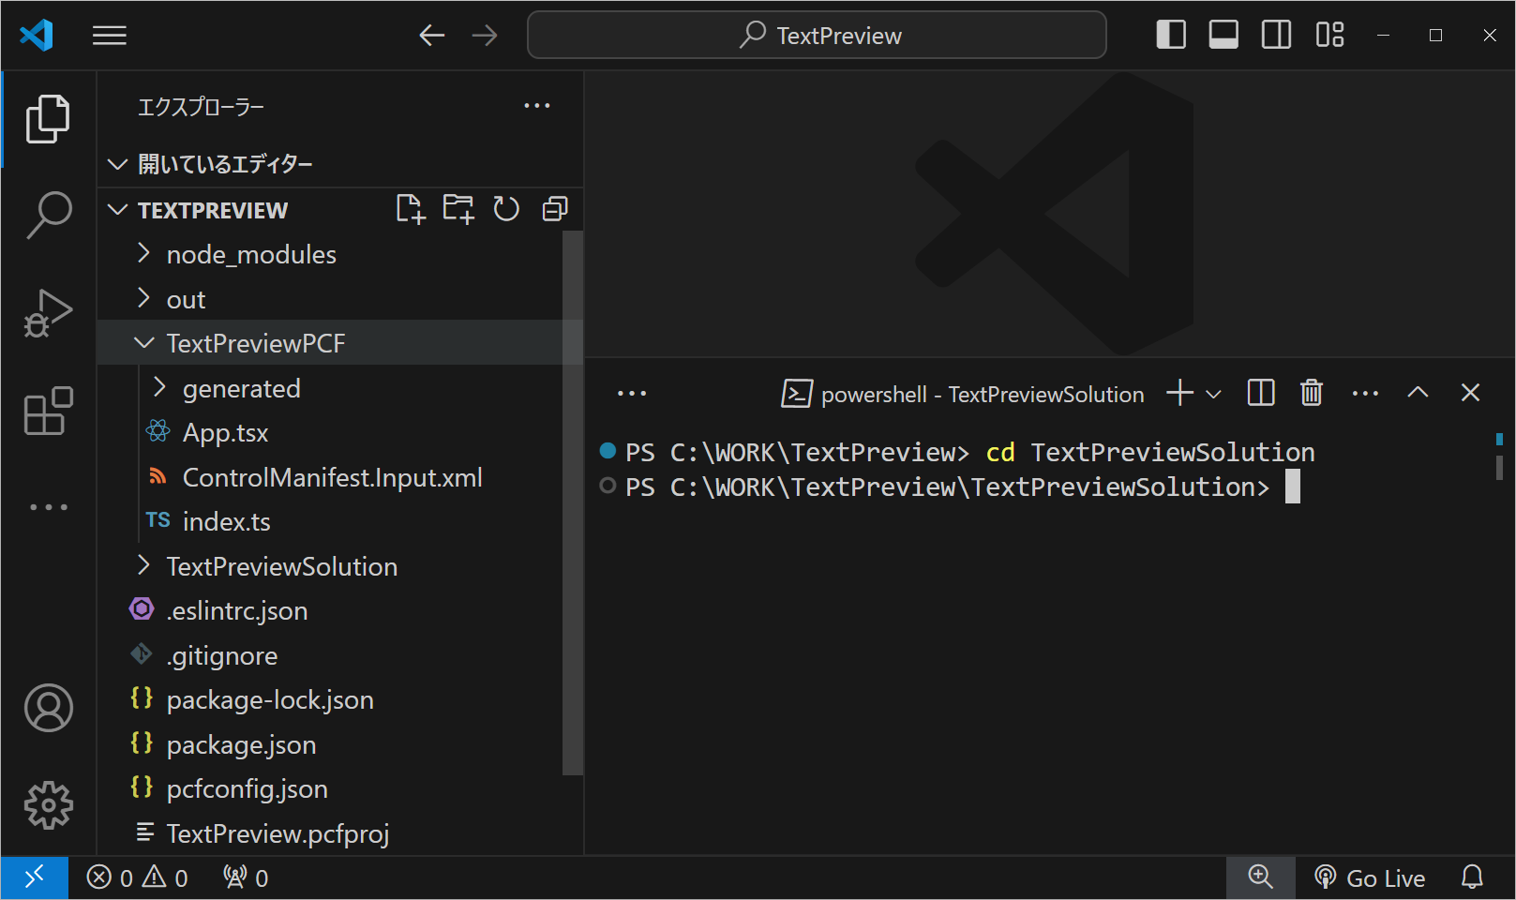
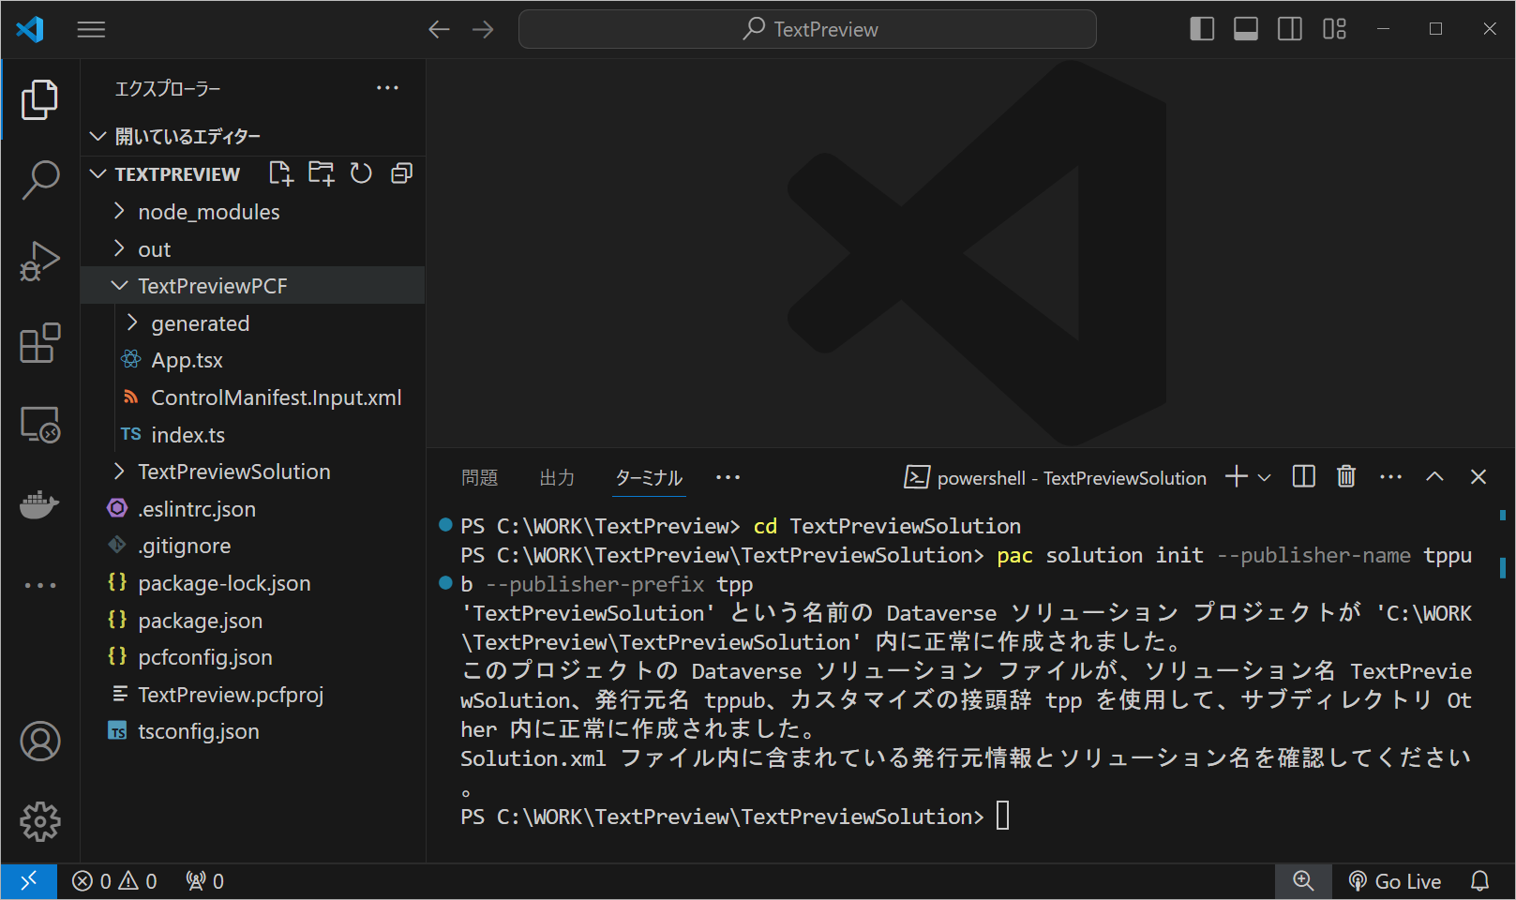
フォルダへ移動後、次のPower Platform CLIコマンドを使用して、ソリューションプロジェクトを作成します。
pac solution init --publisher-name tppub --publisher-prefix tpp必須のパラメータにはそれぞれ以下の内容を設定しています。
- publisher-name(ソリューション発行者):tppub
- publisher-prefix(ソリューション発行者を表すカスタマイズの接頭辞の値):tpp
コマンド実行後次のようにソリューションプロジェクトが作成されました。
続いて、以下のコマンドを実行し、作成したソリューションプロジェクトへコンポーネントプロジェクトの参照を追加します。
pac solution add-reference --path ..最後に、「Build Tools for Visual Studio 2022」を使用して、ソリューションプロジェクトをビルドします。
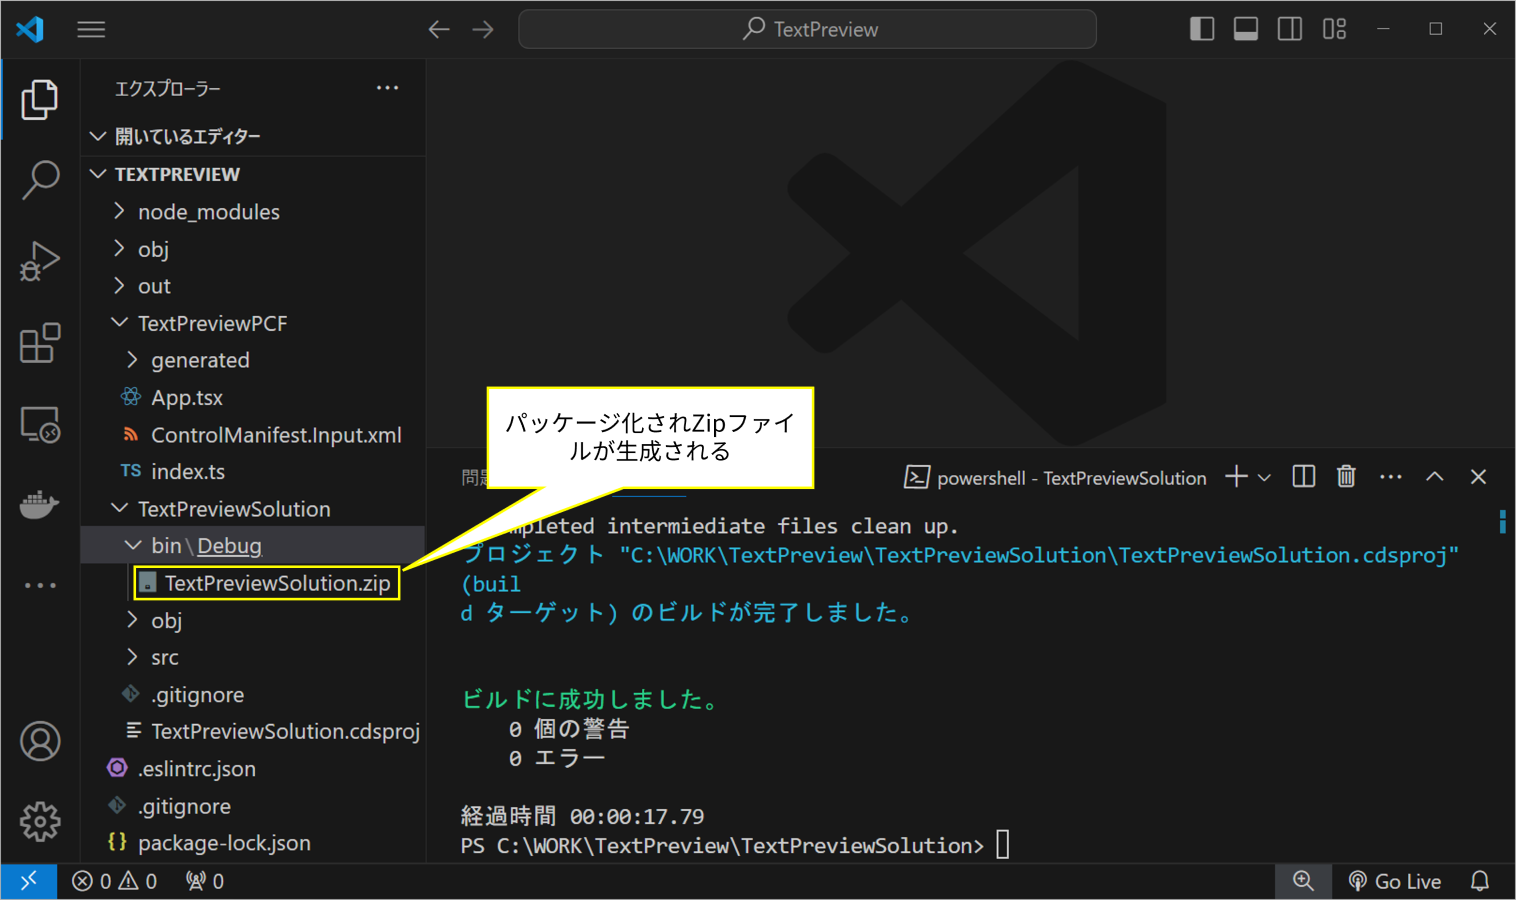
C:\"Program Files (x86)"\"Microsoft Visual Studio"\2022\BuildTools\MSBuild\Current\Bin\MSBuild.exe /t:build /restoreビルドが完了すると、次のようにコードコンポーネントがパッケージ化され「TextPreviewSolution.zip」が作成されます。
Power Apps 環境設定
続いて、パッケージ化したコードコンポーネントをPower Apps環境へアップロードする前にPower Apps環境の設定を行っていきます。
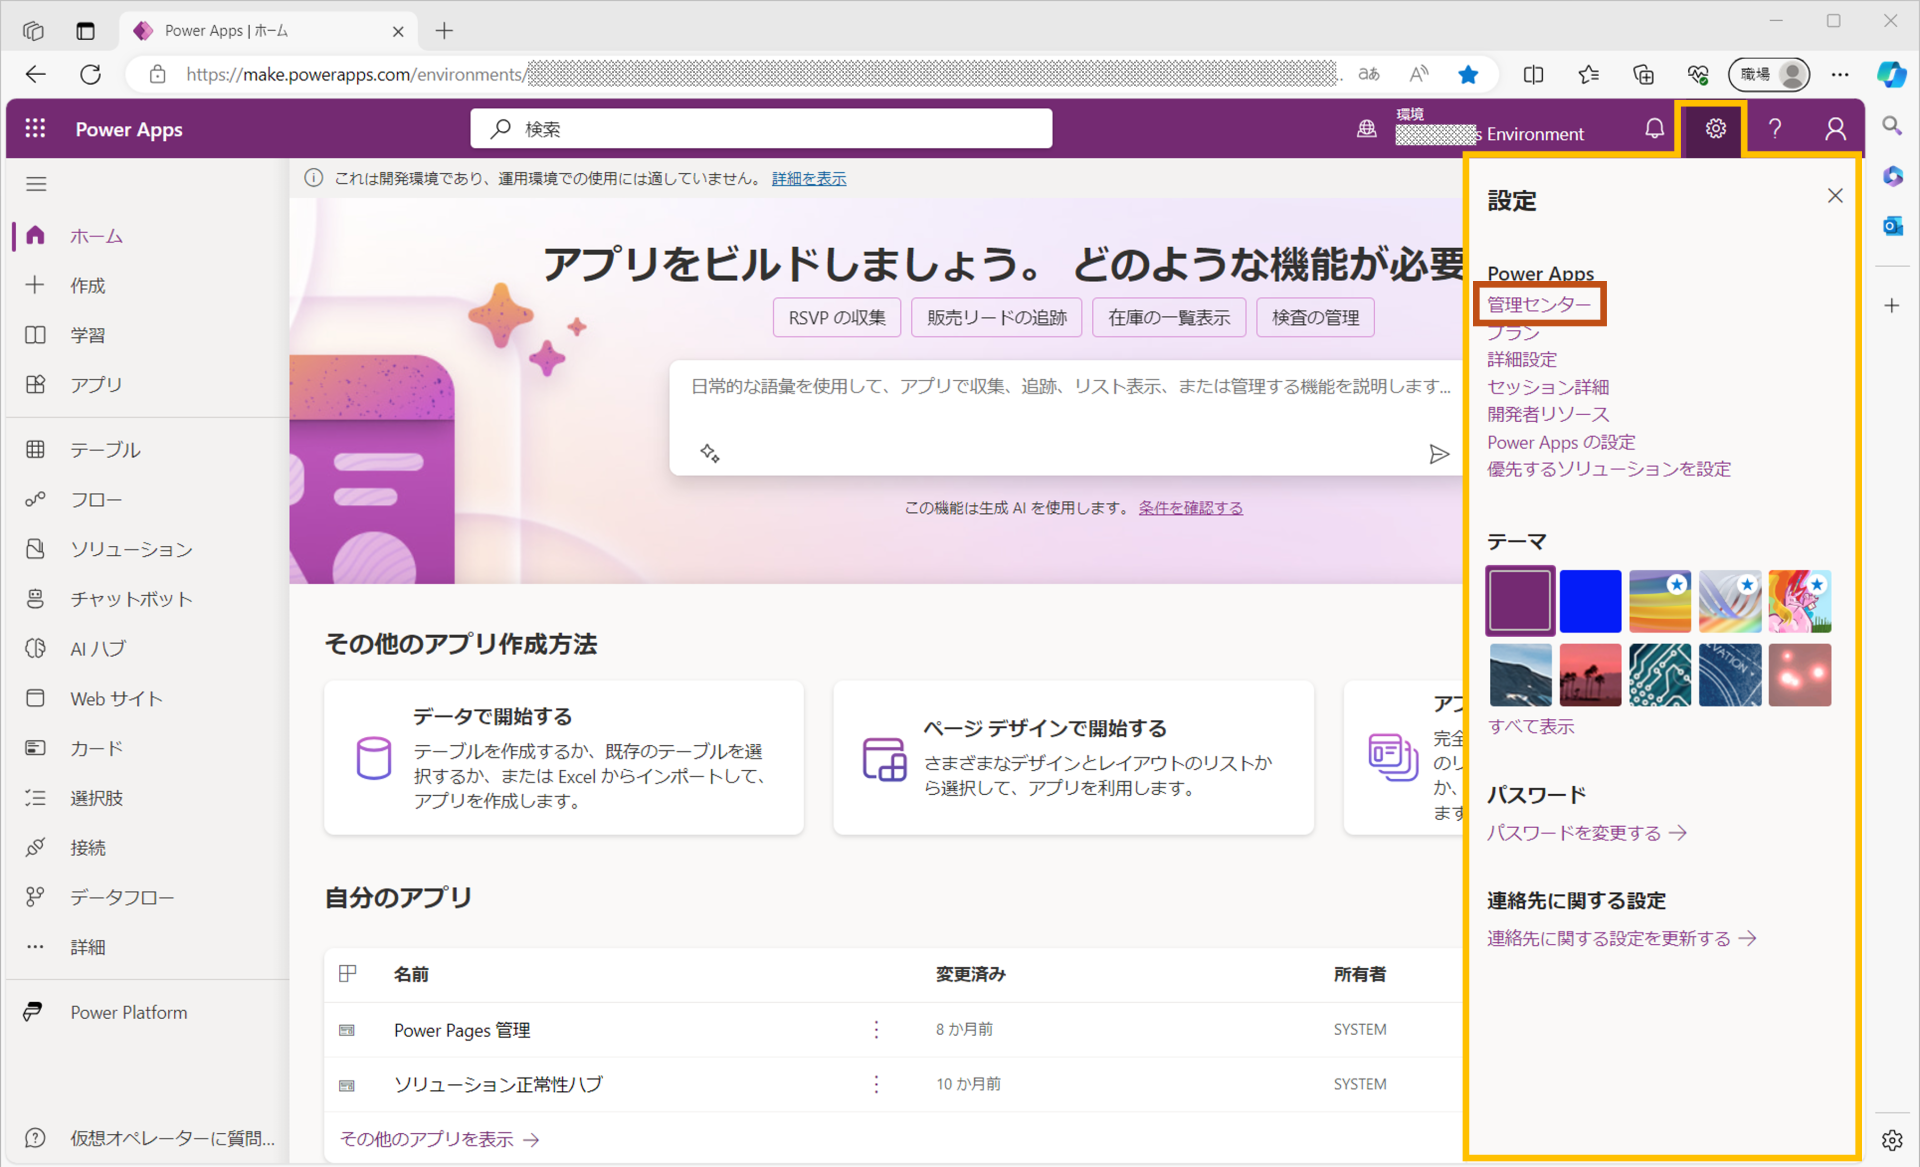
まず、「make.powerapps.com」へアクセスし、次の画像のように、Power Platform管理センターを開き環境設定を行います。
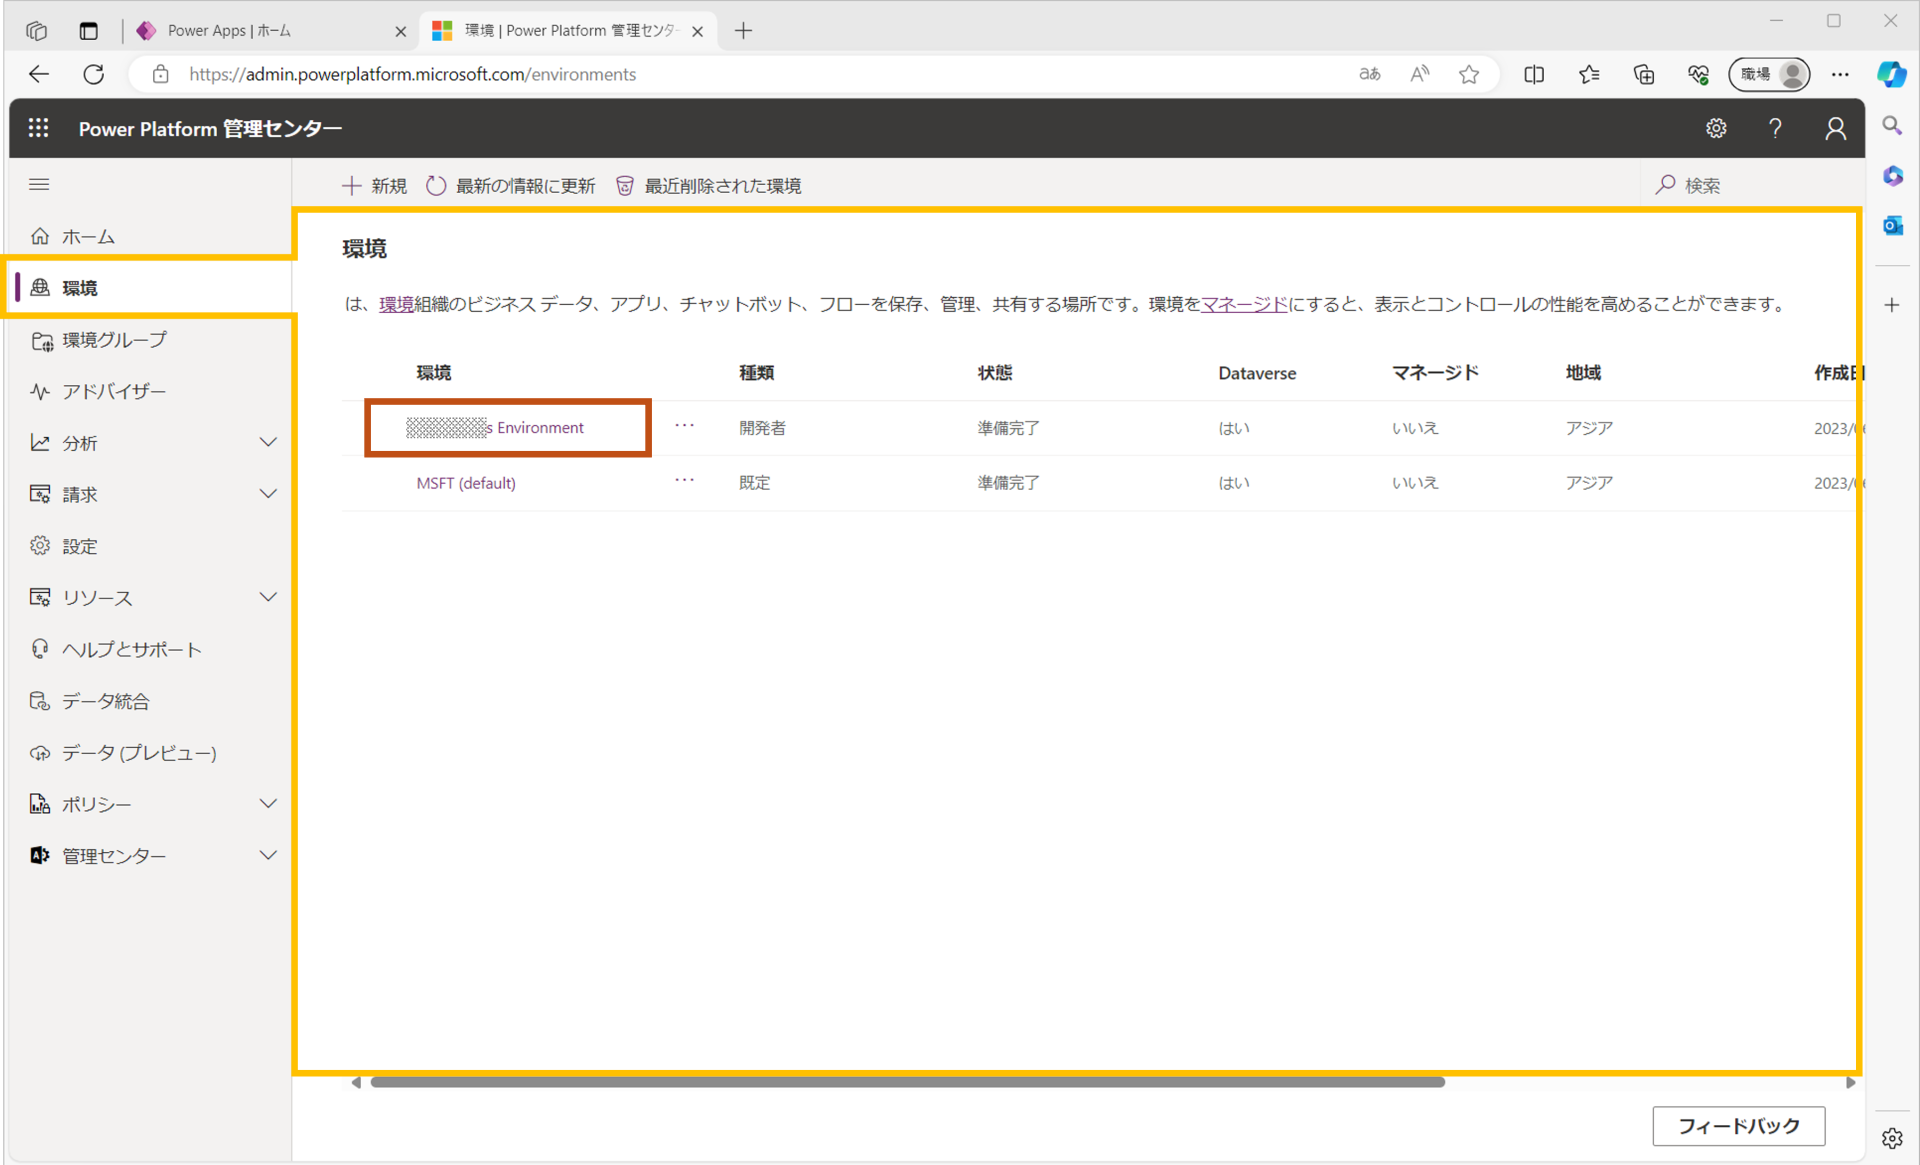
次の画像のように、Power Platform管理センターのサイドバーの環境選択画面を開き、設定対象の環境を選択します。
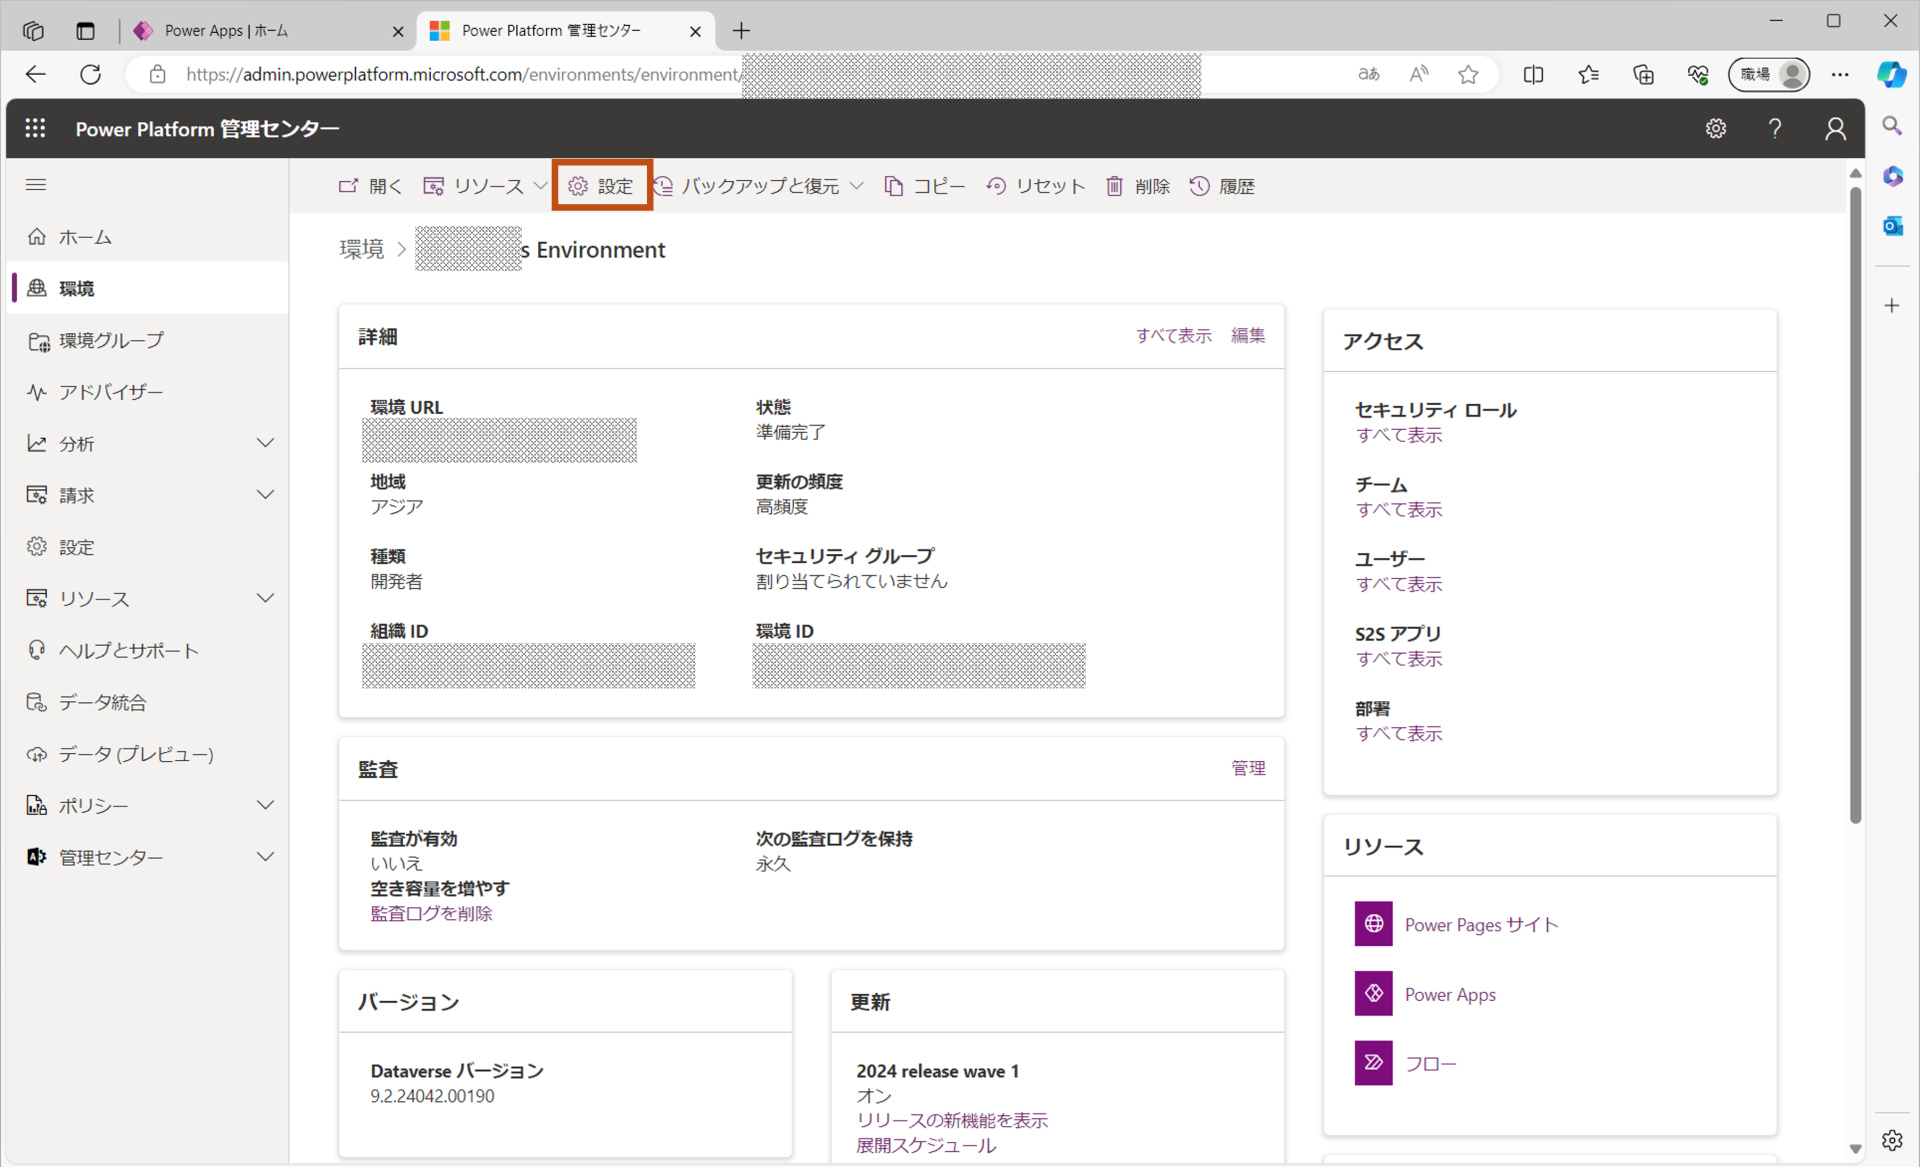
対象環境へ遷移後、以下のように「設定」を選択します。
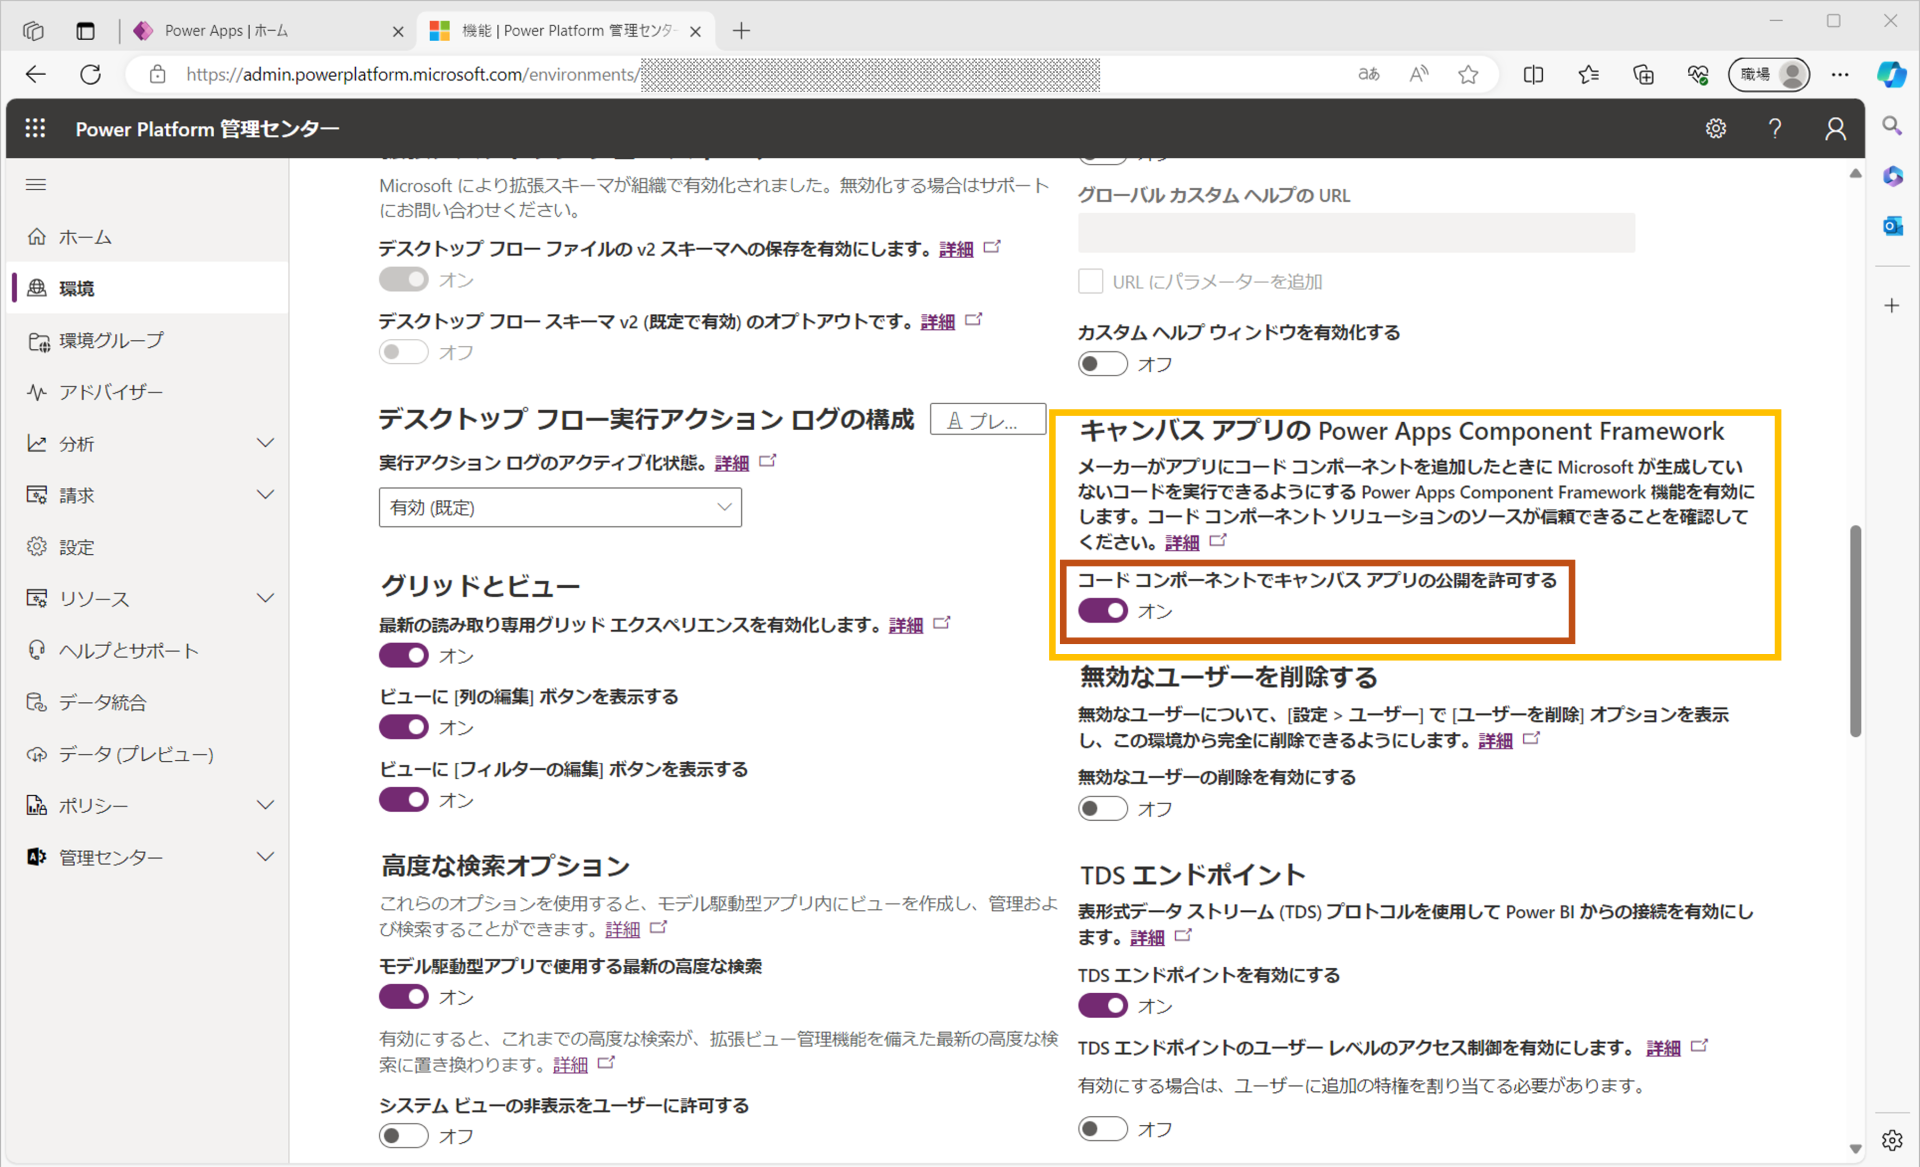
設定画面が表示後、作成したコードコンポーネントをキャンバスアプリ使用できるように設定していきます。次の画像のように「製品>機能」を選択します。

画面表示後、以下の赤枠部「コードコンポーネントをでキャンバスアプリの公開を許可する」をオンに設定し保存します。
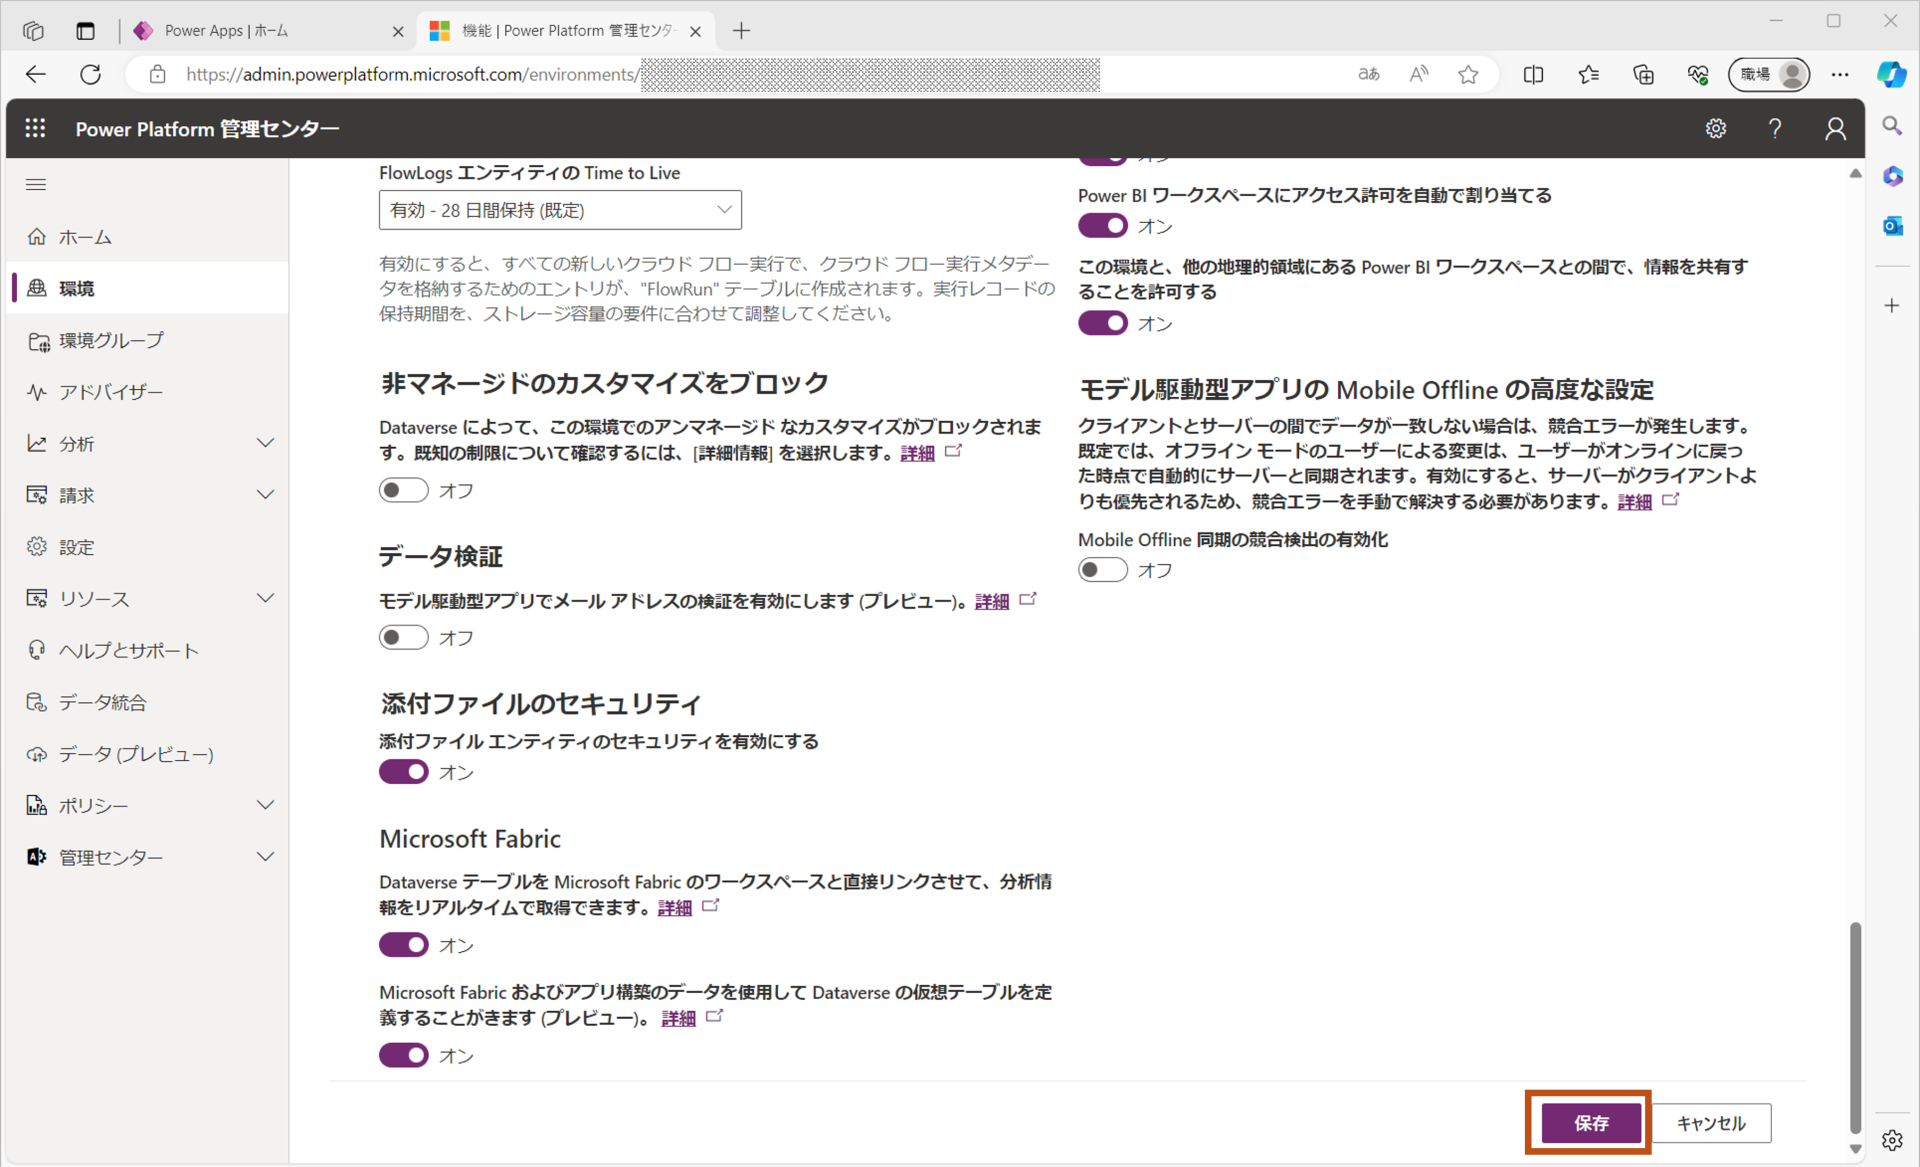
続いて、作成したパッケージのファイルサイズが大きい場合、アップロード時にエラーとなる場合がありますので、予めアップロードサイズを上げておきます。
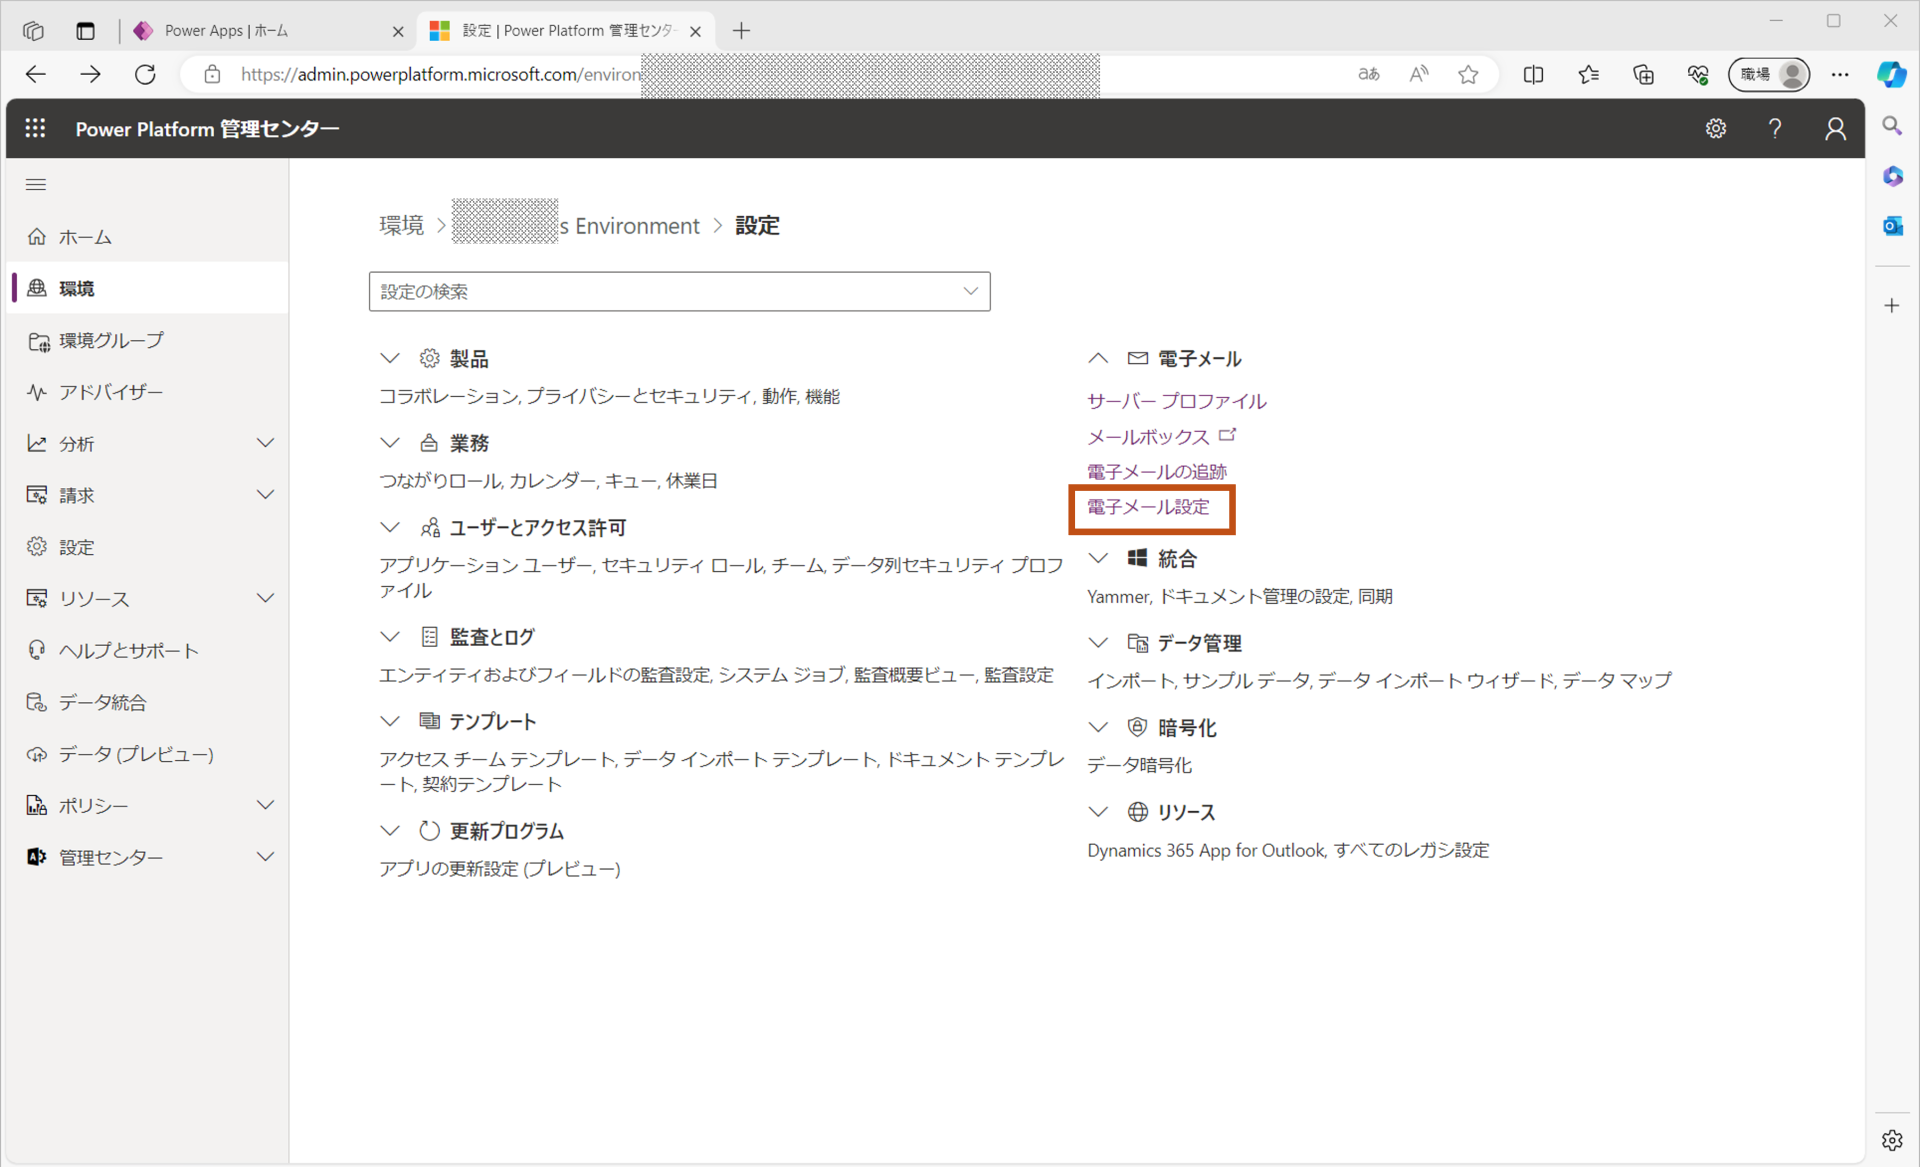
以下のように、設定画面にもどり「電子メール>電子メール設定」を選択します。
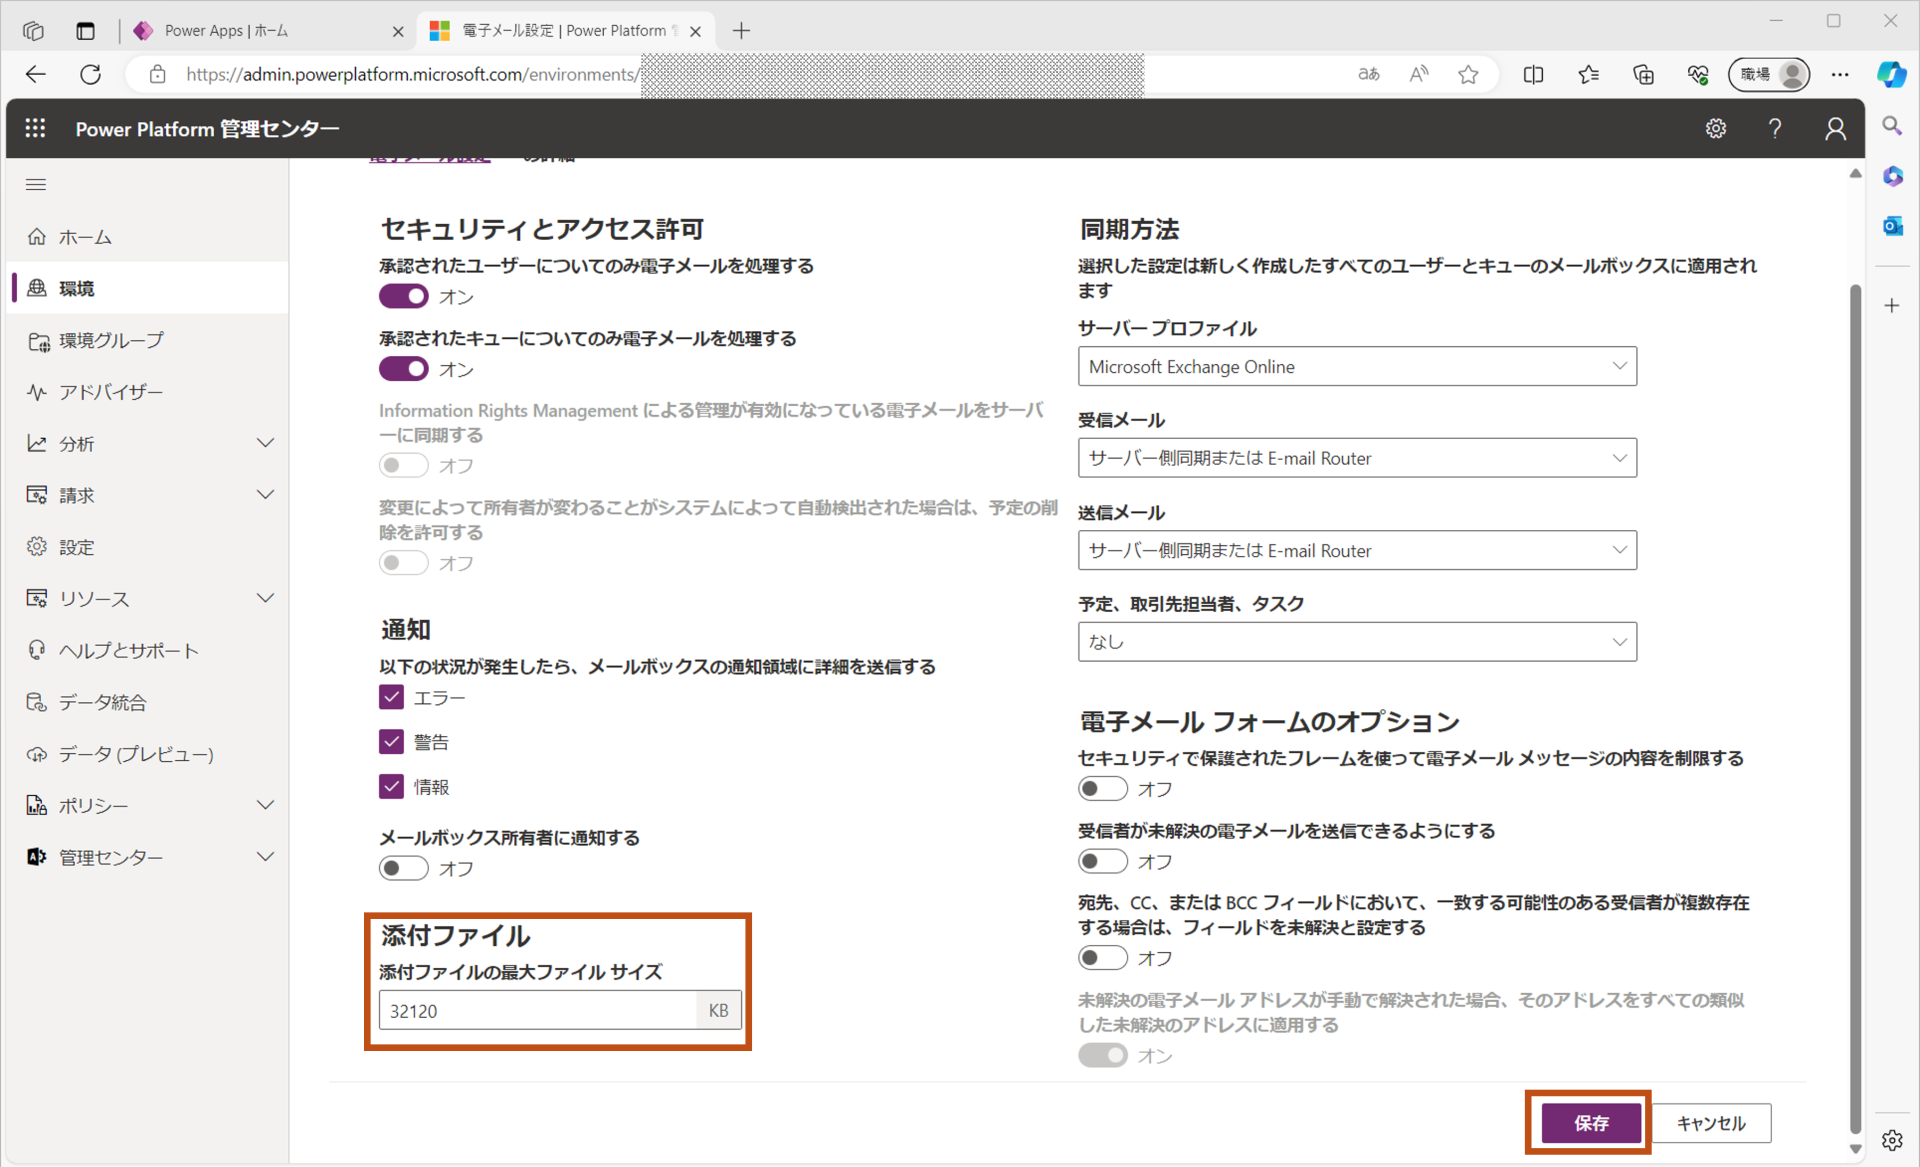
続いて、添付ファイルの最大ファイルサイズを図のように「32120」へ変更し保存します。
コードコンポーネントをPower Apps 環境へアップロード
環境設定が終了しましたので、続いてコードコンポーネントをアップロードしていきます。
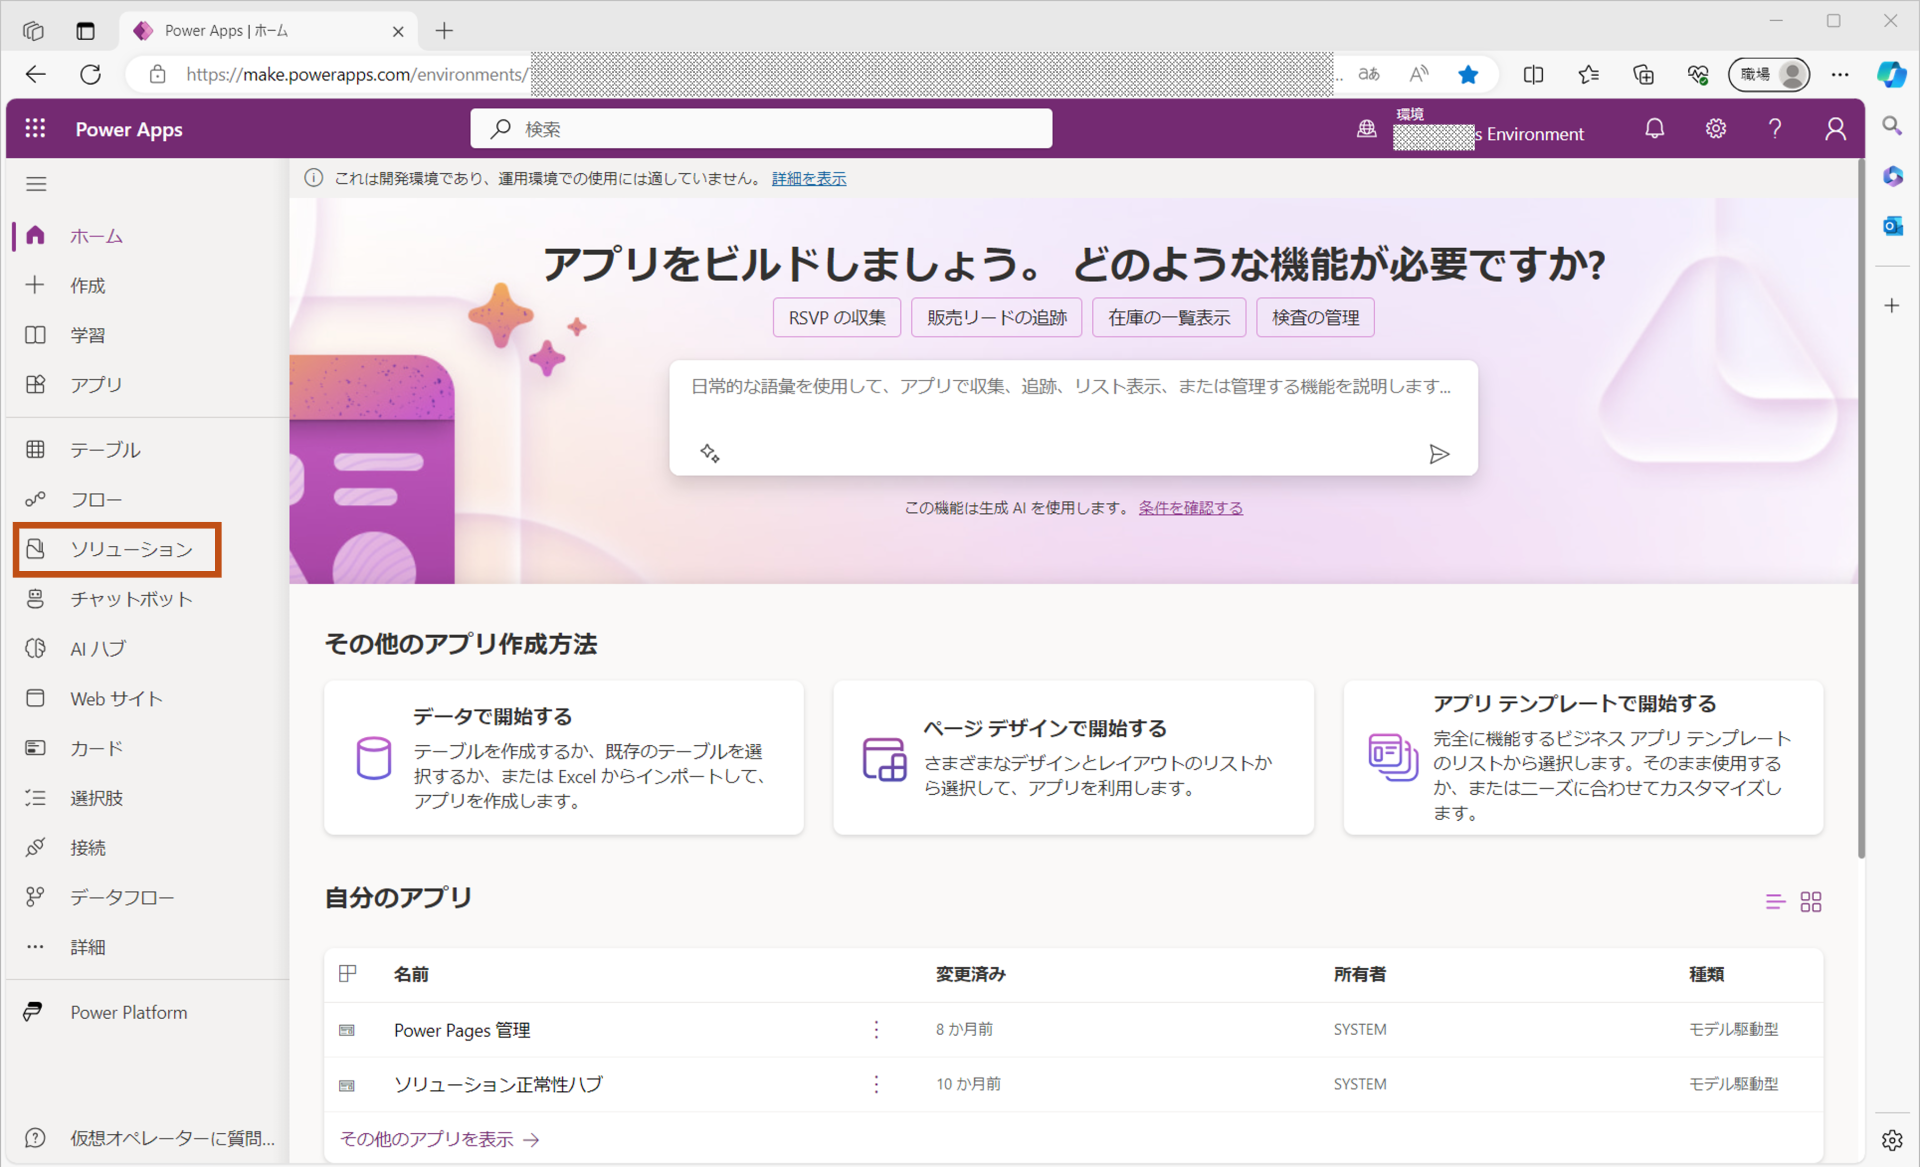
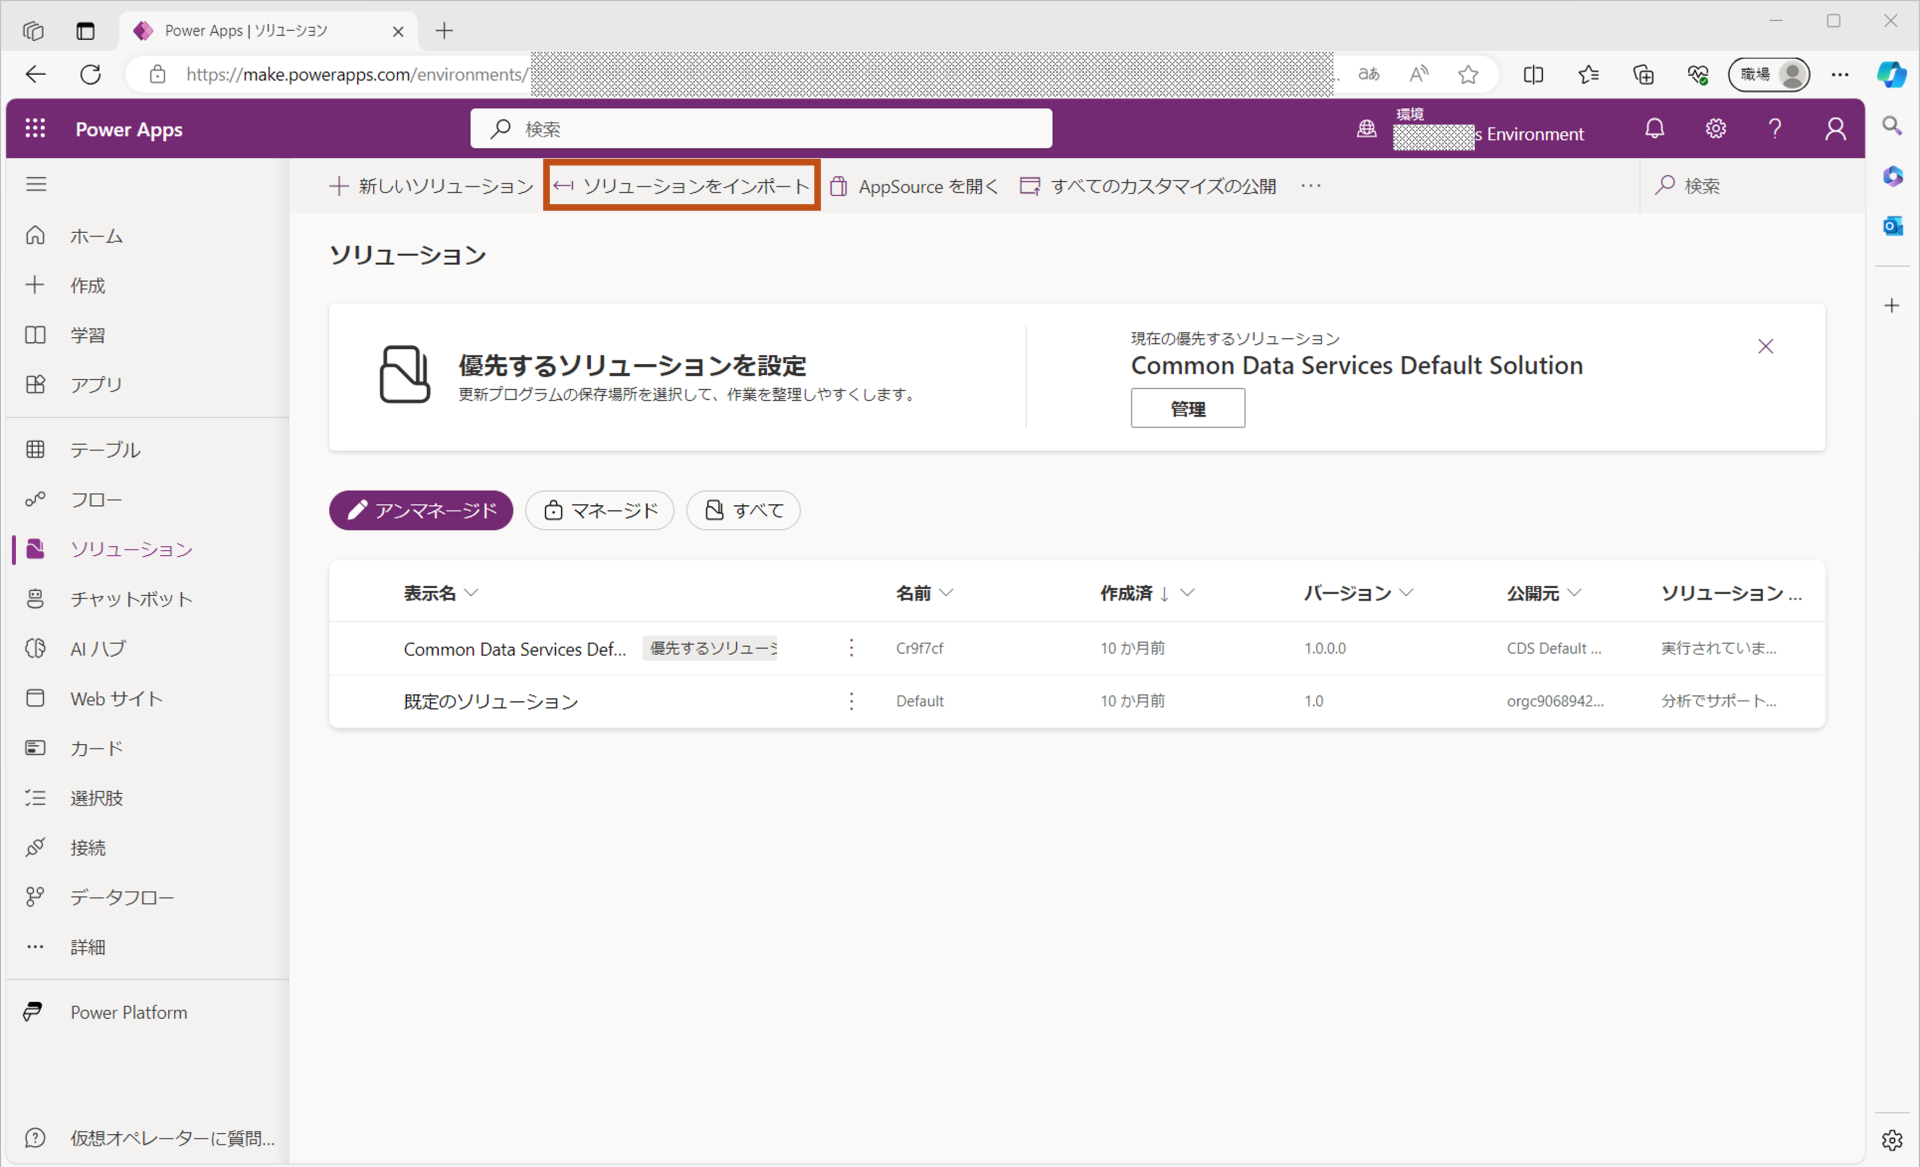
改めてPower Apps 画面を開き、以下のようにサイドバーから「ソリューション」を選択します。
画面が切り替わったら、「ソリューションをインポート」を選択します。
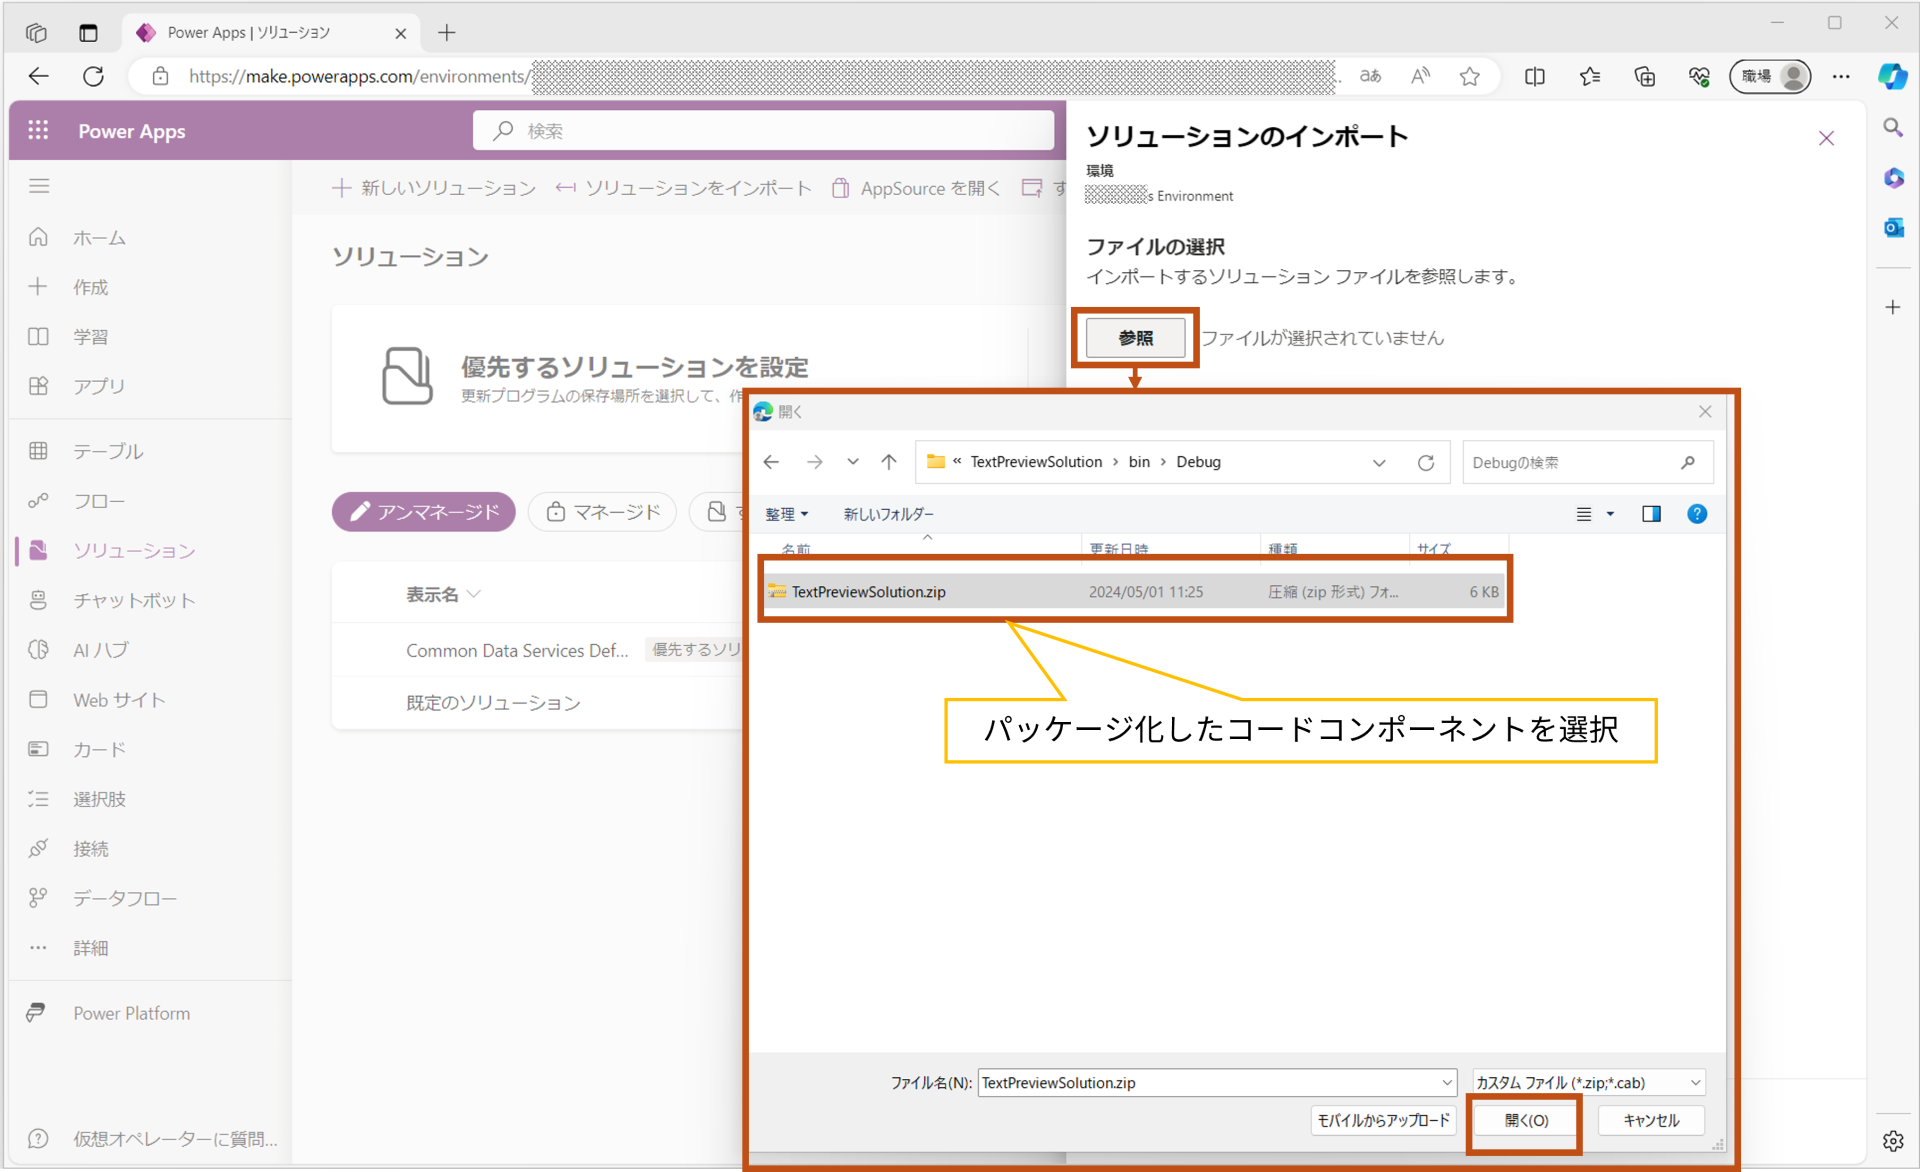
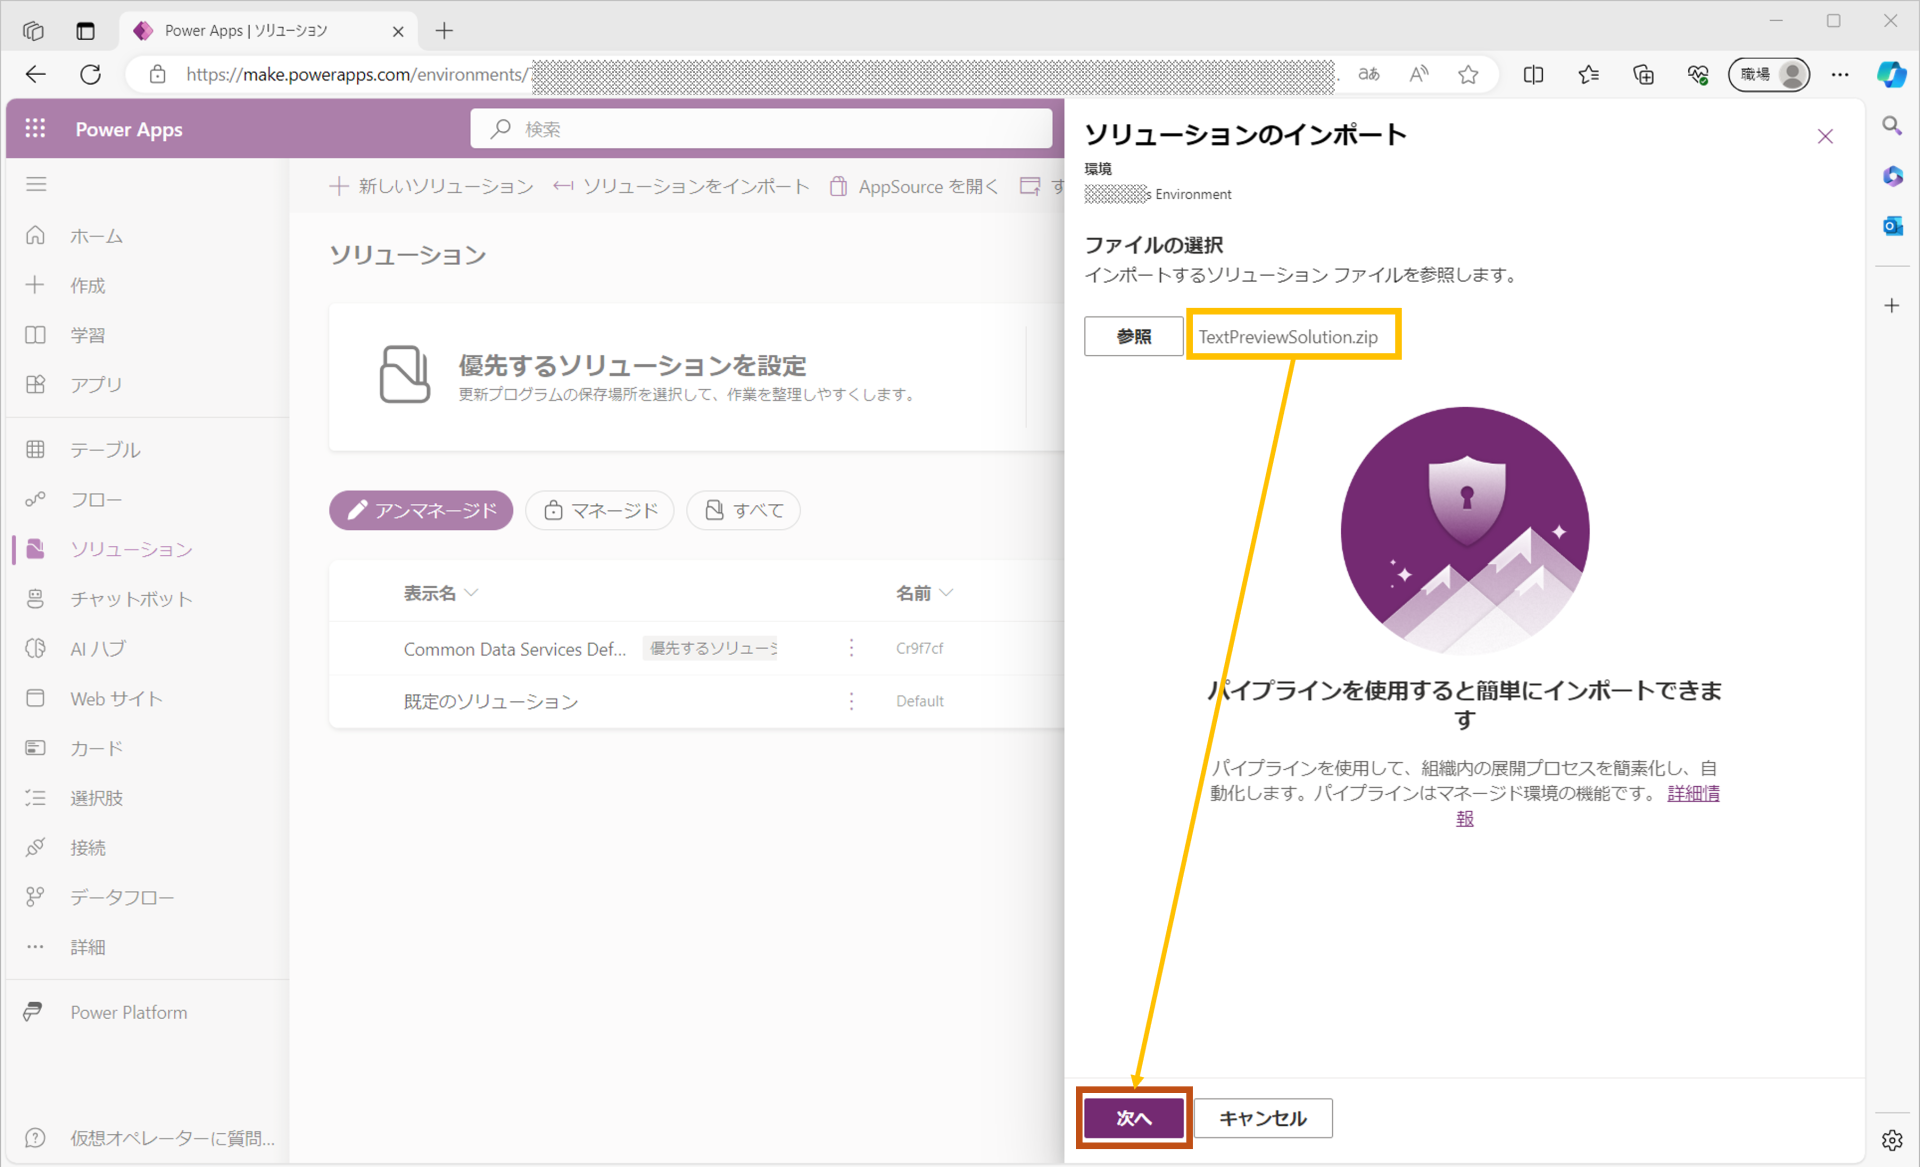
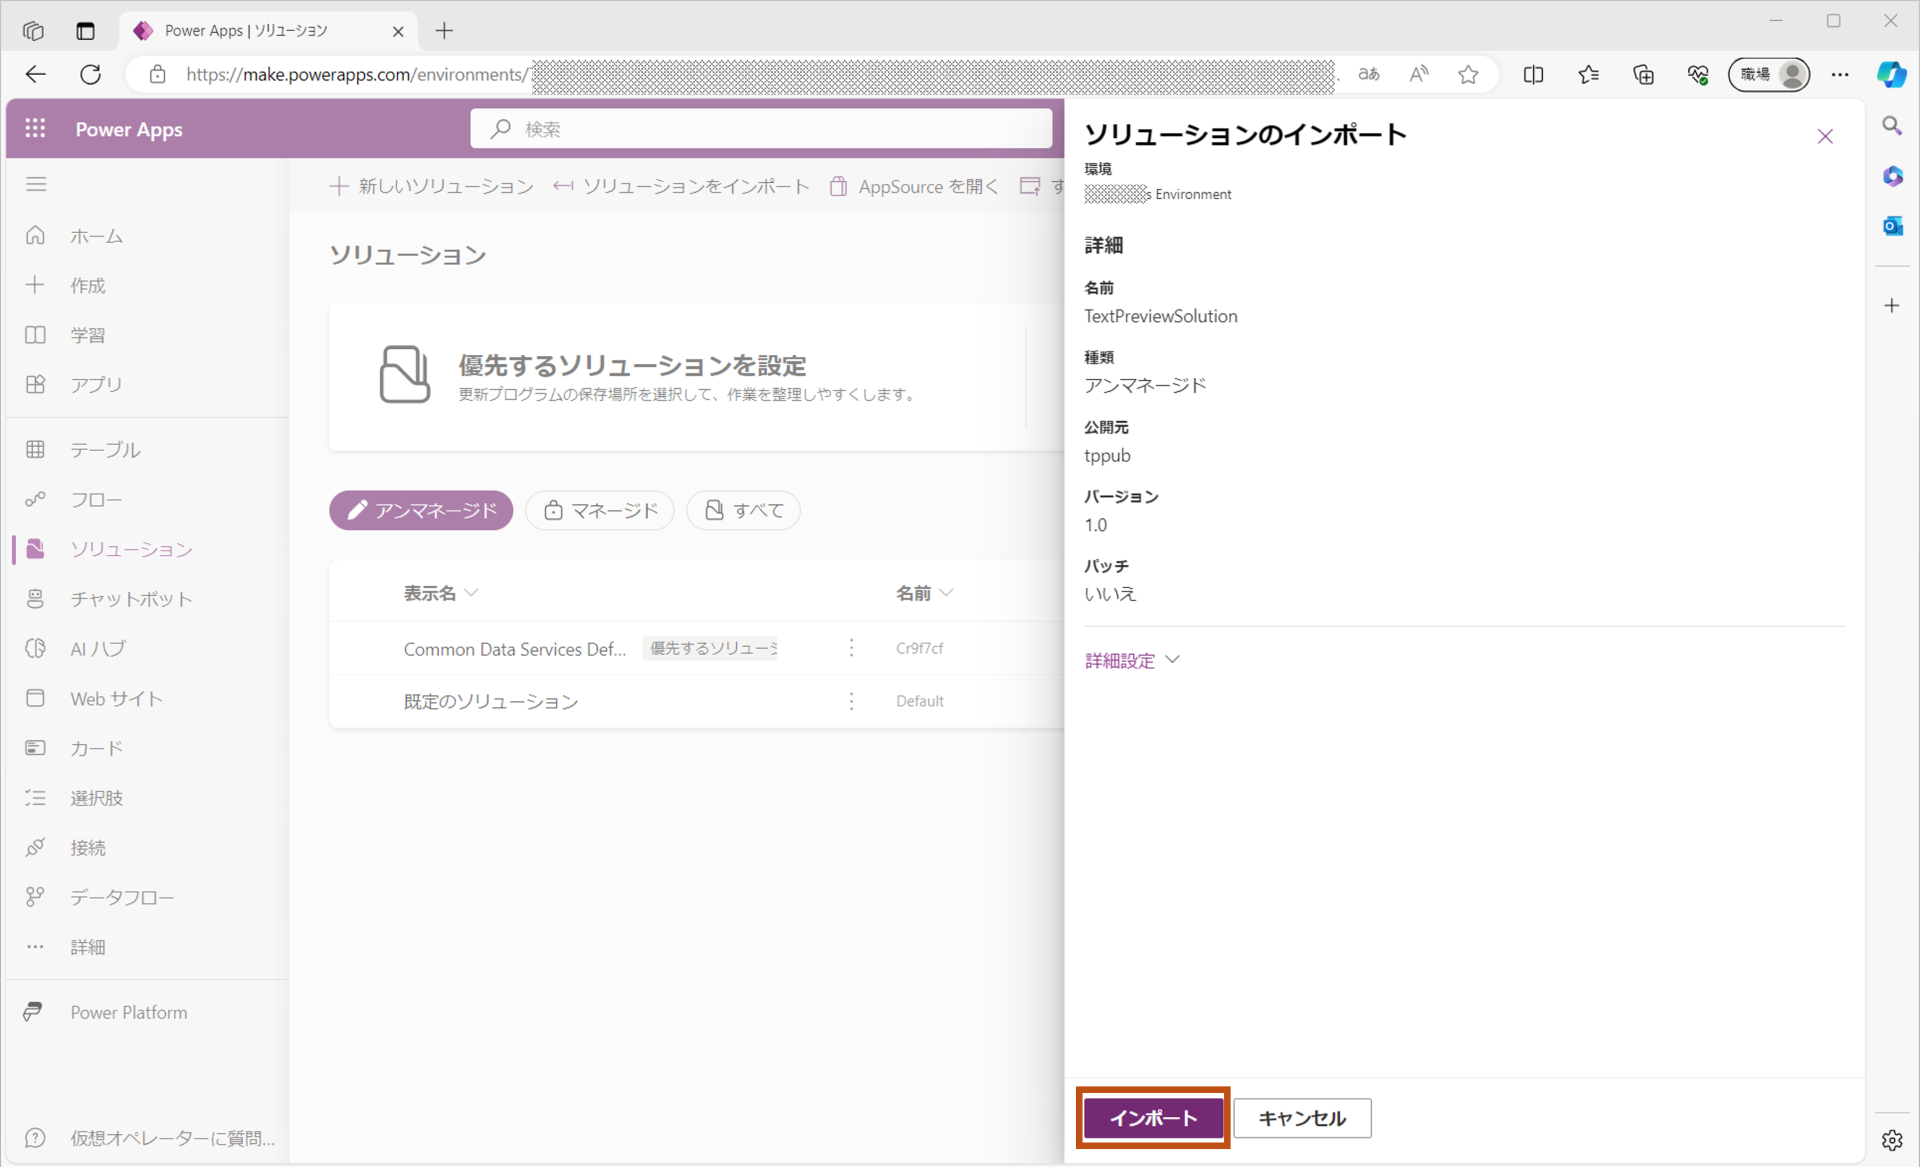
続いて、ソリューションインポートダイアログが表示されますので、先ほどパッケージ化したコードコンポーネントを選択し[開く]を押します。
コードコンポーネントパッケージが選択されていることを確認し、[次へ]を押し、続けて[インポート]を押します。
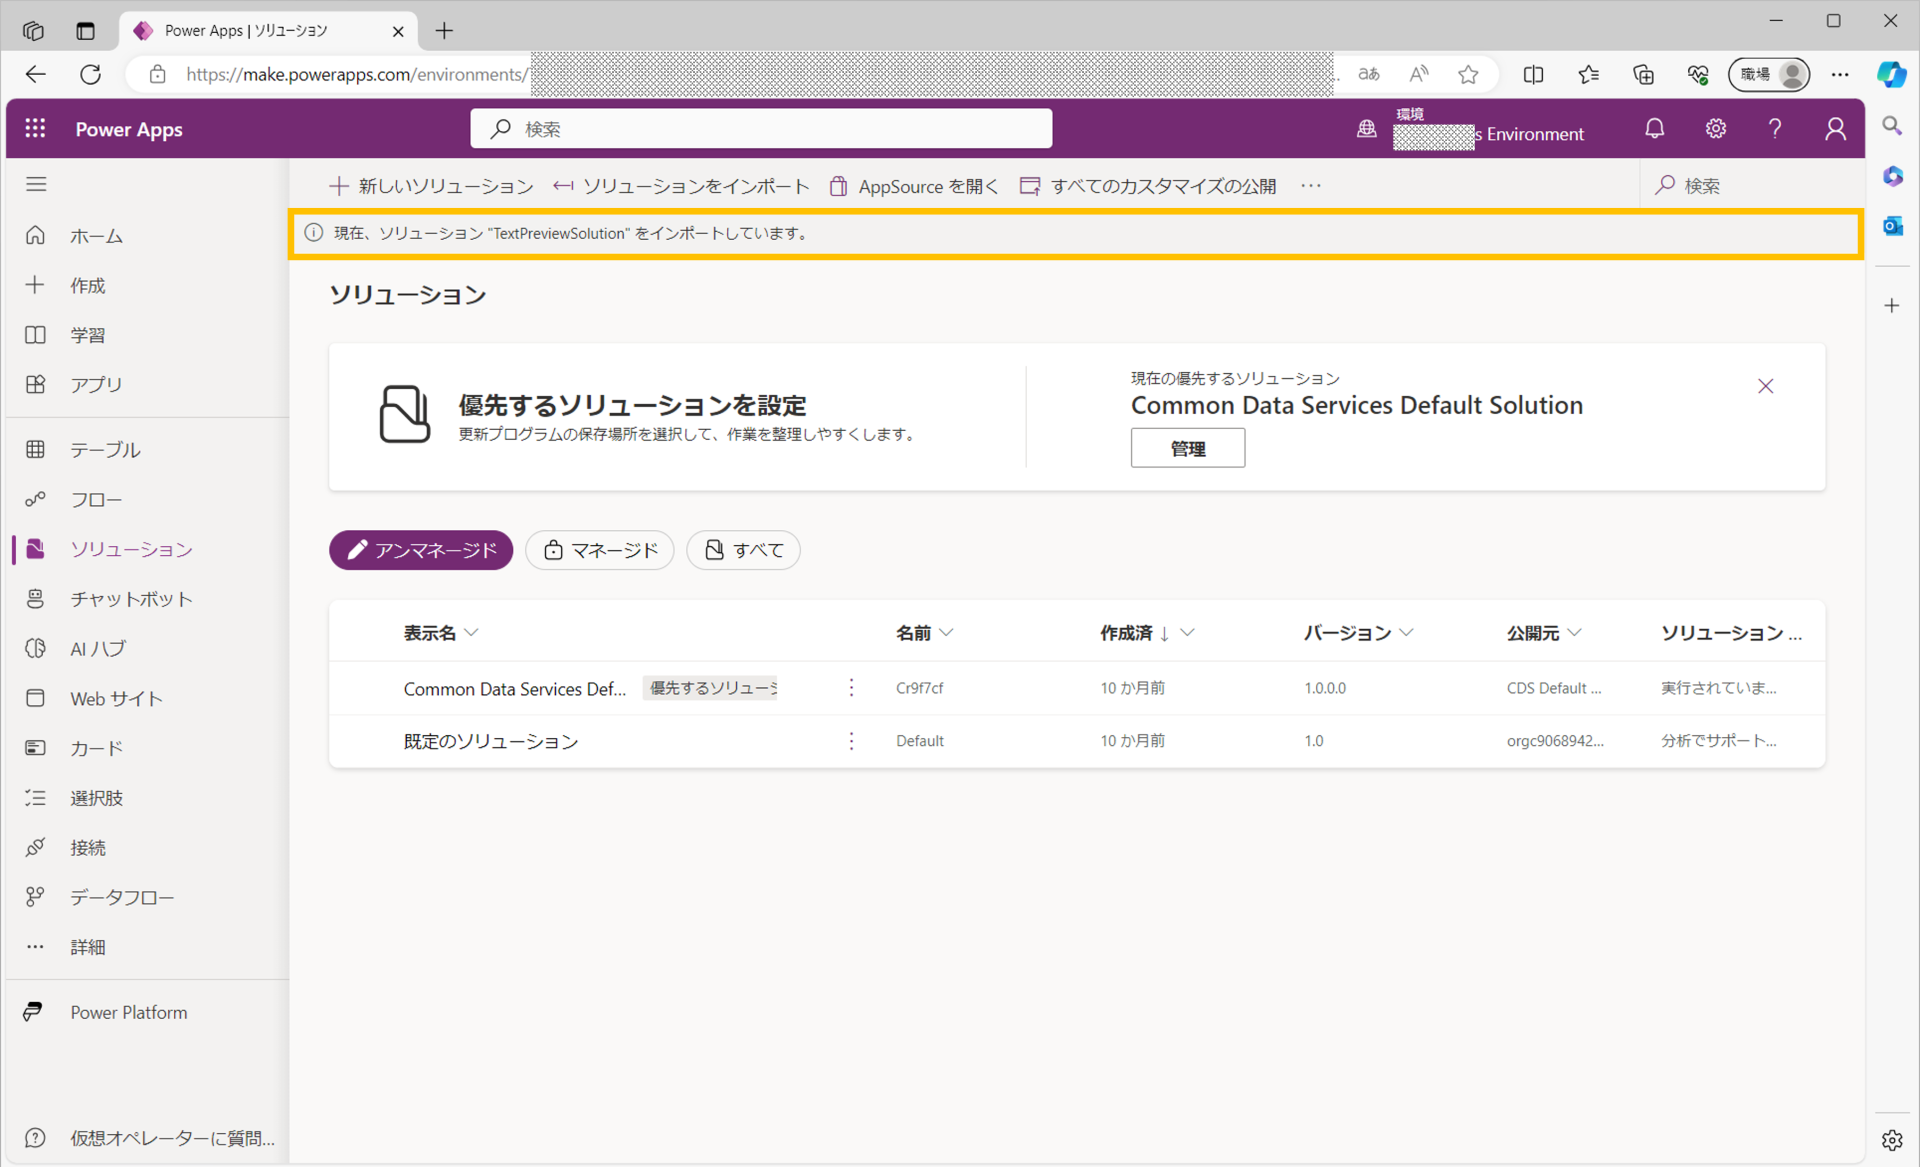
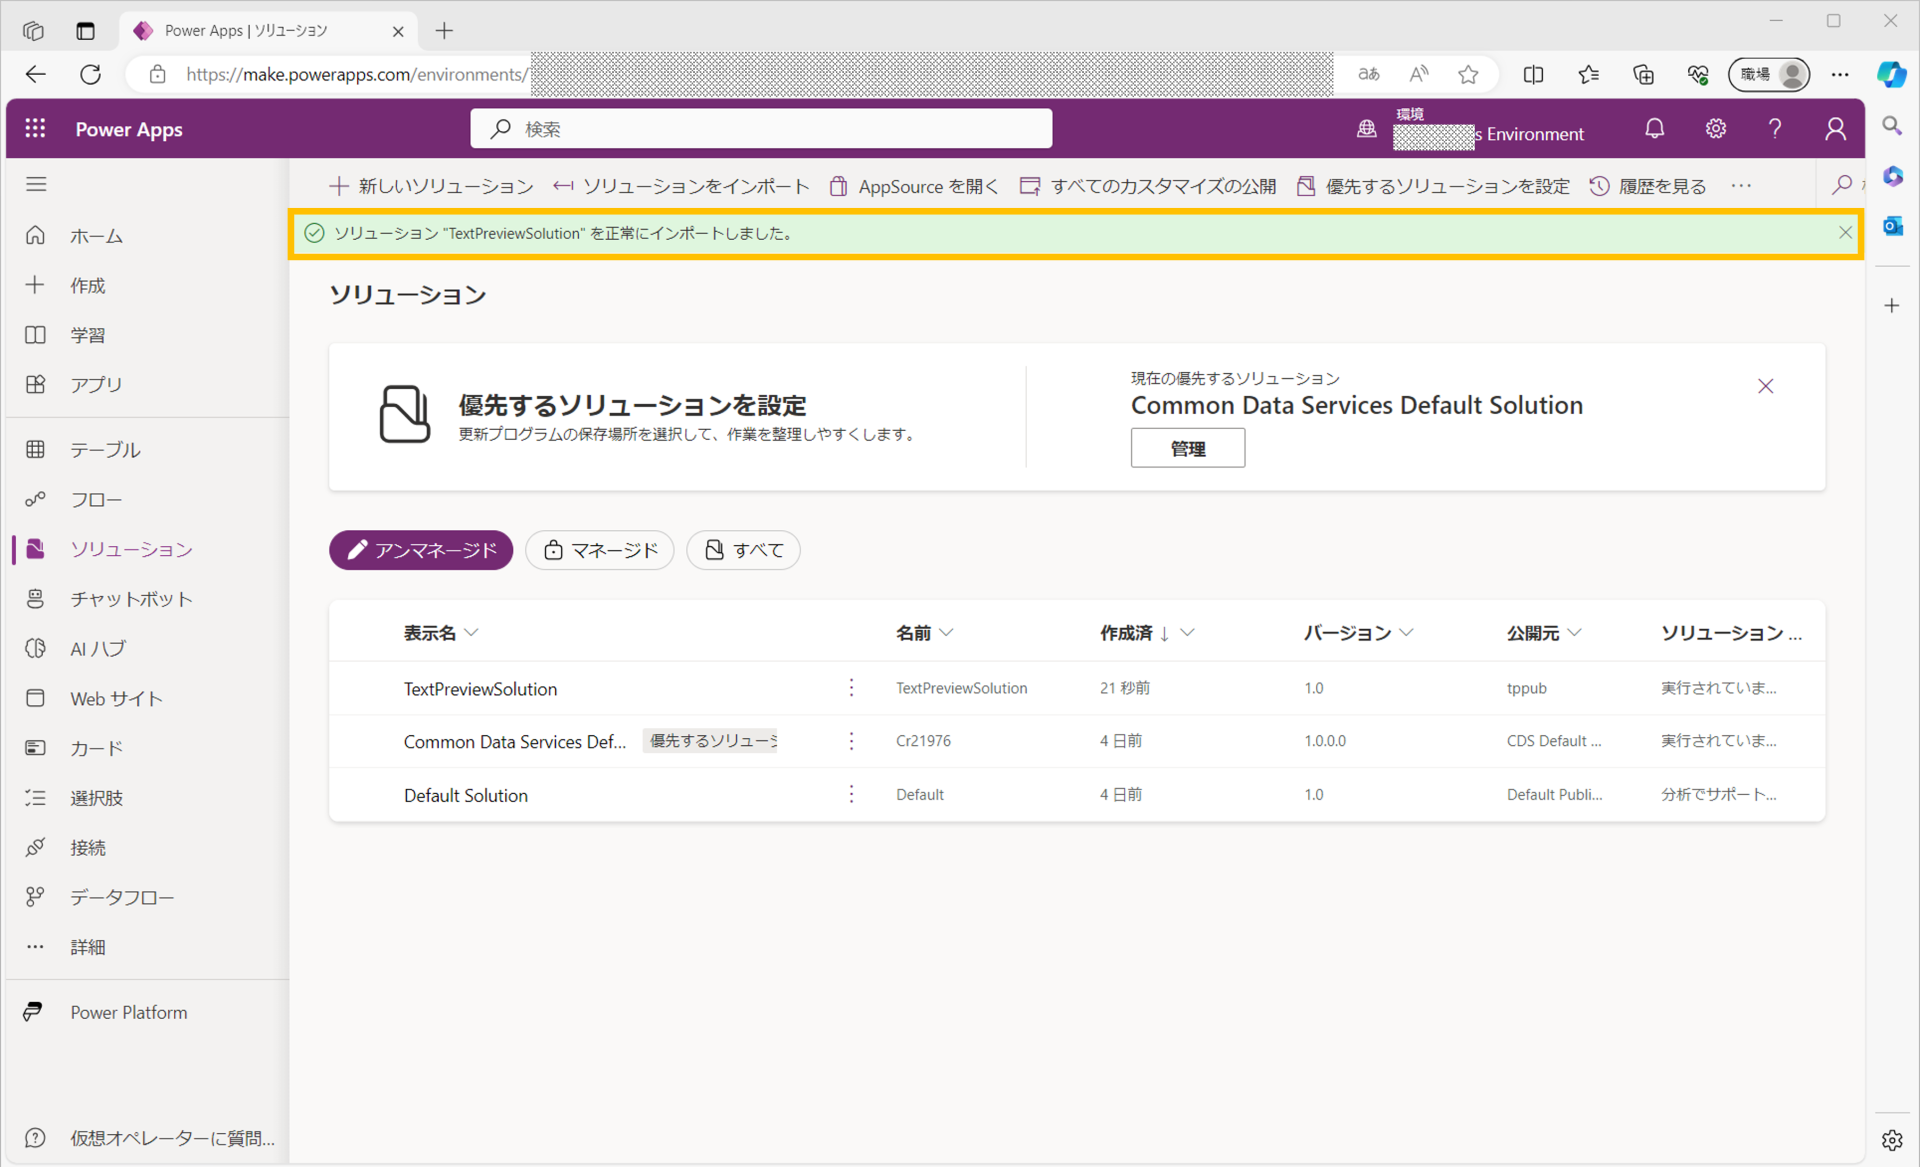
[インポート]を押すと、次のように「現在、ソリューション”TextPreviewSolution”をインポートしています。」というメッセージが表示され、メッセージが「ソリューション”TextPreviewSolution”を正常にインポートしました。」に変われば、コードコンポーネントのアップロードは完了です。
キャンバスアプリでの使用
作成したコードコンポーネントのアップロードが終わりましたので、実際にキャンバスアプリで使用してみたいと思います。
以下のように、空のキャンバスアプリを作成し、コードコンポーネントを使用してみます。
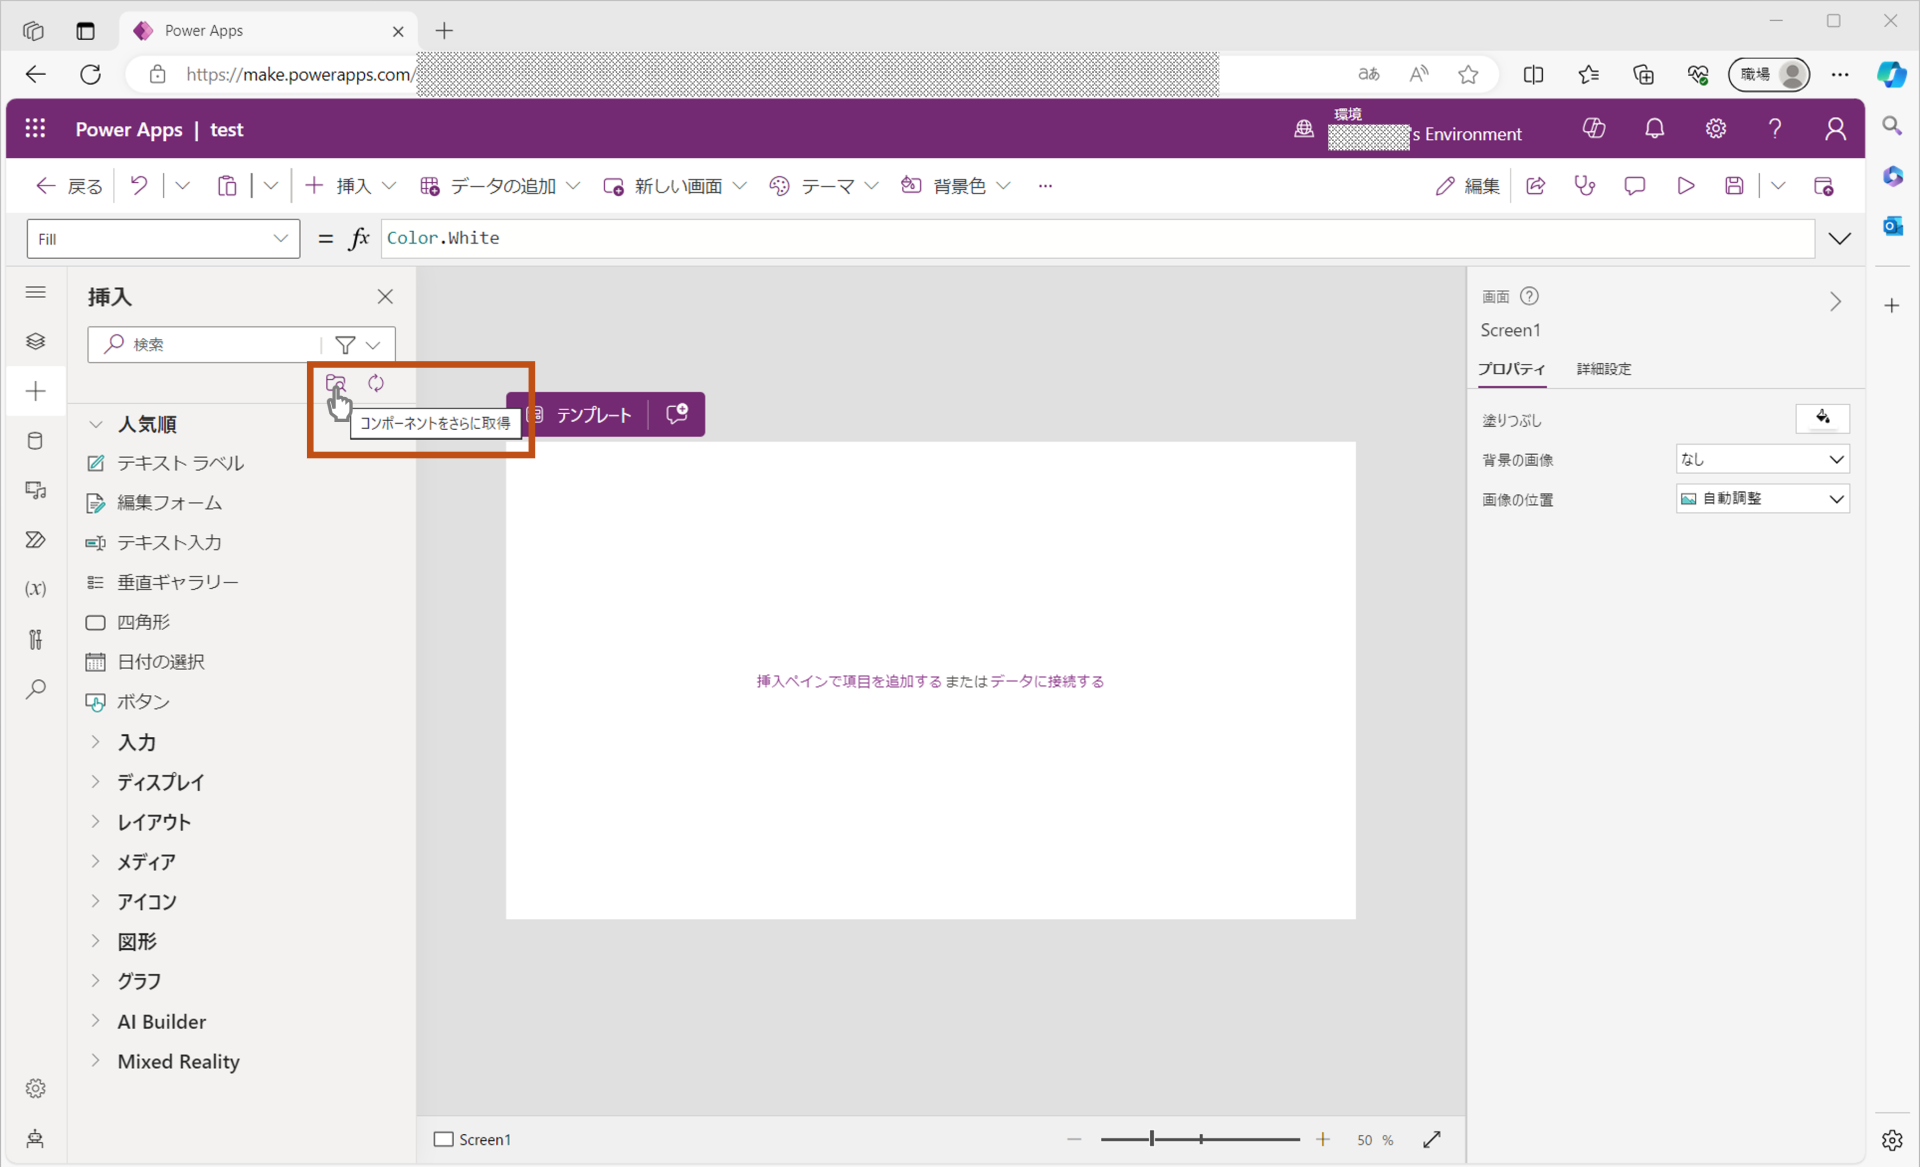
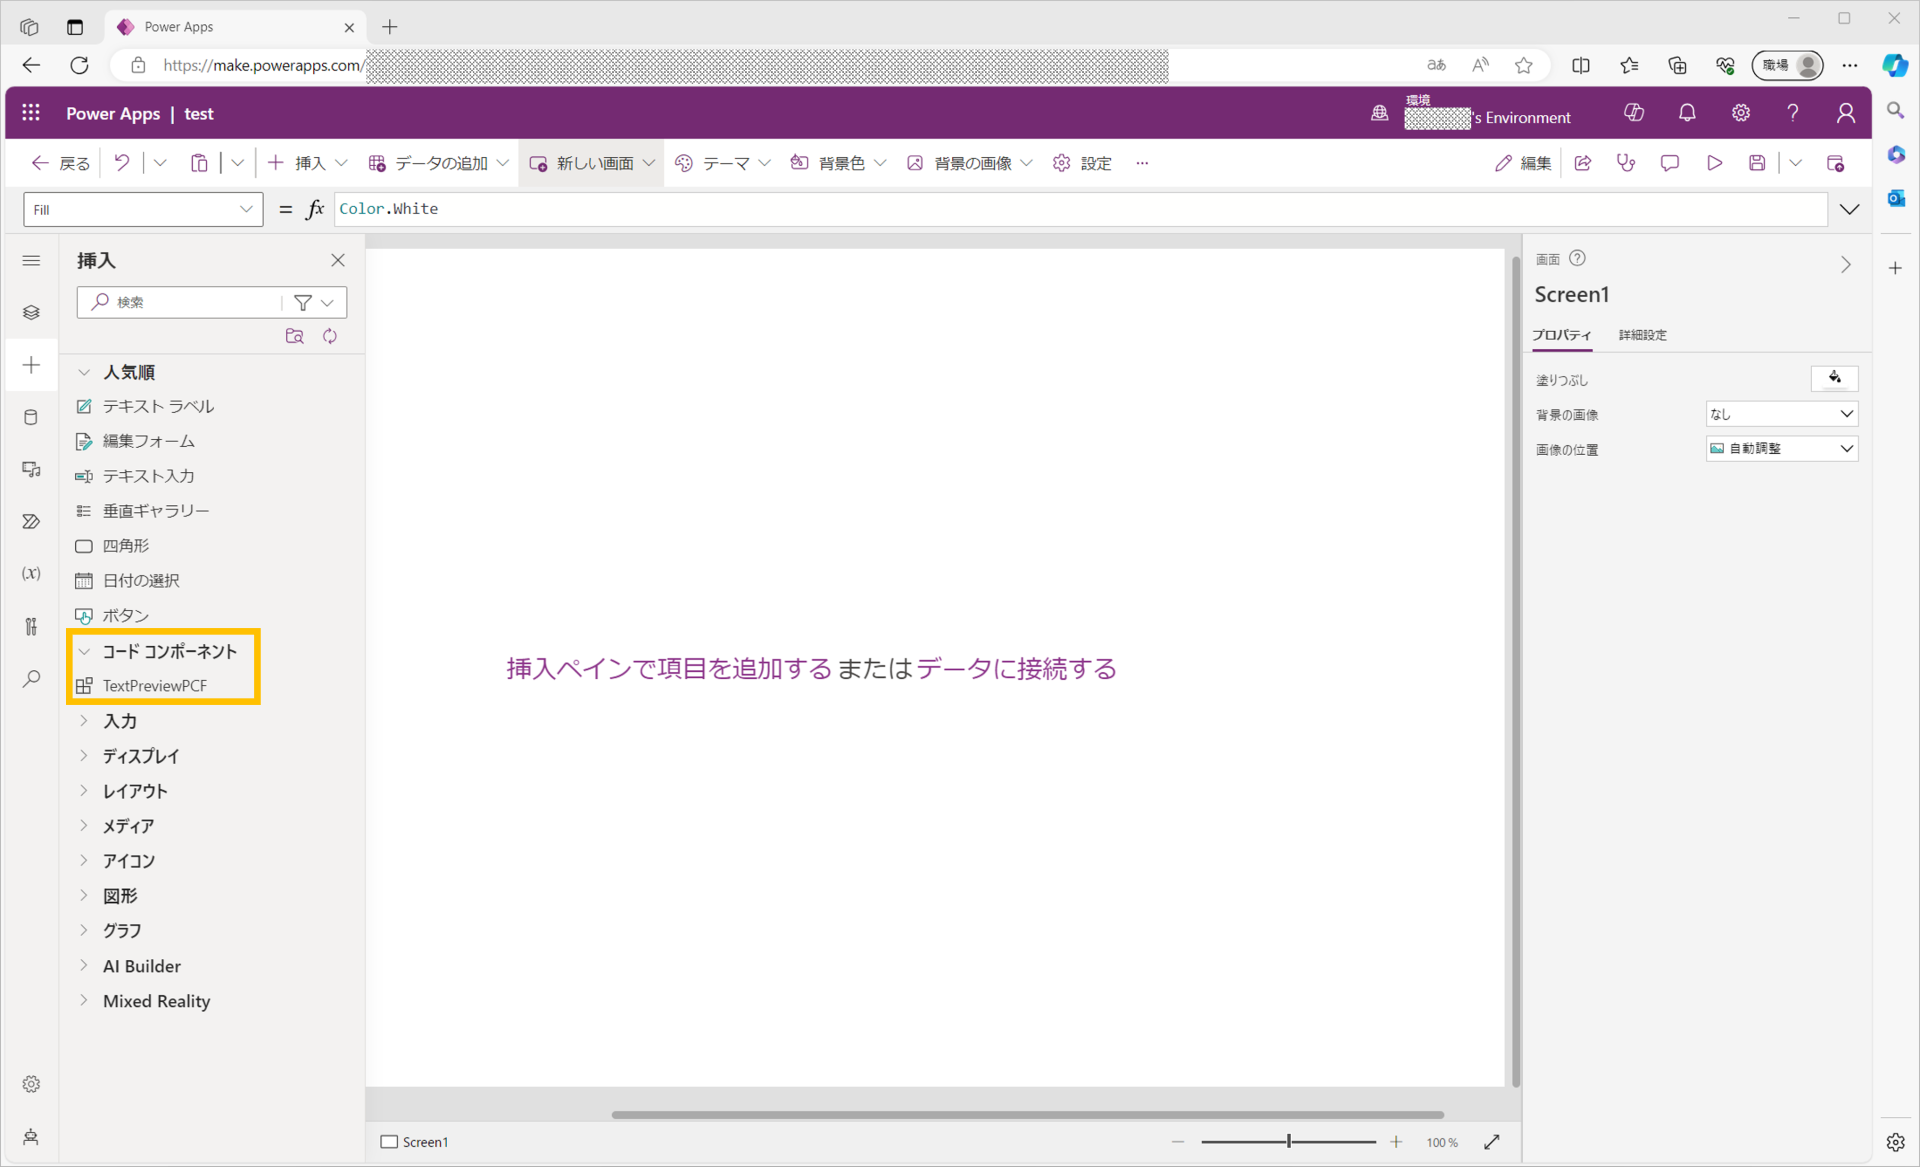
初期状態では、コンポーネントの「挿入」メニューには追加したコードコンポーネントは表示されていませんので、設定を行い追加します。まず、次の画像のように「コンポーネントをさらに取得」アイコンを選択します。
「コンポーネントのインポート」画面が表示後、「コード」タブを選択し、続けて追加した「TextPreviewPCF」コンポーネントを選択し[インポート]を押します。
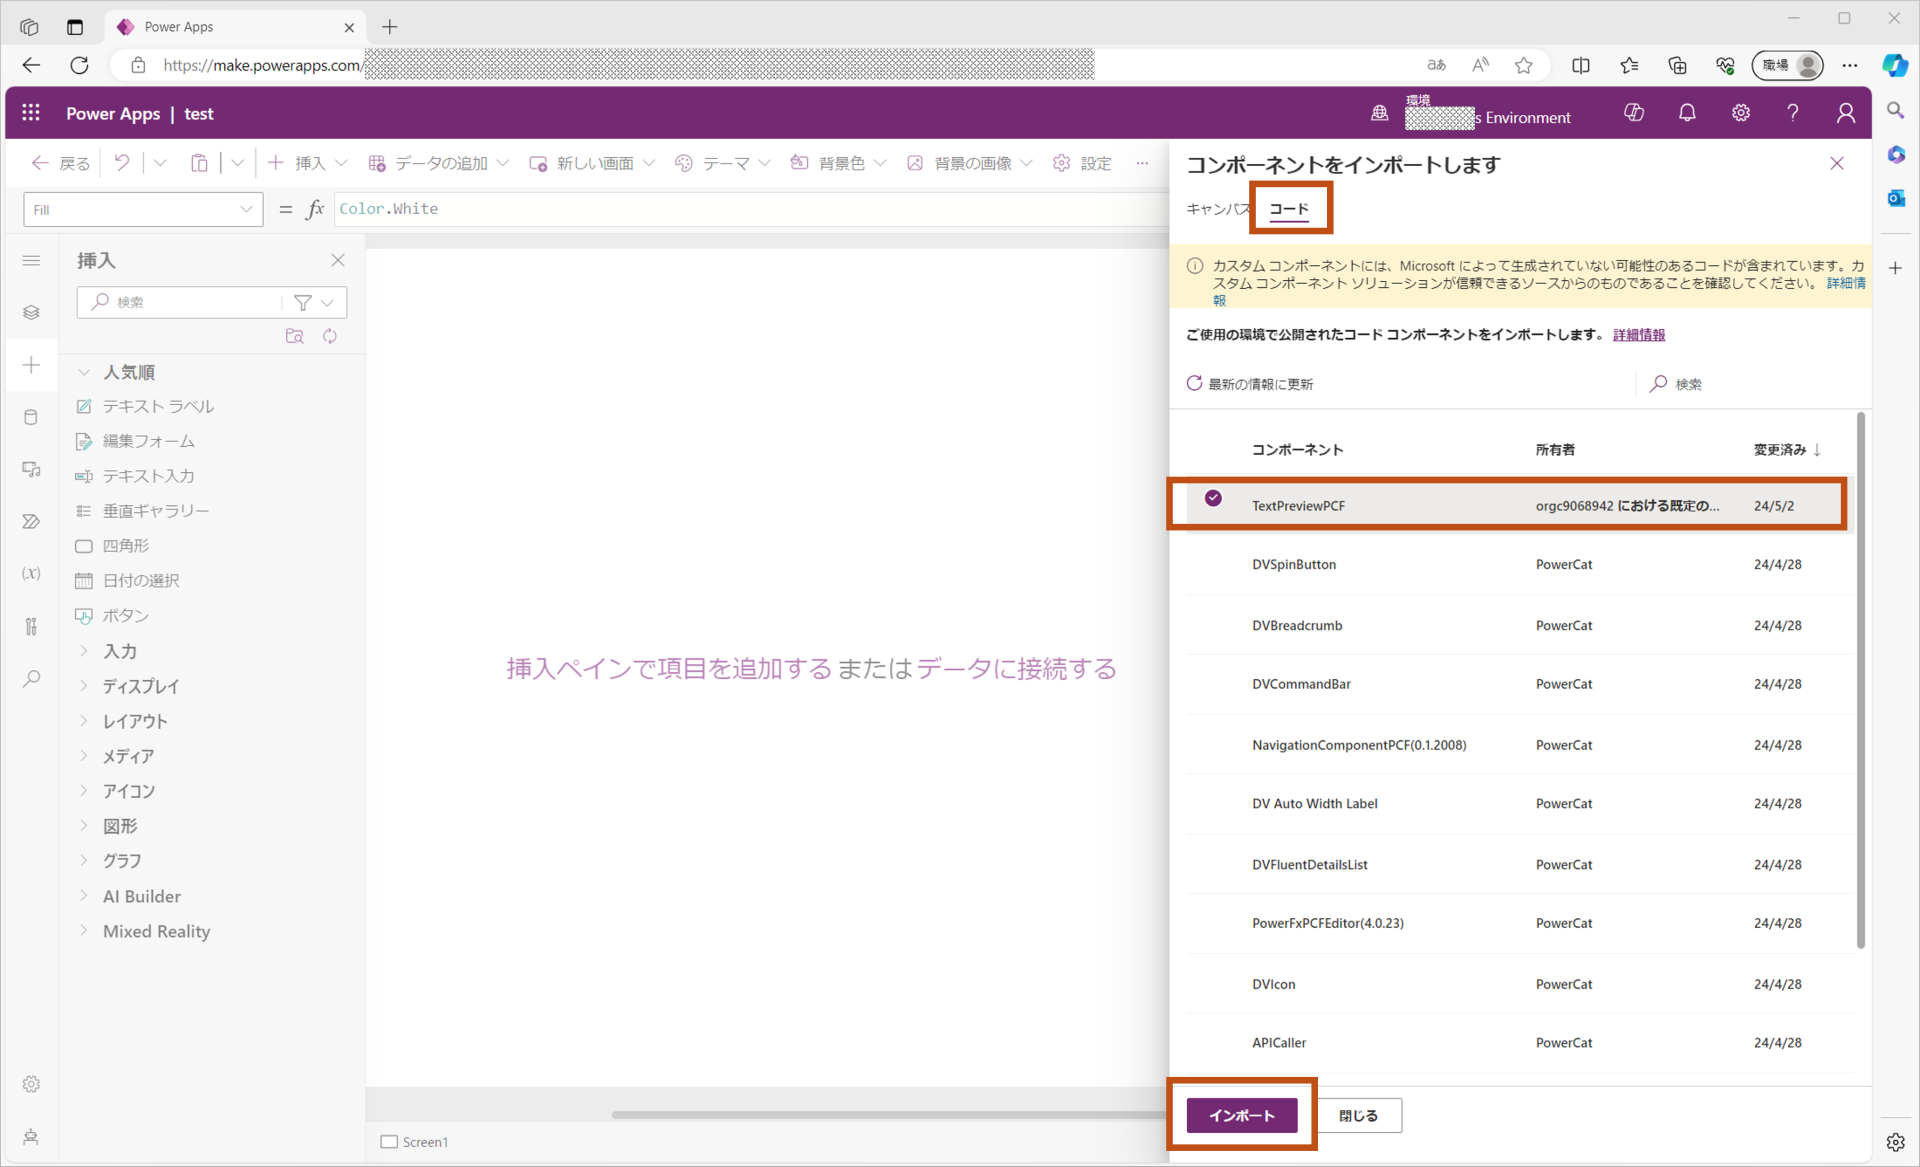
インポートすると次のように、コンポーネントの「挿入」メニューへ「コードコンポーネント>TextPreviewPCF」が追加されます。
実際に「挿入」メニューからキャンバス上へ追加すると、次の動画のように、デバック動作と同様に、テキストボックスの下に入力した値がリアルタイムで出力され正常に動作しました。
OSSライブラリを利用したコードコンポーネント
前回から、単純なコードコンポーネントの作成手順とPower Apps環境での利用手順までを解説してきました。ここからはOSSライブラリを利用してさらに高機能なコンポーネントを作成してみたいと思います。
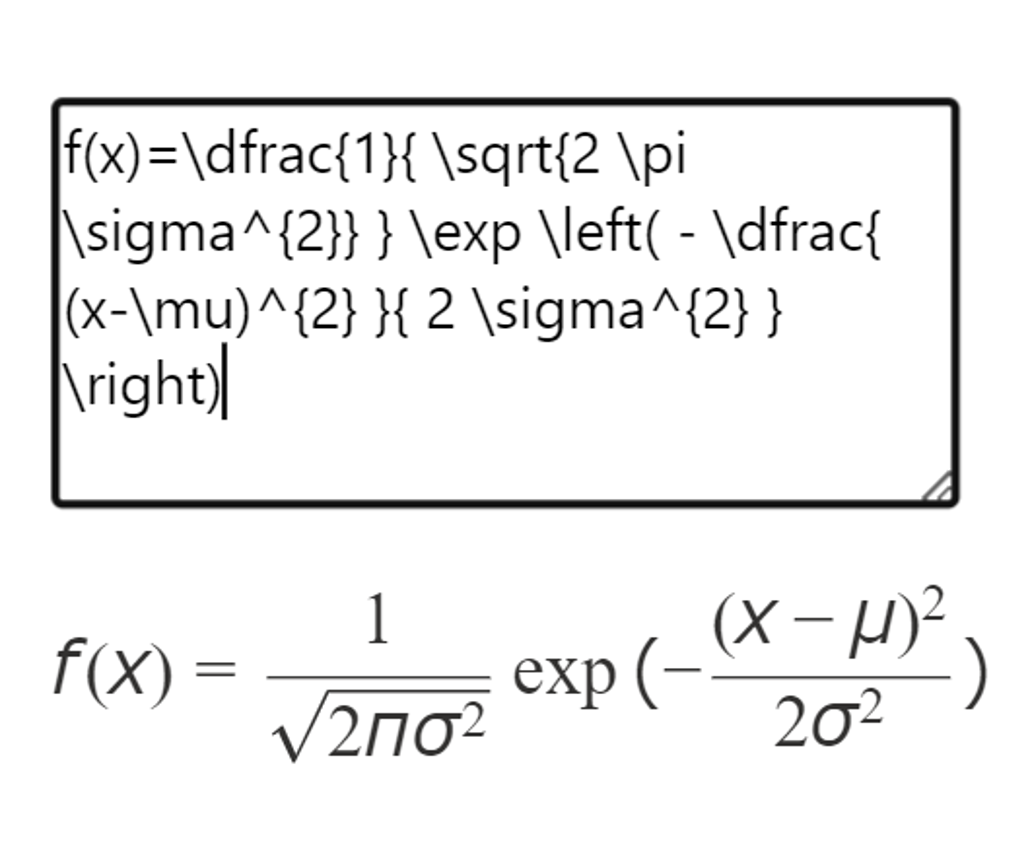
今回は、数式表示を行う為のJavaScriptライブラリ「KaTeX(カテフ)」を利用して、テキストボックスに次のような文字列を入力し、その結果を数式として表示するコードコンポーネントを作成したいと思います。
x^2 - 16 = (x + 4)(x - 4)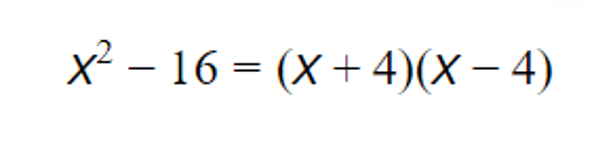
x + 5 = 10 \\ x = 5 
x = \dfrac{-b \pm \sqrt{ b^{2} - 4ac } }{2a}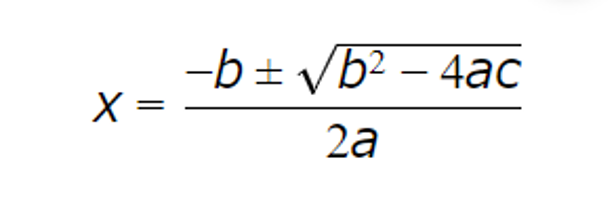
コードコンポーネントのプロジェクトの作成
前回同様にコードコンポーネントプロジェクト作成していきます。今回はディレクトリ名、プロジェクト名、名前空間を以下として作成しました。
- ディレクトリ名:KatexPreview
- プロジェクト名:KatexPreviewPCF
- 名前空間:KPNameSpace
pac pcf init -n KatexPreviewPCF -ns KPNameSpace -t field -fw react -npm続けて、以下のコマンドでKaTeXもインストールします。今回はReact用の「react-katex」をインストールします。
npm install react-katex
npm install --save-dev @types/react-katex
マニフェストファイルの更新
前回と同様に、まずは「ControlManifest.Input.xml」を更新します。プロパティ定義に関しては前回と同様としています。今回の変更点としては、「Katex」の「CSSファイル」を利用するため、以下のハイライト箇所にCSSファイルの参照を追加しています。
<?xml version="1.0" encoding="utf-8" ?>
<manifest>
  <control namespace="KPNameSpace" constructor="KatexPreviewPCF" version="0.0.1" display-name-key="KatexPreviewPCF" description-key="KatexPreviewPCF description" control-type="virtual" >
    <!--external-service-usage node declares whether this 3rd party PCF control is using external service or not, if yes, this control will be considered as premium and please also add the external domain it is using.
    If it is not using any external service, please set the enabled="false" and DO NOT add any domain below. The "enabled" will be false by default.
    Example1:
      <external-service-usage enabled="true">
        <domain>www.Microsoft.com</domain>
      </external-service-usage>
    Example2:
      <external-service-usage enabled="false">
      </external-service-usage>
    -->
    <external-service-usage enabled="false">
      <!--UNCOMMENT TO ADD EXTERNAL DOMAINS
      <domain></domain>
      <domain></domain>
      -->
    </external-service-usage>
    <!-- property node identifies a specific, configurable piece of data that the control expects from CDS -->
    <property name="InputValueProperty" display-name-key="InputValueProperty_Display_Key" description-key="InputValueProperty_Desc_Key" of-type="Multiple" usage="bound" required="true" />
    <!--
      Property node's of-type attribute can be of-type-group attribute.
      Example:
      <type-group name="numbers">
        <type>Whole.None</type>
        <type>Currency</type>
        <type>FP</type>
        <type>Decimal</type>
      </type-group>
      <property name="sampleProperty" display-name-key="Property_Display_Key" description-key="Property_Desc_Key" of-type-group="numbers" usage="bound" required="true" />
    -->
    <resources>
      <code path="index.ts" order="1"/>
      <platform-library name="React" version="16.8.6" />
      <platform-library name="Fluent" version="8.29.0" />
      <css path="../node_modules\katex\dist\katex.css" order="1" />
      <css path="../node_modules\katex\dist\katex.min.css" order="2" />
      <!-- UNCOMMENT TO ADD MORE RESOURCES

      <resx path="strings/KatexPreviewPCF.1033.resx" version="1.0.0" />
      -->
    </resources>
    <!-- UNCOMMENT TO ENABLE THE SPECIFIED API
    <feature-usage>
      <uses-feature name="Device.captureAudio" required="true" />
      <uses-feature name="Device.captureImage" required="true" />
      <uses-feature name="Device.captureVideo" required="true" />
      <uses-feature name="Device.getBarcodeValue" required="true" />
      <uses-feature name="Device.getCurrentPosition" required="true" />
      <uses-feature name="Device.pickFile" required="true" />
      <uses-feature name="Utility" required="true" />
      <uses-feature name="WebAPI" required="true" />
    </feature-usage>
    -->
  </control>
</manifest>
上記のように更新が終わりましたら、前回同様ビルドします。
npm run buildtsxファイルの更新
続いて、tsxファイルの更新です。前回作成したコードとの変更箇所は、クラス名やインターフェイス名の他に、以下のコードでハイライトしているように、Katexコンポーネントを利用するためのインポートを追加し、前回は<p>タグで出力していた箇所をKatexコンポーネントの「BlockMath」を利用した内容に変更しています。
import * as React from 'react';
import { Label } from '@fluentui/react';
import { BlockMath } from 'react-katex';

export interface IKatexPreviewSampleProps {
  InputValue?: string;
  InputValueChanged?: (newValue: string) => void;
}


export class KatexPreviewSample extends React.Component<IKatexPreviewSampleProps,{InputValue: string}> {
  constructor(props: IKatexPreviewSampleProps) {
    super(props);
    this.state = {
      InputValue: String(this.props.InputValue),
    };
  }

  public render(): React.ReactNode {
    return (
      <Label>
        <textarea cols={30} rows={5} value={this.props.InputValue}  onChange={this.onInputValueChange} />
        <BlockMath>{this.props.InputValue}</BlockMath>
      </Label>
    )
  }

  private onInputValueChange = (e: React.ChangeEvent<HTMLTextAreaElement>) => {
    const newValue = e.target.value;
      this.setState(
        prevState => (
          {
            InputValue: newValue
          }
        )
      );
      if (this.props.InputValueChanged) {
        this.props.InputValueChanged(newValue);
      }
  };
}
index.tsファイルの更新
最後に、「index.ts」ファイルを更新しますが、こちらは前回作成したコードから名称以外に変更している箇所はありません。
import { IInputs, IOutputs } from "./generated/ManifestTypes";
import { KatexPreviewSample, IKatexPreviewSampleProps } from "./App";
import * as React from "react";

export class KatexPreviewPCF implements ComponentFramework.ReactControl<IInputs, IOutputs> {
    private theComponent: ComponentFramework.ReactControl<IInputs, IOutputs>;
    private notifyOutputChanged: () => void;
    private props:IKatexPreviewSampleProps={
        InputValueChanged:this.InputValueChanged.bind(this),
    };


    /**
     * Empty constructor.
     */
    constructor() { }

    /**
     * Used to initialize the control instance. Controls can kick off remote server calls and other initialization actions here.
     * Data-set values are not initialized here, use updateView.
     * @param context The entire property bag available to control via Context Object; It contains values as set up by the customizer mapped to property names defined in the manifest, as well as utility functions.
     * @param notifyOutputChanged A callback method to alert the framework that the control has new outputs ready to be retrieved asynchronously.
     * @param state A piece of data that persists in one session for a single user. Can be set at any point in a controls life cycle by calling 'setControlState' in the Mode interface.
     */
    public init(
        context: ComponentFramework.Context<IInputs>,
        notifyOutputChanged: () => void,
        state: ComponentFramework.Dictionary
    ): void {
        this.notifyOutputChanged = notifyOutputChanged;
    }

    /**
     * Called when any value in the property bag has changed. This includes field values, data-sets, global values such as container height and width, offline status, control metadata values such as label, visible, etc.
     * @param context The entire property bag available to control via Context Object; It contains values as set up by the customizer mapped to names defined in the manifest, as well as utility functions
     * @returns ReactElement root react element for the control
     */
    public updateView(context: ComponentFramework.Context<IInputs>): React.ReactElement {
        this.props = { InputValue: String(context.parameters.InputValueProperty.raw)};
        return React.createElement(
            KatexPreviewSample,
            {
                InputValue:this.props.InputValue,
                InputValueChanged:this.InputValueChanged.bind(this)
            }
        );
    }

    private InputValueChanged(newValue: string) {
		if (this.props.InputValue !== newValue) {
			this.props.InputValue = newValue;
			this.notifyOutputChanged();
		}
	}

    /**
     * It is called by the framework prior to a control receiving new data.
     * @returns an object based on nomenclature defined in manifest, expecting object[s] for property marked as "bound" or "output"
     */
    public getOutputs(): IOutputs {
        return {
            InputValueProperty:this.props.InputValue
        };
    }

    /**
     * Called when the control is to be removed from the DOM tree. Controls should use this call for cleanup.
     * i.e. cancelling any pending remote calls, removing listeners, etc.
     */
    public destroy(): void {
        // Add code to cleanup control if necessary
    }
}
コードの記述が終わりましたら、npm run buildまたはnpm startにてビルド、デバッグ実行を行いPower Apps環境へアップします。
動作確認
テキストボックスに入力した文字列を元に、複雑な数式がリアルタイムで出力されることが確認できました。また、コントロールのプロパティに変数を設定しておくことで、他のテキストボックスの値を元に変数を変更することができ、ご覧のようにボタン操作による一括値セットやクリアなどの実装も行えるようになり、標準コンポーネントと遜色なく利用できるようになります。
さいごに
今回は、コードコンポーネントをPower Apps環境で使用する方法と、JavaScriptライブラリ「KaTeX(カテフ)」を利用し、複雑な数式表現が可能なコードコンポーネントを作成する方法について解説いたしました。
コードコンポーネントでは、JavaScriptライブラリを組み込むことが可能です。このコードコンポーネントを利用することで、標準コンポーネントでは実現できなかった機能を持つ、既存の業務システムのUIをPower Apps上で構築することが可能となります。是非、こちらの記事を参考にPower Appsアプリケーションを作成していただければ幸いです
当社では、コードコンポーネント上で使用できるJavaScriptライブラリを提供しています。「Power Apps」アプリケーションに高度なUI機能を追加されたい方は是非Webサイトをご確認ください。
編集部ピックアップでは、「Power Apps」をはじめとした「Power Platform」関連の情報を公開しています。今後も継続して「Power Platform」関連情報をご紹介していきます。