日本仕様の入力用JavaScriptコントロールセット「InputManJS(インプットマンJS)」の「V6J」では、複数のステップ(段階)に分かれたタスクやワークフローをユーザーに順序立てて案内できる「ステッパーコンポーネント(GcStepper)」が追加されています。各種の申込処理や登録処理における完了までのステップや進捗状況を可視化できるので、UXの向上やタスクの完了率を高めるのに有効です。
本記事では、ステッパーコンポーネントの特長や、導入方法について詳しくご紹介します。
目次
ステッパーコンポーネントとは
ステッパーコンポーネント(GcStepper)は、複数のステップ(段階)に分かれた処理やワークフローを、視覚的に分かりやすくユーザーに示すためのUIコンポーネントです。現在のステップ、完了/未完了といった進行状況を直感的に把握でき、ステップ間の移動制御や表示のカスタマイズも行えます。各種申込・登録フロー、入力ウィザード、ユーザーオンボーディングや利用ガイドといったUI構築のシーンで効果を発揮します。
ステッパーコンポーネントの特長
ワークフローの進行状況を直感的に可視化
各ステップの状態(未実行/進行中/完了など)をインジケーターとして表示することで、「今どこまで進んでいるか」「あと何が残っているか」をユーザーが一目で理解できます。これにより操作の迷いを減らし、タスク完了までの心理的ハードルを下げられます。
ステップ間の移動制御で、入力ミスや手戻りを防止
各項目の入力が完了するまで次へ進めないように制御することができるので、入力漏れに後から気づくような問題を防止できます。また、InputManJSの検証機能と組み合わせれば、すべてのステップで検証が成功した場合のみ、最終ステップに進める、といった制御も可能です。
アイコン・表示方向など柔軟なカスタマイズ
ステッパーは以下のような表示カスタマイズに対応しています。
- ステップごとのアイコン設定
- 状態(完了/エラーなど)に応じたインジケーター表示切り替え
- 横方向/縦方向レイアウトの切り替え
要件や画面構成にあわせて柔軟に調整できるのが特長です。
ステッパーコンポーネントの使い方
ここからはステッパーコンポーネントの使い方について、架空のサービスの申込画面を例に解説していきます。
開発環境の準備とInputManJSの参照
今回は開発環境として以下を使用します。
作成するファイルは以下の3つです。
| index.html | ページ本体。ページの要素としてGcTextBox、GcComboBox、GcMask、GcDateTime、GcStepperを配置します |
|---|---|
| app.js | GcTextBox、GcComboBox、GcMask、GcDateTime、GcValidator、GcStepperを作成するコードを記載します |
| style.css | 各種ページ要素のスタイル定義を記載します |
GcStepperコンポーネントなどのInputManJSの各種コントロールを使用するには、InputManJSのモジュールを環境にインストールする必要があります。CDNを参照したり、npmなどから入手したりする方法もありますが、今回は環境に直接モジュールを配置していきます。あらかじめInputManJSの製品版かトライアル版をご用意ください。トライアル版は以下より無償で入手可能です。
製品版、またはトライアル版をダウンロードしたら、ZIPファイルを解凍し、以下のファイルを環境にコピーします。
- css/gc.inputman-js.css
- scripts/gc.inputman-js.ja.js
ステッパーコンポーネントを実装する
それではステッパーコンポーネントを実装するサンプルを作成していきます。ここでは、フォームの入力項目としてInputManJSの以下のコントロールを使用します。
最初に、前述の各モジュールと「app.js」および「style.css」への参照設定をHTMLファイルに追加します。
※ CDNから参照する場合はコメントアウトされている部分とライブラリの参照先を入れ替えてください。
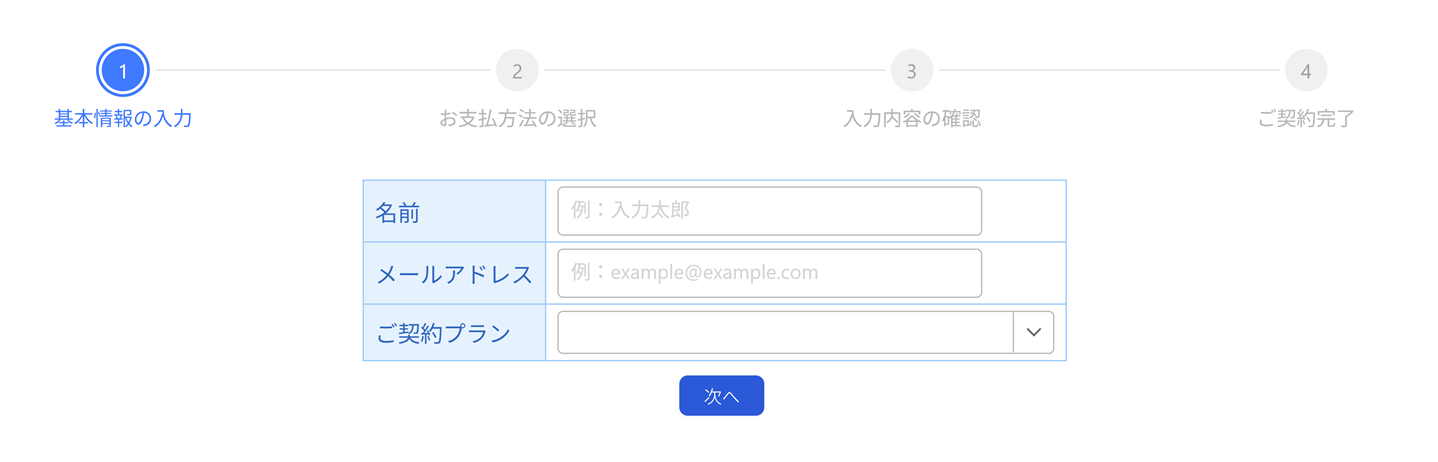
また、<div>タグでステッパーに表示する各ステップの要素を定義します。今回は「基本情報の入力」「お支払方法の選択」「入力内容の確認」の3ステップを定義しています。
<!DOCTYPE html>
<html>

<head>
    <meta charset="utf-8">
    <title>InputManJSのステッパーコンポーネント</title>

    <!-- ローカルのライブラリを参照する場合 -->
    <link rel="stylesheet" href="css/gc.inputman-js.css" />
    <script src="scripts/gc.inputman-js.ja.js"></script>

    <!-- CDNからライブラリを参照する場合 -->
    <!-- <link rel="stylesheet" href="https://cdn.mescius.com/inputmanjs/hosted/css/gc.inputman-js.css">
  <script src="https://cdn.mescius.com/inputmanjs/hosted/scripts/gc.inputman-js.ja.js"></script> -->

    <link rel="stylesheet" href="css/style.css" />
    <script src="scripts/app.js"></script>
</head>

<body>
    <!-- 基本情報入力フォーム -->
    <div id="form1" class="step">
        <table class="form">
            <tr>
                <th>名前</th>
                <td><input id="name" /></td>
            </tr>
            <tr>
                <th>メールアドレス</th>
                <td><input id="mail" /></td>
            </tr>
            <tr>
                <th>ご契約プラン</th>
                <td><select id="plan" /></td>
            </tr>
        </table>

        <div class="button-group">
            <button class="nextBtn">次へ</button>
        </div>
    </div>

    <!-- 支払方法入力フォーム -->
    <div id="form2" class="step">
        <table class="form">
            <tr>
                <th>カードブランド</th>
                <td><select id="cardType"></select></td>
            </tr>
            <tr>
                <th>カード番号</th>
                <td><input id="cardNumber" /></td>
            </tr>
            <tr>
                <th>カード名義</th>
                <td><input id="ownerName" /></td>
            </tr>
            <tr>
                <th>有効期限</th>
                <td><input id="expirationDate" /></td>
            </tr>
            <tr>
                <th>セキュリティコード</th>
                <td>
                    <input id="securityCode" />
                </td>
            </tr>
        </table>

        <div class="button-group">
            <button class="prevBtn">戻る</button>
            <button class="nextBtn">次へ</button>
        </div>
    </div>

    <!-- 入力内容確認 -->
    <div id="form3" class="step">
        <table class="form">
            <tr>
                <th>名前</th>
                <td id="confirmName" ></td>
            </tr>
            <tr>
                <th>メールアドレス</th>
                <td id="confirmMail"></td>
            </tr>
            <tr>
                <th>ご契約プラン</th>
                <td id="confirmPlan"></td>
            </tr>
            <tr>
                <th>カードブランド</th>
                <td id="confirmCardType"></td>
            </tr>
            <tr>
                <th>カード番号</th>
                <td id="confirmCardNumber"></td>
            </tr>
            <tr>
                <th>カード名義</th>
                <td id="confirmOwnerName"></td>
            </tr>
            <tr>
                <th>有効期限</th>
                <td id="confirmExpirationDate"></td>
            </tr>
            <tr>
                <th>セキュリティコード</th>
                <td id="confirmSecurityCode"></td>
            </tr>
        </table>

        <div class="button-group">
            <button class="prevBtn">戻る</button>
            <button class="submitBtn">送信</button>
        </div>
    </div>
    <div id="gcStepper"></div>
</body>

</html>
続いて「app.js」を以下のように作成します。
※ ライセンスキーを設定しない場合トライアル版を示すメッセージが表示されます。ライセンスキーの入手や設定方法についてはこちらをご覧ください。
document.addEventListener('DOMContentLoaded', () => {
    setTimeout(() => {
        // ライセンスキーの設定
        // GC.InputMan.LicenseKey = 'ここにInputManJSのライセンスキーを設定します';
        GC.InputMan.appearanceStyle = GC.InputMan.AppearanceStyle.Modern;

        // 基本情報入力フォームの各項目を生成します。
        // 名前
        const name = new GC.InputMan.GcTextBox(document.getElementById('name'), {
            watermarkDisplayNullText: '例:入力太郎',
            width: 300,
            height: 35,
        });

        // メールアドレス
        const mail = new GC.InputMan.GcTextBox(
            document.getElementById('mail'),
            {
                watermarkDisplayNullText: '例:example@example.com',
                width: 300,
                height: 35,
            }
        );

        // プラン選択用の候補リスト。
        const products = ['ベーシックプラン', 'プロフェッショナルプラン', 'プレミアムプラン'];

        // プラン選択用の候補リスト。
        const cards = ['MESCIUS', 'InputMan', 'Spread', 'ActiveReports'];

        // プラン選択
        const plan = new GC.InputMan.GcComboBox(document.getElementById('plan'), {
            items: products,
        });

        // 支払い情報入力フォームの各項目を生成します。
        // カードブランド選択。選択したカードに応じてカード番号入力欄のマスク形式を切り替えます。
        const cardType = new GC.InputMan.GcComboBox(
            document.getElementById('cardType'),
            {
                items: cards,
                watermarkDisplayNullText: '選択してください。',
                isEditable: false,
                exitOnLeftRightKey: GC.InputMan.ExitOnLeftRightKey.Both,
                exitOnEnterKey: GC.InputMan.ExitKey.Both,
            }
        );
        cardType.addEventListener(
            GC.InputMan.GcComboBoxEvent.TextChanged,
            (control, args) => {
                // カードブランドが変更されたら、カード番号の入力マスクを更新します。
                cardNumber.formatPattern = cardNoFormats[cardType.displayText];
            }
        );

        // カードブランドごとの番号フォーマット定義。
        const cardNoFormats = {
            MESCIUS: '\\D{4}-\\D{4}-\\D{4}-\\D{4}',
            InputMan: '\\D{4}-\\D{4}-\\D{4}-\\D{4}',
            Spread: '\\D{4}-\\D{6}-\\D{5}',
            ActiveReports: '\\D{4}-\\D{6}-\\D{4}'
        };

        // カード番号入力欄。初期状態ではVISAのマスクを適用します。
        const cardNumber = new GC.InputMan.GcMask(
            document.getElementById('cardNumber'),
            {
                //watermarkDisplayNullText: '半角数字を入力してください。',
                formatPattern: cardNoFormats.MESCIUS,
                exitOnLastChar: true,
                exitOnLeftRightKey: GC.InputMan.ExitOnLeftRightKey.Both,
                exitOnEnterKey: GC.InputMan.ExitKey.Both,
            }
        );

        // カード名義入力欄。アルファベットの入力形式を指定します。
        const ownerName = new GC.InputMan.GcTextBox(
            document.getElementById('ownerName'),
            {
                watermarkDisplayNullText: '例:TARO NYURYOKU',
                format: 'AS',
                exitOnLeftRightKey: GC.InputMan.ExitOnLeftRightKey.Both,
                exitOnEnterKey: GC.InputMan.ExitKey.Both,
            }
        );

        // 有効期限入力欄を設定します。
        // 年月形式のカレンダーを表示し、現在日付以降から5年後までを選択可能にします。
        var today = new Date();
        var thisYear = today.getFullYear();
        var thisMonth = today.getMonth();
        const expirationDate = new GC.InputMan.GcDateTime(
            document.getElementById('expirationDate'),
            {
                //watermarkDisplayNullText: '年月を入力してください。',
                formatPattern: 'yyyy年MM月',
                displayFormatPattern: 'MM/yy',
                exitOnLastChar: true,
                exitOnLeftRightKey: GC.InputMan.ExitOnLeftRightKey.Both,
                exitOnEnterKey: GC.InputMan.ExitKey.Both,
                showDropDownButton: true,
                dropDownConfig: {
                    dropDownType: GC.InputMan.DateDropDownType.Calendar,
                    calendarType: GC.InputMan.CalendarType.YearMonth,
                    autoSwitch: false,
                    minDate: new Date(thisYear, thisMonth, 1),
                    maxDate: new Date(thisYear + 5, 11, 31),
                },
                minDate: new Date(thisYear, thisMonth, 1),
                maxDate: new Date(thisYear + 5, 11, 31),
            }
        );
        expirationDate.value = null;

        // セキュリティコード入力欄。
        // 数値のみ許可し、入力値はマスク表示されます。
        const securityCode = new GC.InputMan.GcTextBox(
            document.getElementById('securityCode'),
            {
                watermarkDisplayNullText: 'カードに記載されている3~4桁の数値です。',
                maxLength: 4,
                format: '9',
                exitOnLastChar: true,
                exitOnLeftRightKey: GC.InputMan.ExitOnLeftRightKey.Both,
                exitOnEnterKey: GC.InputMan.ExitKey.Both,
                passwordChar: '*',
                passwordRevelationMode: GC.InputMan.PasswordRevelationMode.ShowLastTypedChar,
            }
        );
        securityCode.addDropDownSoftKeyboard(
            null,
            {
                displayType: GC.InputMan.DisplayType.Numeric,
            },
            true
        );

        // ステッパーを生成します。
        const gcStepper = new GC.InputMan.GcStepper(
            document.getElementById('gcStepper'),
            {
                steps: [
                    {
                        label: '基本情報の入力',
                        text: '1',
                        target: () => document.getElementById('form1'),
                    },
                    {
                        label: 'お支払方法の選択',
                        text: '2',
                        target: () => document.getElementById('form2'),
                    },
                    {
                        label: '入力内容の確認',
                        text: '3',
                        target: () => document.getElementById('form3'),
                    },
                    {
                        label: 'ご契約完了',
                        text: '4',
                        target: `
            <div style="text-align: center; padding: 5px;">
                <h3>ご契約完了</h3>
                <p>ご契約が正常に完了いたしました。引き続きサービスをご利用ください。</p>
                           <button class="topPageBtn">トップページに戻る</button>

            </div>
        `,
                    },
                ],
            }
        );

        // 「戻る」ボタンをクリックしたときに、ステッパーを前のステップに移動させます。
        document
            .querySelectorAll('.prevBtn')
            .forEach((v) => v.addEventListener('click', () => gcStepper.previous()));

        // 指定した要素が現在表示されているかどうかを判定します。
        function isVisible(el) {
            if (!el) return false;
            const style = getComputedStyle(el);
            return style.display !== 'none' && style.visibility !== 'hidden' && el.offsetParent !== null;
        }

        // 確認画面に表示するため、現在の入力内容をコピーします。
        function populateForm3() {
            const get = (id) => document.getElementById(id) ? document.getElementById(id).value : '';
            const cardTypeEl = document.getElementById('cardType');
            const cardTypeText = cardTypeEl && cardTypeEl.selectedOptions && cardTypeEl.selectedOptions[0]
                ? cardTypeEl.selectedOptions[0].text
                : (cardTypeEl ? cardTypeEl.value : '');

            document.getElementById('confirmName').textContent = get('name');
            document.getElementById('confirmAddress').textContent = get('address');
            document.getElementById('confirmPlan').textContent = gcComboBox1.selectedValue;
            document.getElementById('confirmCardType').textContent = cardType.selectedValue;
            document.getElementById('confirmCardNumber').textContent = '****-****-****-' + get('cardNumber').slice(-4);
            document.getElementById('confirmOwnerName').textContent = get('ownerName');
            document.getElementById('confirmExpirationDate').textContent = expirationDate.value ? expirationDate.displayText : '';
            document.getElementById('confirmSecurityCode').textContent = '***';
        }

        // 「次へ」ボタン押下時の処理。
        document.querySelectorAll('.nextBtn').forEach((v) =>
            v.addEventListener('click', () => {
                const form2 = document.getElementById('form2');
                if (isVisible(form2)) {
                    populateForm3();
                }
                gcStepper.next();
            })
        );

        // 確認画面の「送信」ボタン押下時の処理。
        // 送信データをログに出力し、完了ステップに進みます。
        document.querySelectorAll('.submitBtn').forEach((v) =>
            v.addEventListener('click', () => {
                const data = {
                    name: document.getElementById('confirmName').textContent,
                    address: document.getElementById('confirmAddress').textContent,
                    cardType: document.getElementById('confirmCardType').textContent,
                    cardNumber: document.getElementById('confirmCardNumber').textContent,
                    ownerName: document.getElementById('confirmOwnerName').textContent,
                    expirationDate: document.getElementById('confirmExpirationDate').textContent,
                    securityCode: document.getElementById('confirmSecurityCode').textContent,
                };
                // 実際の送信処理に置き換える必要があります。
                console.log('Submitting data:', data);
                gcStepper.next();
            })
        );

        // 「トップページに戻る」ボタン押下時の処理。
        // ページをリロードします。
        document.querySelectorAll('.topPageBtn').forEach((v) =>
            v.addEventListener('click', () => {
                location.reload();
            })
        );
    }, 1000);
});ステッパーコンポーネントのtargetにはそのステップで表示(フォーカス)したいコンテンツを設定します。ここではdocument.getElementById('form1')のように対象要素を返す関数を渡しています。また本サンプルでは、最終ステップの「ご契約完了」だけtargetにHTML文字列を直接指定しています。
最後に「style.css」にスタイルを記述します。
.gcim_watermark_null {
color: lightgrey;
}
button {
min-width: 60px;
padding: 5px 7px;
border: none;
border-radius: 6px;
background: #0056d6;
color: #fff;
font-size: 0.8em;
font-weight: 300;
cursor: pointer;
margin-left: 10px;
margin-top: 10px;
margin-bottom: 200px;
box-shadow: 0 1px 3px #0056d61a;
}
.prevBtn {
background: #f3f4f6;
color: #2d3a4b;
border: 1px solid #e0e0e0;
}
.step {
/* height: 100%;*/
display: flex;
flex-direction: column;
justify-content: center;
align-items: center;
text-align: left;
width: 100%;
}
#form3 {
text-align: center;
}
#form3 .form td {
width: 320px;
}
.form input,
.form select {
width: var(--form-control-width, 320px);
max-width: 100%;
box-sizing: border-box;
}
table.form {
border-collapse: collapse;
}
table.form>tbody>tr>* {
padding: 0.25rem 0.5rem;
border: 1px solid #90caf9;
}
table.form>tbody>tr>th {
text-align: left;
background: #e3f2fd;
color: #1565c0;
font-weight: normal;
}
body {
margin-top: 50px;
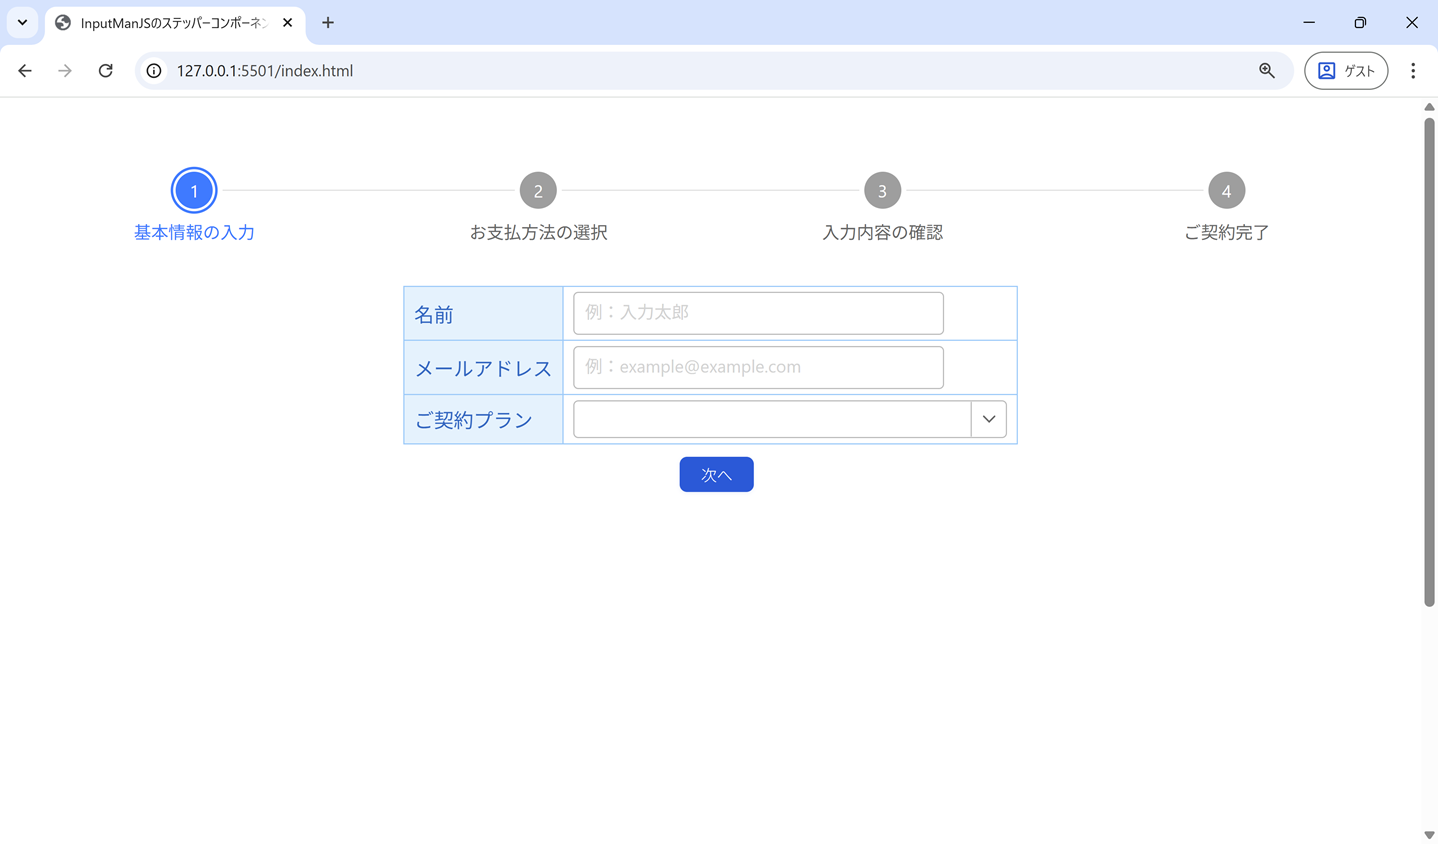
}以上を記述した後にアプリケーションを実行すると、ステッパーコンポーネントが組み込まれた入力フォームが表示されます。
[次へ]ボタンを押下することで次のステップの入力フォームに進むことができます。
ステッパーコンポーネントのカスタマイズ
ここからはステッパーコンポーネントの動作や表示をカスタマイズする方法をご紹介します。
ステップの表示のカスタマイズ
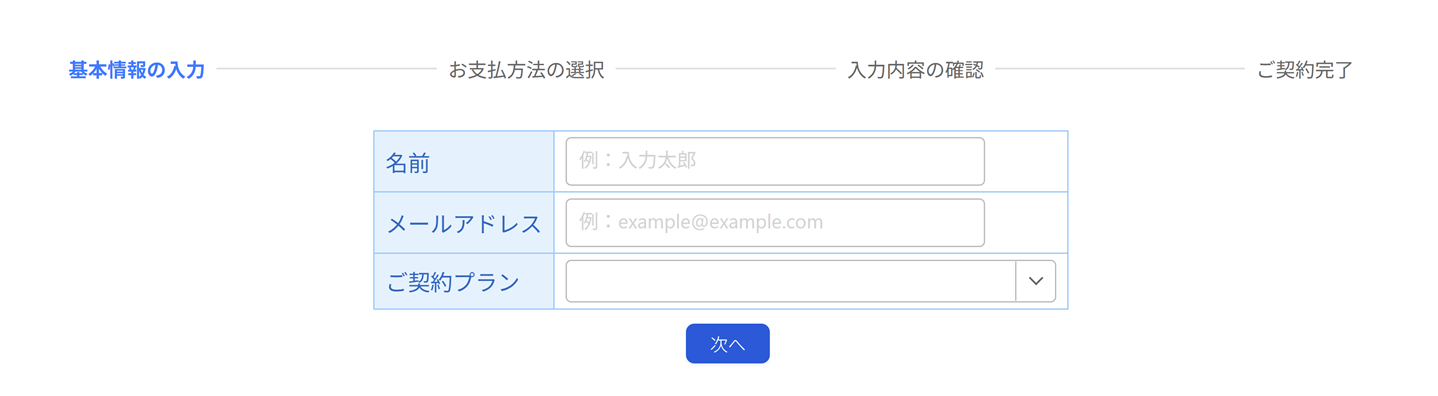
ステッパーコンポーネントのステップの表示は、デフォルトではインジケーターとその下に表示されるラベルで構成されています。このステップの表示はstepTypeプロパティにStepperStepType列挙型設定することで、ラベルとインジケーターの両方、ラベルのみ、またはインジケーターのみを表示できます。
| StepperStepType | 説明 |
|---|---|
| Full | ラベルとインジケーターの両方を表示(既定値) |
| Label | ラベルのみを表示 |
| Indicator | インジケーターのみを表示 |
以下はステップの表示をラベルのみに変更する例です。
const gcStepper = new GC.InputMan.GcStepper(
            document.getElementById('gcStepper'),
            {
                ・・・(中略)・・・
                stepType: GC.InputMan.StepperStepType.Label,
            },
        );
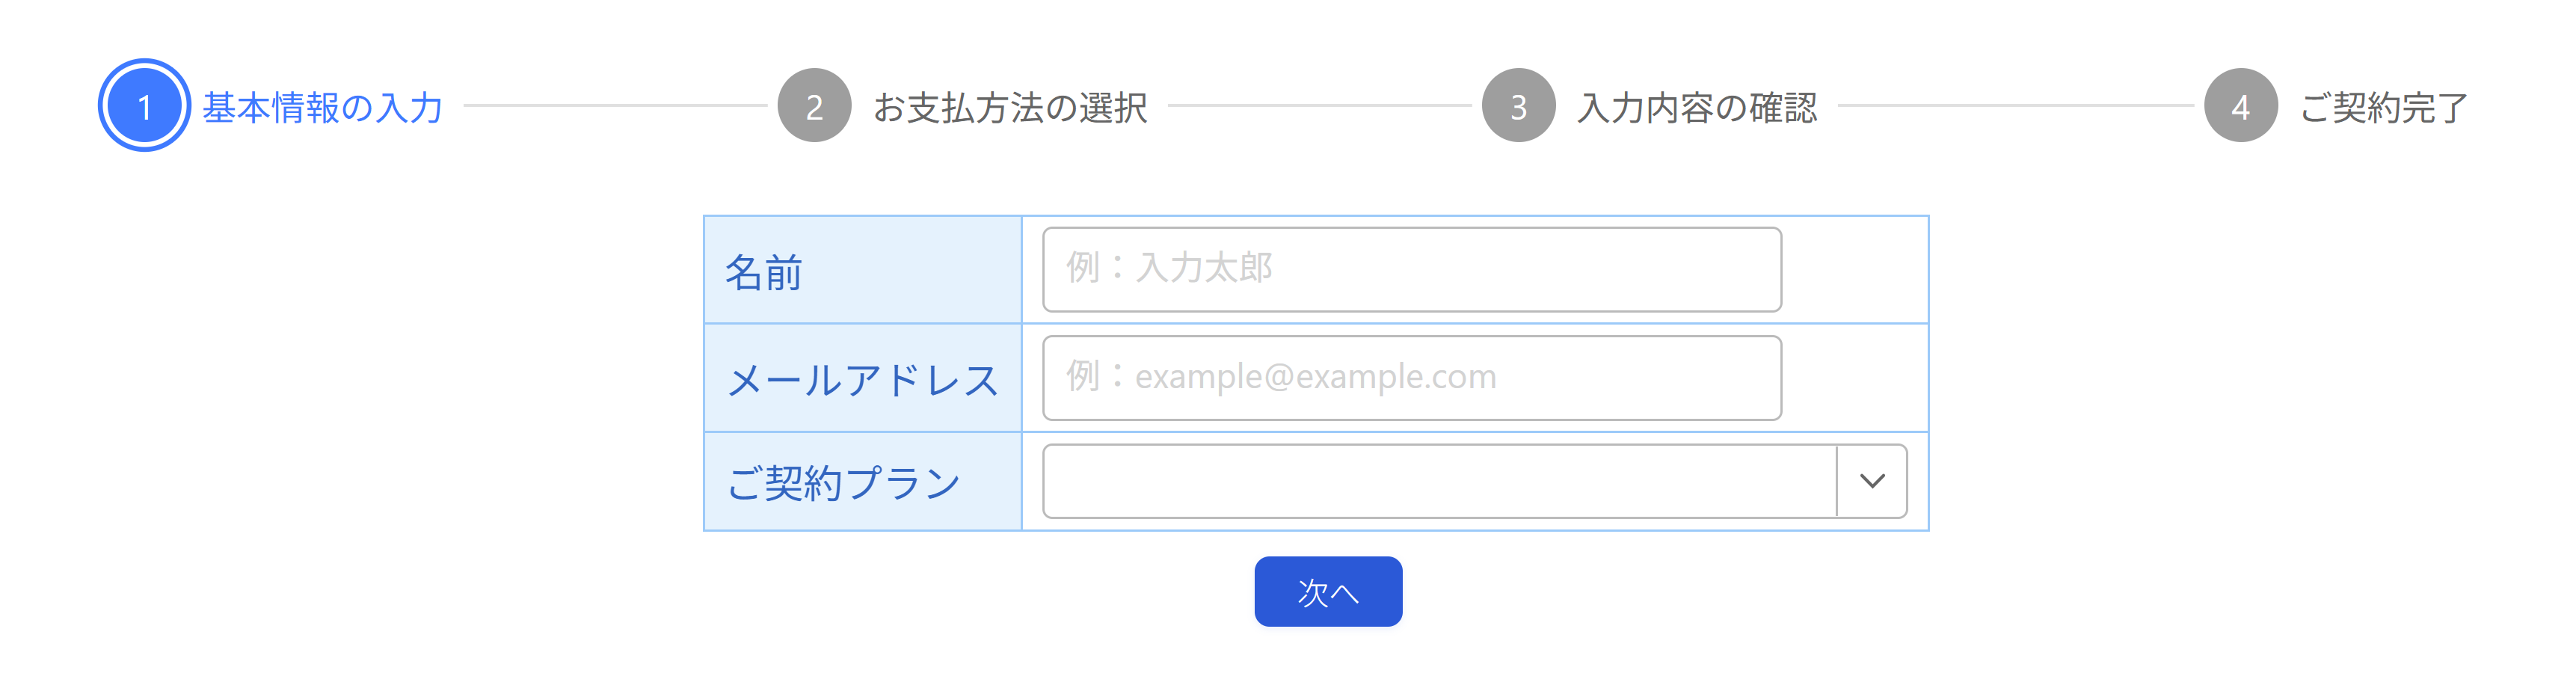
また、インジケーターとラベルの両方を表示する場合は、labelPositionプロパティを使用してラベルの表示位置を変更することもできます。本プロパティにはStepperLabelPosition列挙型の値を設定します。以下はインジケーターの右側にラベルを表示する例です。
const gcStepper = new GC.InputMan.GcStepper(
            document.getElementById('gcStepper'),
            {
                ・・・(中略)・・・
                stepType: GC.InputMan.StepperStepType.Full,
                labelPosition: GC.InputMan.StepperLabelPosition.Right,
            },
        );
ステップの進行の制御
デフォルトでは、各ステップのインジケーターを押下することで、フォームの入力状況に関わらず、各ステップ間を自由に行き来できます。
各ステップへの進行はAPIを使用して制御できるので、現在のステップの入力フォームの項目の値が正常だった場合のみ次のステップに進む(有効化する)、値が不正な場合は次のステップに進めない(無効化する)、といったステップの制御も可能です。
今回はInputManJSの検証コントロールを使用して、フォームを検証した結果が正常だった場合のみ、次のステップに進めるような制御を加えてみます。
まずはlinearプロパティをtrueに設定し、ステップ間の自由な移動を禁止します。
const gcStepper = new GC.InputMan.GcStepper(
            document.getElementById('gcStepper'),
            {
                ・・・(中略)・・・
                linear: true
            },
        );
再度実行すると、最初のステップ以外が無効となり、ステップ間の移動ができないことが確認できます。
これに対して、入力フォームの検証結果が正常だったら次のステップが有効になるように制御を加えていきます。
フォームの各入力項目に対応した検証コントロールを追加し、バリデーションチェックを実装します。基本情報と支払い情報とで計2つの検証コントロールを追加します。
・・・(中略)・・・
        const validator = new GC.InputMan.GcValidator({
            items: [
                // 名前
                {
                    control: name,
                    ruleSet: [
                        {
                            rule: GC.InputMan.ValidateType.Required,
                            failMessage: "お名前を入力してください。",
                        }
                    ],
                    validateWhen: GC.InputMan.ValidateWhen.Typing,
                },
                // メールアドレス
                {
                    control: mail,
                    ruleSet: [
                        {
                            rule: GC.InputMan.ValidateType.Required,
                        },
                        {
                            rule: (control) => {
                                const regexp = /^[A-Za-z0-9]{1}[A-Za-z0-9_.-]*@{1}[A-Za-z0-9_.-]{1,}\.[A-Za-z0-9]{1,}$/;
                                return regexp.test(control.value);
                            },
                            failMessage: '正しいメールアドレス形式で入力してください',
                        },
                    ],
                    validateWhen: GC.InputMan.ValidateWhen.Typing,
                },
                // プラン選択
                {
                    control: plan,
                    ruleSet: [
                        {
                            rule: GC.InputMan.ValidateType.Required,
                            failMessage: "プランを選択してください。",
                        }
                    ],
                    validateWhen: GC.InputMan.ValidateWhen.Typing,
                },
            ],
            defaultNotify: {
                icon: true
            }
        });

        const validator2 = new GC.InputMan.GcValidator({
            items: [
                // カードブランド
                {
                    control: cardType,
                    ruleSet: [
                        {
                            rule: GC.InputMan.ValidateType.Required,
                            failMessage: 'カードブランドを選択してください'
                        }
                    ],
                    validateWhen: GC.InputMan.ValidateWhen.Typing,
                },
                // カード番号
                {
                    control: cardNumber,
                    ruleSet: [
                        {
                            rule: GC.InputMan.ValidateType.Required,
                            failMessage: 'カード番号を入力してください'
                        }
                    ],
                    validateWhen: GC.InputMan.ValidateWhen.Typing,
                },
                // カード名義
                {
                    control: ownerName,
                    ruleSet: [
                        {
                            rule: GC.InputMan.ValidateType.Required,
                            failMessage: '名前を入力してください'
                        }
                    ],
                    validateWhen: GC.InputMan.ValidateWhen.Typing,
                },
                // 有効期限
                {
                    control: expirationDate,
                    ruleSet: [
                        {
                            rule: GC.InputMan.ValidateType.Required,
                            failMessage: '日付を入力してください'
                        }
                    ],
                    validateWhen: GC.InputMan.ValidateWhen.Typing,
                },
                // セキュリティコード
                {
                    control: securityCode,
                    ruleSet: [
                        {
                            rule: GC.InputMan.ValidateType.Required,
                            failMessage: '数値を入力してください'
                        }
                    ],
                    validateWhen: GC.InputMan.ValidateWhen.Typing,
                }
            ],
            defaultNotify: {
                icon: true
            }
        });
・・・(中略)・・・
[次へ]ボタン押下時に各フォームに対応した検証を実行し、検証に成功したら次のステップを有効にします。同様に、確認フォームの[送信]ボタン押下時にも次のステップを有効にする処理を追加します。
・・・(中略)・・・
        // 「次へ」ボタン押下時の処理。
        // 各フォームに対応した検証を実行します。また、支払情報の入力フォームが表示されているときは、確認用フォームに入力内容を反映してから次のステップへ進みます。
        document.querySelectorAll('.nextBtn').forEach((v) =>
            v.addEventListener('click', () => {
                const form1 = document.getElementById('form1');
                if (isVisible(form1)) {
                    // 全ての項目の検証に成功したら次のステップを有効にします。
                    if (validator.validate()) {
                        gcStepper.steps[0].isValid = true;
                    }
                }
                const form2 = document.getElementById('form2');
                if (isVisible(form2)) {
                    // 全ての項目の検証に成功したら次のステップを有効にします。
                    if (validator2.validate()) {
                        gcStepper.steps[1].isValid = true;
                        populateForm3();
                    }
                }
                gcStepper.next();
            })
        );

        // 確認画面の「送信」ボタン押下時の処理。
        //送信データをログに出力し、完了ステップに進みます。
        document.querySelectorAll('.submitBtn').forEach((v) =>
            v.addEventListener('click', () => {
                const data = {
                    name: document.getElementById('confirmName').textContent,
                    mail: document.getElementById('confirmMail').textContent,
                    plan: document.getElementById('confirmPlan').textContent,
                    cardType: document.getElementById('confirmCardType').textContent,
                    cardNumber: document.getElementById('confirmCardNumber').textContent,
                    ownerName: document.getElementById('confirmOwnerName').textContent,
                    expirationDate: document.getElementById('confirmExpirationDate').textContent,
                    securityCode: document.getElementById('confirmSecurityCode').textContent,
                };
                // 実際の送信処理に置き換える必要があります。
                console.log('Submitting data:', data);
                // 完了ステップに進みます。
                gcStepper.steps[2].isValid = true;
                gcStepper.next();
            })
        );
・・・(中略)・・・
また、検証失敗時には次のステップが無効になるように、検証失敗時のイベントリスナーを追加します。
・・・(中略)・・・
        // 基本情報入力フォームの検証失敗時のイベントリスナー追加
        validator.addEventListener(GC.InputMan.GcValidatorEvent.ValidationFailed,
            () => gcStepper.steps[0].isValid = false);
        // 支払い情報入力フォームの検証失敗時のイベントリスナー追加
        validator2.addEventListener(GC.InputMan.GcValidatorEvent.ValidationFailed,
            () => gcStepper.steps[1].isValid = false);
・・・(中略)・・・
ここで再度実行すると、[次へ]ボタン押下時にフォームの検証結果が正常だった場合に次のステップが有効になり、次のステップに進めるようになります。
また、一度有効になった後も、前のステップに戻って検証エラー発生させると、次のステップは再び無効となります。
今回ご紹介したステッパーコンポーネントと検証コントロールの連携については、以下のデモアプリケーションでも確認できます(“Run Project”をクリックするとデモが起動します)。
さいごに
今回の記事では、「InputManJS」に含まれるステッパーコンポーネントの基本的な使い方と表示のカスタマイズ方法、および検証コントロールと組み合わせてステップ間の移動を制御する方法についてご紹介しました。ステッパーコンポーネントはこのほかにも多数の機能を搭載していますので、詳しくはヘルプとデモをご確認ください。
InputManJSは、リッチテキスト、テキスト、マスク、日付時刻、数値、コンボなど用途別に最適化された入力用コントロールを収録したJavaScript製品です。Webアプリケーションにおけるストレスフリーのきめ細かい入力フォームの開発に、ぜひInputManJSをご検討いただければと思います。
製品サイトでは、InputManJSの機能を手軽に体験できるデモアプリケーションやトライアル版も公開しておりますので、こちらもご確認ください。
また、ご導入前の製品に関するご相談、ご導入後の各種サービスに関するご質問など、お気軽にお問合せください。