便利で快適な入力フォーム開発に特化したJavaScriptライブラリ「InputManJS(インプットマンJS)」の最新バージョン「V6J」では、各種AIプラットフォームのAPIを利用して、リッチテキストエディタ(GcRichTextEditor)と複数行テキスト(GcMultiLineTextBox)に文章の生成、校正、要約、翻訳といったAIによる文章作成支援機能を組み込むことができる「AI文章作成アシスタントコンポーネント(GcTextAssistant)」が新機能として追加されました。
今回はリッチテキストエディタにAI文章作成アシスタントを組み込み、AIを活用した入力支援機能を実装する方法をご紹介します。
目次
事前準備
Gemini APIのAPIキーの入手
AI文章作成アシスタントを使用するには各種AIプラットフォームのAPIキーを準備・設定する必要があります。今回は無料で利用が可能な「Gemini API」を使用します。
Gemini APIのAPIキーの入手方法は以下の記事の「Gemini APIの導入方法」ご参考ください。
AI文章作成アシスタントをWebアプリケーションに組み込む
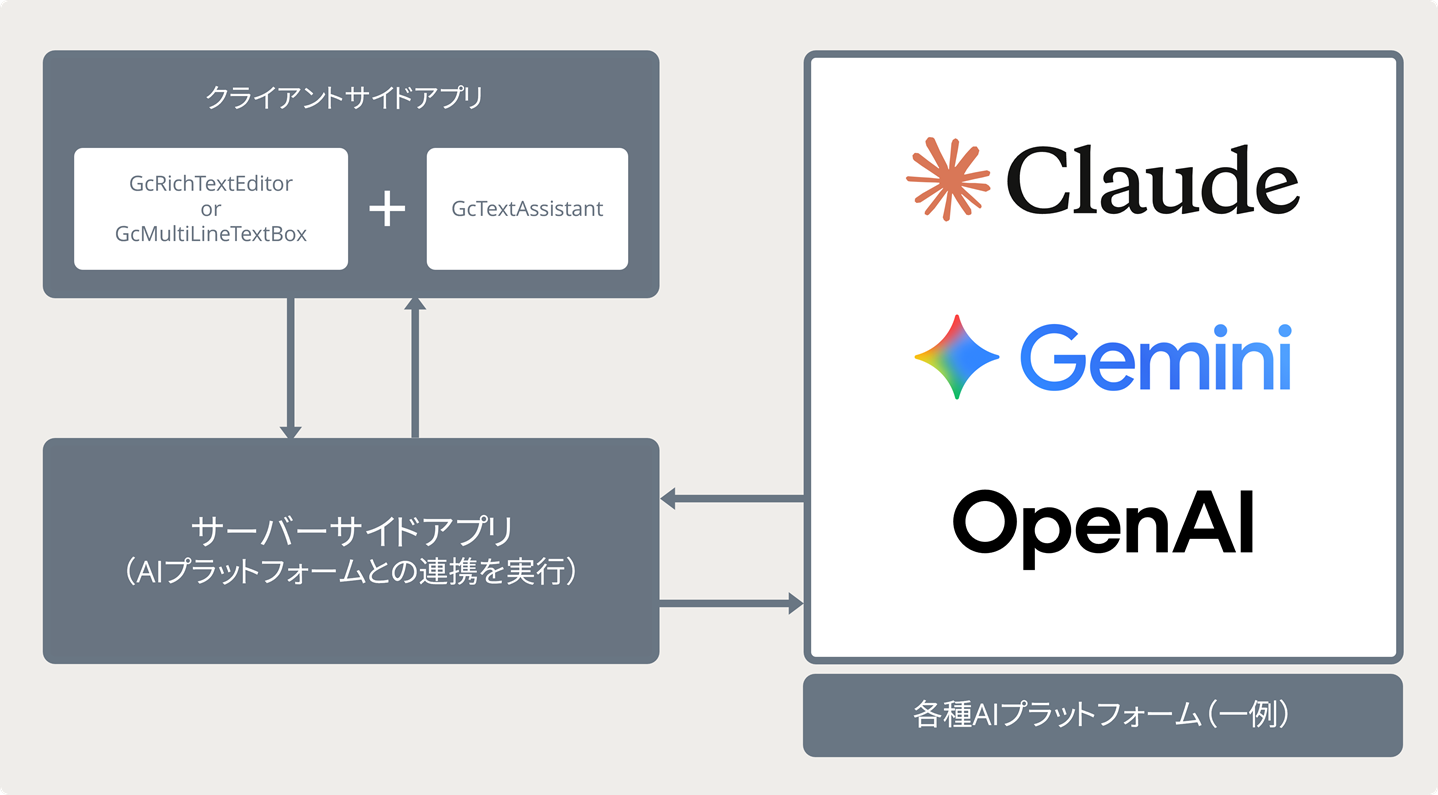
ここからは取得したAPIキーを使用して、WebアプリケーションにAI文章作成アシスタントを組み込んでいきます。AI文章作成アシスタントを使用するには、OpenAIやClaudeといった各種AIプラットフォームと連携する必要がありますが、クライアントから直接連携するのはAPIキーの流出などの危険性があるので、AIプラットフォームとの連携はサーバー側で行います。
サーバー側はクライアント側からプロンプトを受け取り、AIプラットフォームのAPIを実行し、返却された生成結果をクライアント側に戻します。
クライアントサイドアプリの作成
ターミナルなどで以下のコマンドを実行して、ViteでベースとなるWebアプリケーションを作成します。今回は「vanilla」のオプションを指定し、PureJSのアプリケーションをスキャフォールドします。
※ 使用可能なテンプレートはこちらをご覧ください。
※ Windows環境でPowerShellを使用する場合、--は演算子として使用されているので、コマンドプロンプトを使用するか、npm create vite@latest inputmanjs-gctextassistant --- --template vanillaとして実行してください。
npm create vite@latest inputmanjs-gctextassistant -- --template vanilla次に以下のコマンドを実行し、プロジェクト配下に異動してInputManJSのライブラリをインストールします。
cd inputmanjs-gctextassistant
npm install @mescius/inputman @mescius/inputman.richtexteditorさらに環境変数を使用するため、「dotenv」もインストールします。
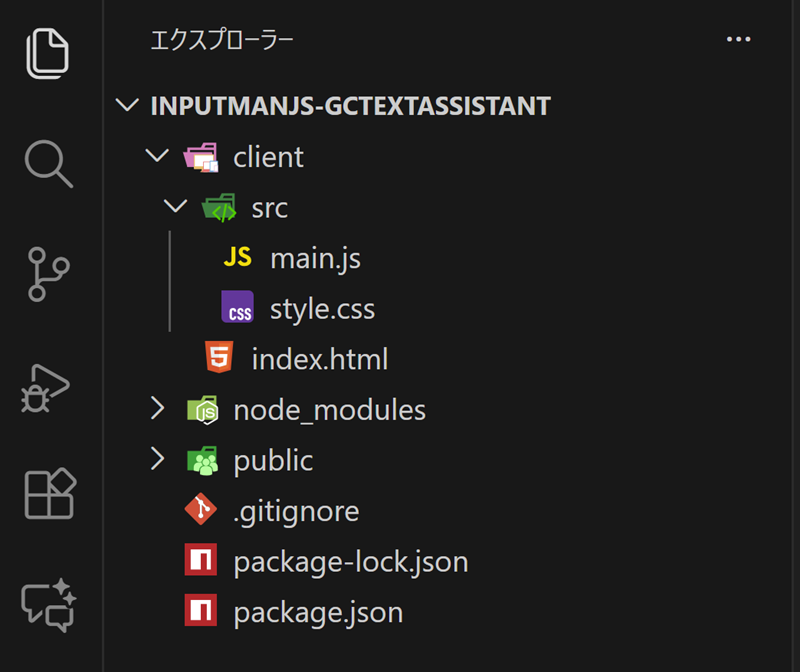
npm install dotenvプロジェクトのルートフォルダに「client」フォルダを作成し、既存の「src」フォルダと「index.html」を「client」フォルダ配下に移動します。その際、「src」フォルダに元々あった「counter.js」「javascript.svg」は不要なので削除します。
次に「client/index.html」を以下のように書き換えます。
<!doctype html>
<html lang="ja">

<head>
  <meta charset="UTF-8" />
  <title>AI文章作成アシスタントサンプル</title>
</head>

<body>
  <script type="module" src="/src/main.js"></script>
  <textarea id="gcRichTextEditor1"> </textarea>
</body>

</html>
「client/src/main.js」を以下のように置き換え、InputManJSのコントロールの初期化処理等を行います。
※ ライセンスキーを設定しない場合トライアル版を示すメッセージが表示されます。ライセンスキーの入手や設定方法についてはこちらをご覧ください。
import "@mescius/inputman.richtexteditor/CSS/gc.inputman.richtexteditor.css";
import { InputMan } from "@mescius/inputman.richtexteditor";
import '@mescius/inputman.richtexteditor/JS/plugins/all/plugin.js';

// ライセンスキーの設定
InputMan.LicenseKey = import.meta.env.VITE_INPUTMANJS_LICENSE_KEY || "";
InputMan.appearanceStyle = InputMan.AppearanceStyle.Modern;

const gcRichTextEditor = new GC.InputMan.GcRichTextEditor(
  document.querySelector('#gcRichTextEditor1'),
  {
    width: 1250,
    height: 600,
    toolbar: ['newdocument', 'print', 'undo', 'redo', 'cut', 'copy', 'paste', 'pastetext', 'selectall',
      'blockquote', 'bold', 'italic', 'underline', 'strikethrough', 'superscript', 'subscript',
      'styles', 'fontfamily', 'fontsize', 'align', 'lineheight', 'forecolor', 'backcolor', 'removeformat',
      'outdent', 'indent'
    ],}
);
また、「client/.env」ファイルを追加し、main.jsの中で使用するInputManJSのライセンスキーを設定します。
VITE_INPUTMANJS_LICENSE_KEY='ここにInputManJSのライセンスキーを設定します'
VITE_API_BASE_URL='http://localhost:3005'
さらにプロジェクトのルートに「vite.config.js」を追加し、クライアントアプリのルートを変更します。
import { defineConfig } from 'vite';

export default defineConfig({
    // フロントエンドのソースコードのルートを 'client' フォルダに設定
    root: 'client',

    // ビルド出力先をルートの 'dist' ディレクトリに指定
    build: {
        outDir: '../dist',
    },
});
ここまで設定したら以下のコマンドを実行し、Viteの開発サーバーでアプリケーションを起動します。
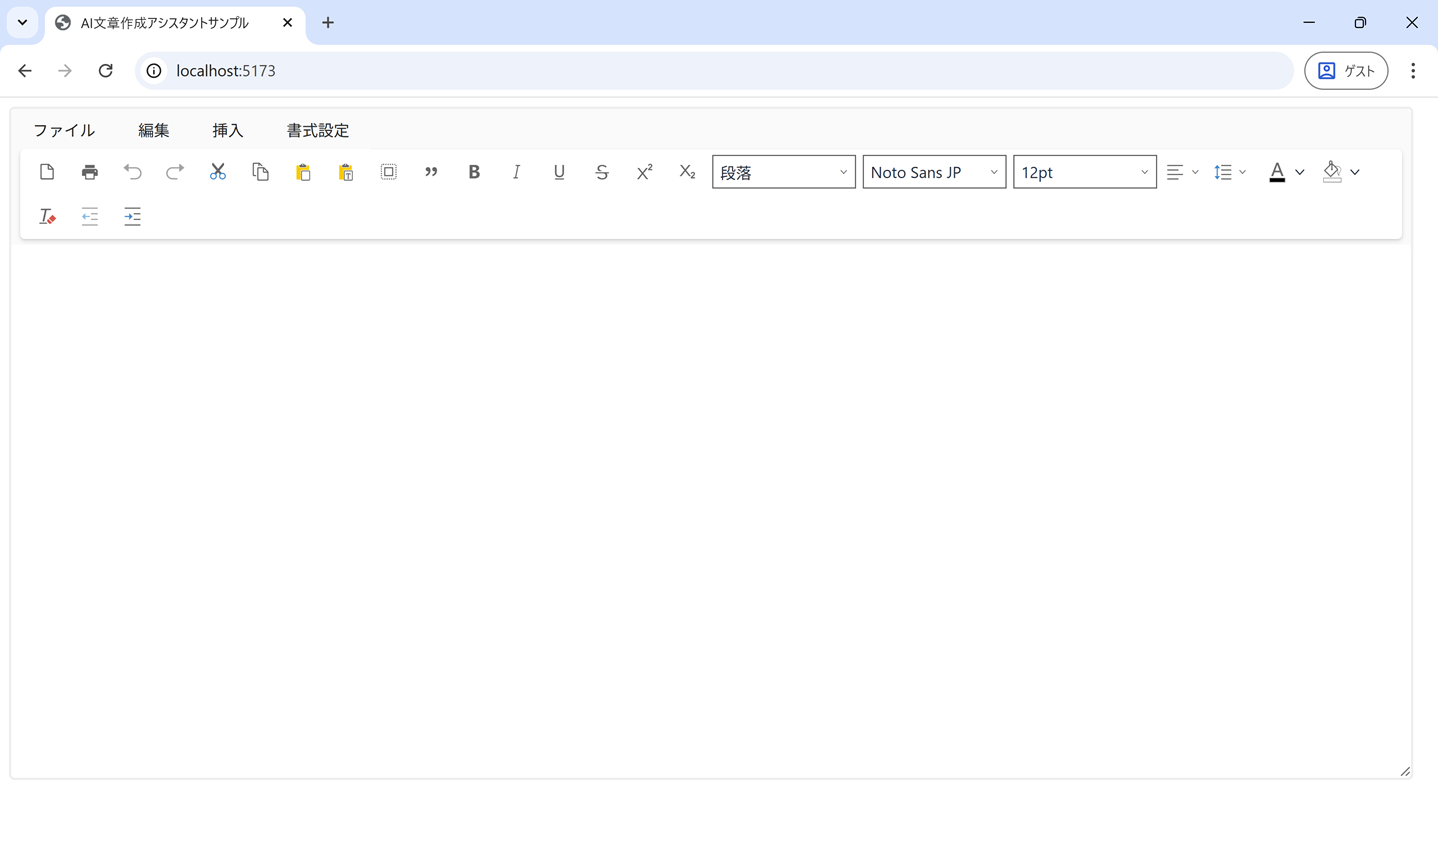
npm run dev「http://localhost:5173/」にブラウザでアクセスすると、以下のようにInputManJSのリッチテキストエディタを組み込んだWebアプリケーションが立ち上がります。
サーバーサイドアプリの作成
次にAIプラットフォームとの連携を実施するサーバーサイドアプリケーションを作成していきます。サーバーサイドは「Express」を使用して実装するので、以下のコマンドでExpressのパッケージをインストールします。また、Viteの開発サーバーと同時に実行できるように「concurrently」もインストールします。
npm install express concurrentlyさらに、Gemini APIと連携するために、JavaScript用のGoogle AI SDKもインストールします。
npm install @google/generative-ai 各種パッケージのインストールが完了したら、ルートディレクトリに「server」フォルダを新たに追加し、「index.js」を以下のように作成します。POSTの「/api/chat」エンドポイントでは、クライアントからの入力を元にプロンプトを構築し、Google Generative AIに送信して生成結果を返却します。
import express from 'express';
import { GoogleGenerativeAI } from '@google/generative-ai';
import path from 'path';
import dotenv from 'dotenv';
dotenv.config();
import { fileURLToPath } from 'url';
import { dirname } from 'path';

const __filename = fileURLToPath(import.meta.url);
const __dirname = dirname(__filename);

const API_KEY = process.env.API_KEY;
if (!API_KEY) {
  console.error('APIキーが見つかりませんでした');
}
const genAI = API_KEY ? new GoogleGenerativeAI(API_KEY) : null;

const app = express();
const PORT = process.env.PORT ? Number(process.env.PORT) : 3005;

// 静的ファイルの配信
app.use(express.static(path.join(__dirname, '../client/dist')));

// CORS設定を追加
app.use((req, res, next) => {
  res.header('Access-Control-Allow-Origin', '*');
  res.header('Access-Control-Allow-Methods', 'GET, POST, PUT, DELETE, OPTIONS');
  res.header(
    'Access-Control-Allow-Headers',
    'Origin, X-Requested-With, Content-Type, Accept, Authorization'
  );

  if (req.method === 'OPTIONS') {
    res.sendStatus(200);
  } else {
    next();
  }
});

app.use(express.json());

const server = app.listen(PORT, () => {
  console.log(`Server app listening at http://localhost:${PORT}`);
});
process.on('SIGINT', () => server.close(() => process.exit(0)));

app.get('/', (req, res) => {
  res.send('Server is running.');
});
app.post('/api/chat', async (req, res) => {
  try {
    const { systemPrompt, userPrompt, temperature, stream = false } = req.body;

    if (!genAI) {
      return res.status(500).json({
        success: false,
        message:
          'APIキーが設定されていません',
      });
    }

    const model = genAI.getGenerativeModel({
      model: 'gemini-2.5-flash',
      generationConfig: {
        temperature: temperature || 1,
      },
    });

    let fullPrompt = `${systemPrompt}\n\n${userPrompt}`;
    fullPrompt +=
      '\n\n注意!!!:必ず回答はHTMLやマークダウン記法を使わず、プレーンテキストで返してください。';

    const abortController = new AbortController();
    res.on('close', () => {
      abortController.abort();
    });

    if (stream) {
      res.setHeader('Content-Type', 'text/plain; charset=utf-8');
      const result = await model.generateContentStream(fullPrompt);

      for await (const chunk of result.stream) {
        const text = chunk.text();
        res.write(text);
      }
      res.end();
    } else {
      const result = await model.generateContent(fullPrompt);
      const responseText = result.response.text();
      res.json({ result: responseText });
    }
  } catch (error) {
    res.status(500).json({
      success: false,
      message: error.message || 'Internal Server Error',
    });
  }
});
今回は回答をプレーンテキストで受け取るために、クライアントから入力されたプロンプトに以下のような内容を追加しています。
・・・(中略)・・・
    let fullPrompt = `${systemPrompt}\n\n${userPrompt}`;
    fullPrompt +=
      '\n\n注意!!!:必ず回答はHTMLやマークダウン記法を使わず、プレーンテキストで返してください。';
・・・(中略)・・・
ルートディレクトリにExpress用の「 .env」ファイルを作成し、あらかじめ入手したGemini APIのAPIキーとポート番号を設定します。
API_KEY='ここにGemini APIのAPIキーを設定します'
PORT=3005「package.json」を以下のように修正し、concurrentlyでnpm run dev実行時にViteの開発サーバーとExpressを同時に起動できるようにします。
・・・(中略)・・・
  "scripts": {
    "dev": "concurrently \"vite\" \"node server/index.js\"",
    "build": "vite build",
    "preview": "vite preview"
  },
・・・(中略)・・・
クライアントサイドアプリにAI文章作成アシスタントの組み込み
サーバーサイドの準備ができたら、再びクライアントサイドアプリの方に戻りAI文章作成アシスタントの組み込みを行っていきます。GcConfigurationManagerクラスのregisterAIServiceメソッドを使用してAIサービスを登録します。registerAIServiceメソッドでは指定したAPIのURL(サーバー側のエンドポイント)に対して、プロンプトを送信します。
import "@mescius/inputman.richtexteditor/CSS/gc.inputman.richtexteditor.css";
import { InputMan } from "@mescius/inputman.richtexteditor";
import '@mescius/inputman.richtexteditor/JS/plugins/all/plugin.js';

// ライセンスキーの設定
InputMan.LicenseKey = import.meta.env.VITE_INPUTMANJS_LICENSE_KEY || "";
InputMan.appearanceStyle = InputMan.AppearanceStyle.Modern;

GC.InputMan.ConfigurationManager.registerAIService(async (context) => {
  try {
    const controller = new AbortController();
    const { signal } = controller;
    const res = await fetch(`${import.meta.env.VITE_API_BASE_URL}/api/chat`, {
      method: 'POST',
      headers: { 'Content-Type': 'application/json' },
      body: JSON.stringify({
        userPrompt: context.input,
        systemPrompt: context.prompt,
        stream: true,
      }),
      signal,
    });
    if (!res.ok) {
      throw new Error(`HTTP error! Status: ${res.status}`);
    }
    if (!res.body) {
      throw new Error(
        'この環境ではReadableStreamがサポートされていない、またはレスポンスボディがnullです。'
      );
    }
    const reader = res.body.getReader();
    const decoder = new TextDecoder('utf-8');
    let done = false;
    try {
      while (!done) {
        const { value, done: isDone } = await reader.read();
        done = isDone;
        if (value) {
          const chunkText = decoder.decode(value, { stream: !done });
          if (chunkText) context.streamWriter(chunkText);
        }
      }
    } finally {
      reader.releaseLock();
    }
  } catch (error) {
    throw error;
  }
});
・・・(中略)・・・次にリッチテキストエディタのツールバーとメニューバーに「AI文章作成アシスタント」ボタンを追加します。さらに、addContextToolbarメソッドを使用して、入力したテキストを選択したときにも同メニューが実行されるようにします。また、AITextAssistantConfigではダイアログのスタイルを設定しています。
・・・(中略)・・・
const gcRichTextEditor = new GC.InputMan.GcRichTextEditor(
  document.querySelector('#gcRichTextEditor1'),
  {
    width: 1250,
    height: 600,
    toolbar: ['newdocument', 'print', 'undo', 'redo', 'cut', 'copy', 'paste', 'pastetext', 'selectall',
      'blockquote', 'bold', 'italic', 'underline', 'strikethrough', 'superscript', 'subscript',
      'styles', 'fontfamily', 'fontsize', 'align', 'lineheight', 'forecolor', 'backcolor', 'removeformat',
      'outdent', 'indent', 'aitextassistant'
    ],
    AITextAssistantConfig: {
      behaviorConfig: {
        dialogConfig: {
          width: 700,
          height: 300,
        }
      }
    },
    menubar: ['AI'],
    menu: {
      AI: {
        title: 'AI文章作成アシスタント',
        items: ['aitextassistant'],
      },
    },
    setup: (editor) => {
      editor.addContextToolbar('textselection', {
        items: [
          GC.InputMan.GcRichTextEditorToolbarItem.AITextAssistant,
        ],
        predicate: (node) => editor.getSelection(),
        position: 'selection',
      });
    },
  }
);
動作確認
以上でAI文章作成アシスタントの組み込みは完了です。npm run devを実行すると、concurrentlyでViteの開発サーバーとExpressが同時に起動されます。

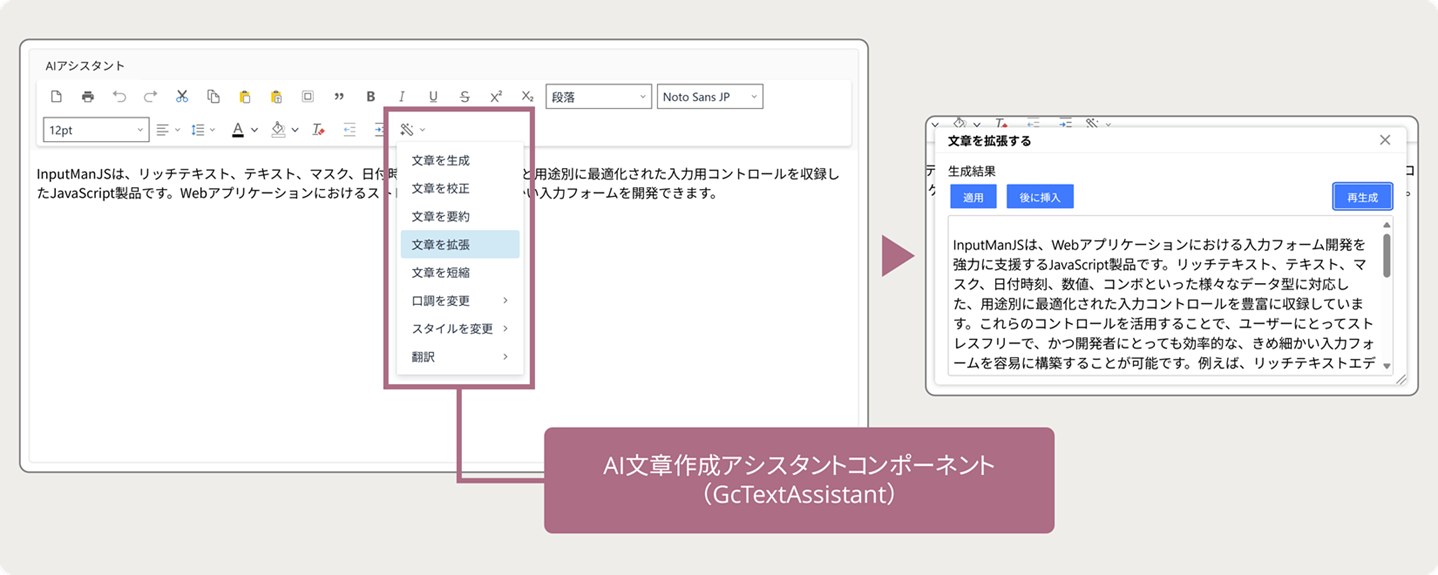
「http://localhost:5173/」にブラウザでアクセスすると、リッチテキストエディタのメニューバー、ツールバー、選択時のメニュー、それぞれにおいてAI文章作成アシスタントが利用可能になります。以下で表示されているメニューはデフォルトの組み込みのアシスタントメニューで、カスタマイズも可能です。
以下は「文章を生成」の実行例です。ダイアログ上に生成結果が表示され、エディタへの適用や再生成の実行などが選択できます。
Expressサーバーでクライアントサイドアプリを配信
前項ではViteの開発サーバーでクライアントサイドアプリを実行しましたが、ビルドしてExpressサーバーで配信することができます。フォールバックを設定するには以下のように「server/index.js」を修正します。
・・・(中略)・・・
//const server = app.listen(PORT, () => {
//  console.log(`Server app listening at http://localhost:${PORT}`);
//});
process.on('SIGINT', () => server.close(() => process.exit(0)));

app.get('/', (req, res) => {
  res.send('Server is running.');
});
app.post('/api/chat', async (req, res) => {
・・・(中略)・・・
});

// フォールバック設定
app.get(/^(?!\/api\/).*$/, (req, res) => {
  res.sendFile(path.join(__dirname, '..', 'client', 'dist', 'index.html'));
});
以下のコマンドでクライアントサイドアプリをビルドします。
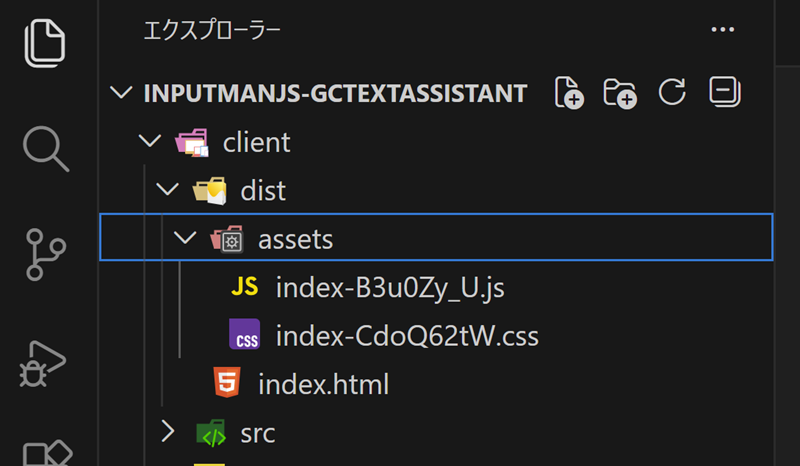
npm run build「client/dist」フォルダにファイルが生成されます。
以下のコマンドでExpressサーバーを起動し、「http://localhost:3005/」にブラウザでアクセスすると、開発サーバーと同様にリッチテキストエディタを組み込んだアプリが起動できます。
node server/index.js
今回作成したサンプルは以下よりダウンロード可能です。
さいごに
今回はInputManJSのリッチテキストエディタに新機能の「AI文章作成アシスタント」を組み込む方法をご紹介しました。次回はアシスタントメニューをカスタマイズして使用する方法をご紹介したいと思います。
製品サイトでは、InputManJSの機能を手軽に体験できるデモアプリケーションやトライアル版も公開しておりますので、こちらもご確認ください。
また、ご導入前の製品に関するご相談、ご導入後の各種サービスに関するご質問など、お気軽にお問合せください。